One of my best buds recently told me, "You need to focus on skiing, golfing, and surfing. Everything else is just noise."
This meme pretty well encapsulates how my new mantra — thanks, Matt! — fits into my current thinking about housing, and how I want to spend my dwindling time on the planet.
It's also a bit of a joke. We definitely do plan on building in Door County, but it may be a little while before things kick back into gear. When they do, I'll start the blog back up. See you then!
I've got several posts planned over the next few weeks, and wanted to start the series by sharing a few numbers from our excavator and builder.
I've posted some of this before, but no matter what you end up building on a rural lot, you're going to have fixed sitework costs, and these can add up fast. Here are ours, in round figures:
Septic: ~$40,000 (3-bedroom)
Well: ~$20,000 (continuous pressure)
Stump Removal: ~$5,000
Fill: ~$25,000
Driveway: ~$10,000
So before there's a foundation, we've got $100K into sitework. Not included in this total is the *hundreds* of hours I've spent clearing the lot — once heavily-wooded — and roughly $10K into brush and tree removal, and hauling logs to the sawmill. Also not included is the ~$3K to get power from a nearby pole.
At this point in the post I was planning on line-iteming the rest of the build estimate. But it's just too much effort and there's too much noise in the spreadsheet, so I will simply post the remaining total: $540K.
So the grand total was $640K for 864 square feet (not counting the loft), with no garage. And here's the kicker: it doesn't include a 💩-ton of materials and labor I was going to have to provide/do myself:
Foundation stonework
Siding and trim
Interior and exterior painting
Interior ceiling and wall cladding
Flooring
Final plumbing (setting toilets, hooking up sinks, etc.)
Final electrical (light fixtures and outlets)
Patio
Landscaping
And I am probably forgetting a few things.
And here's Kicker #2: it appraised! We were 1 signature away from starting the project when life changes forced us to pull the plug.
We paid $700 for a snow removal service that hasn't come once, and local golf courses are opening. On January 30th.
But Door County, WI got about a foot of snow on January 12th, so of course I had to drive over and take a few runs down the partially-cleared ski slope.
A few observations and takeaways:
This is still early beta.
What feels like a wide-enough trail without skis on feels like a chute when you're actually skiing down it.
Confirmed: bump skis are awful in 12" of pow.
A rope tow is a mandatory requirement.
A guy can get shin bang *real* quick hiking up a hill in ski boots.
There is an incredible amount of work ahead that almost certainly requires the purchase of a Bobcat.
The full release might be delayed until winter 2025-26.
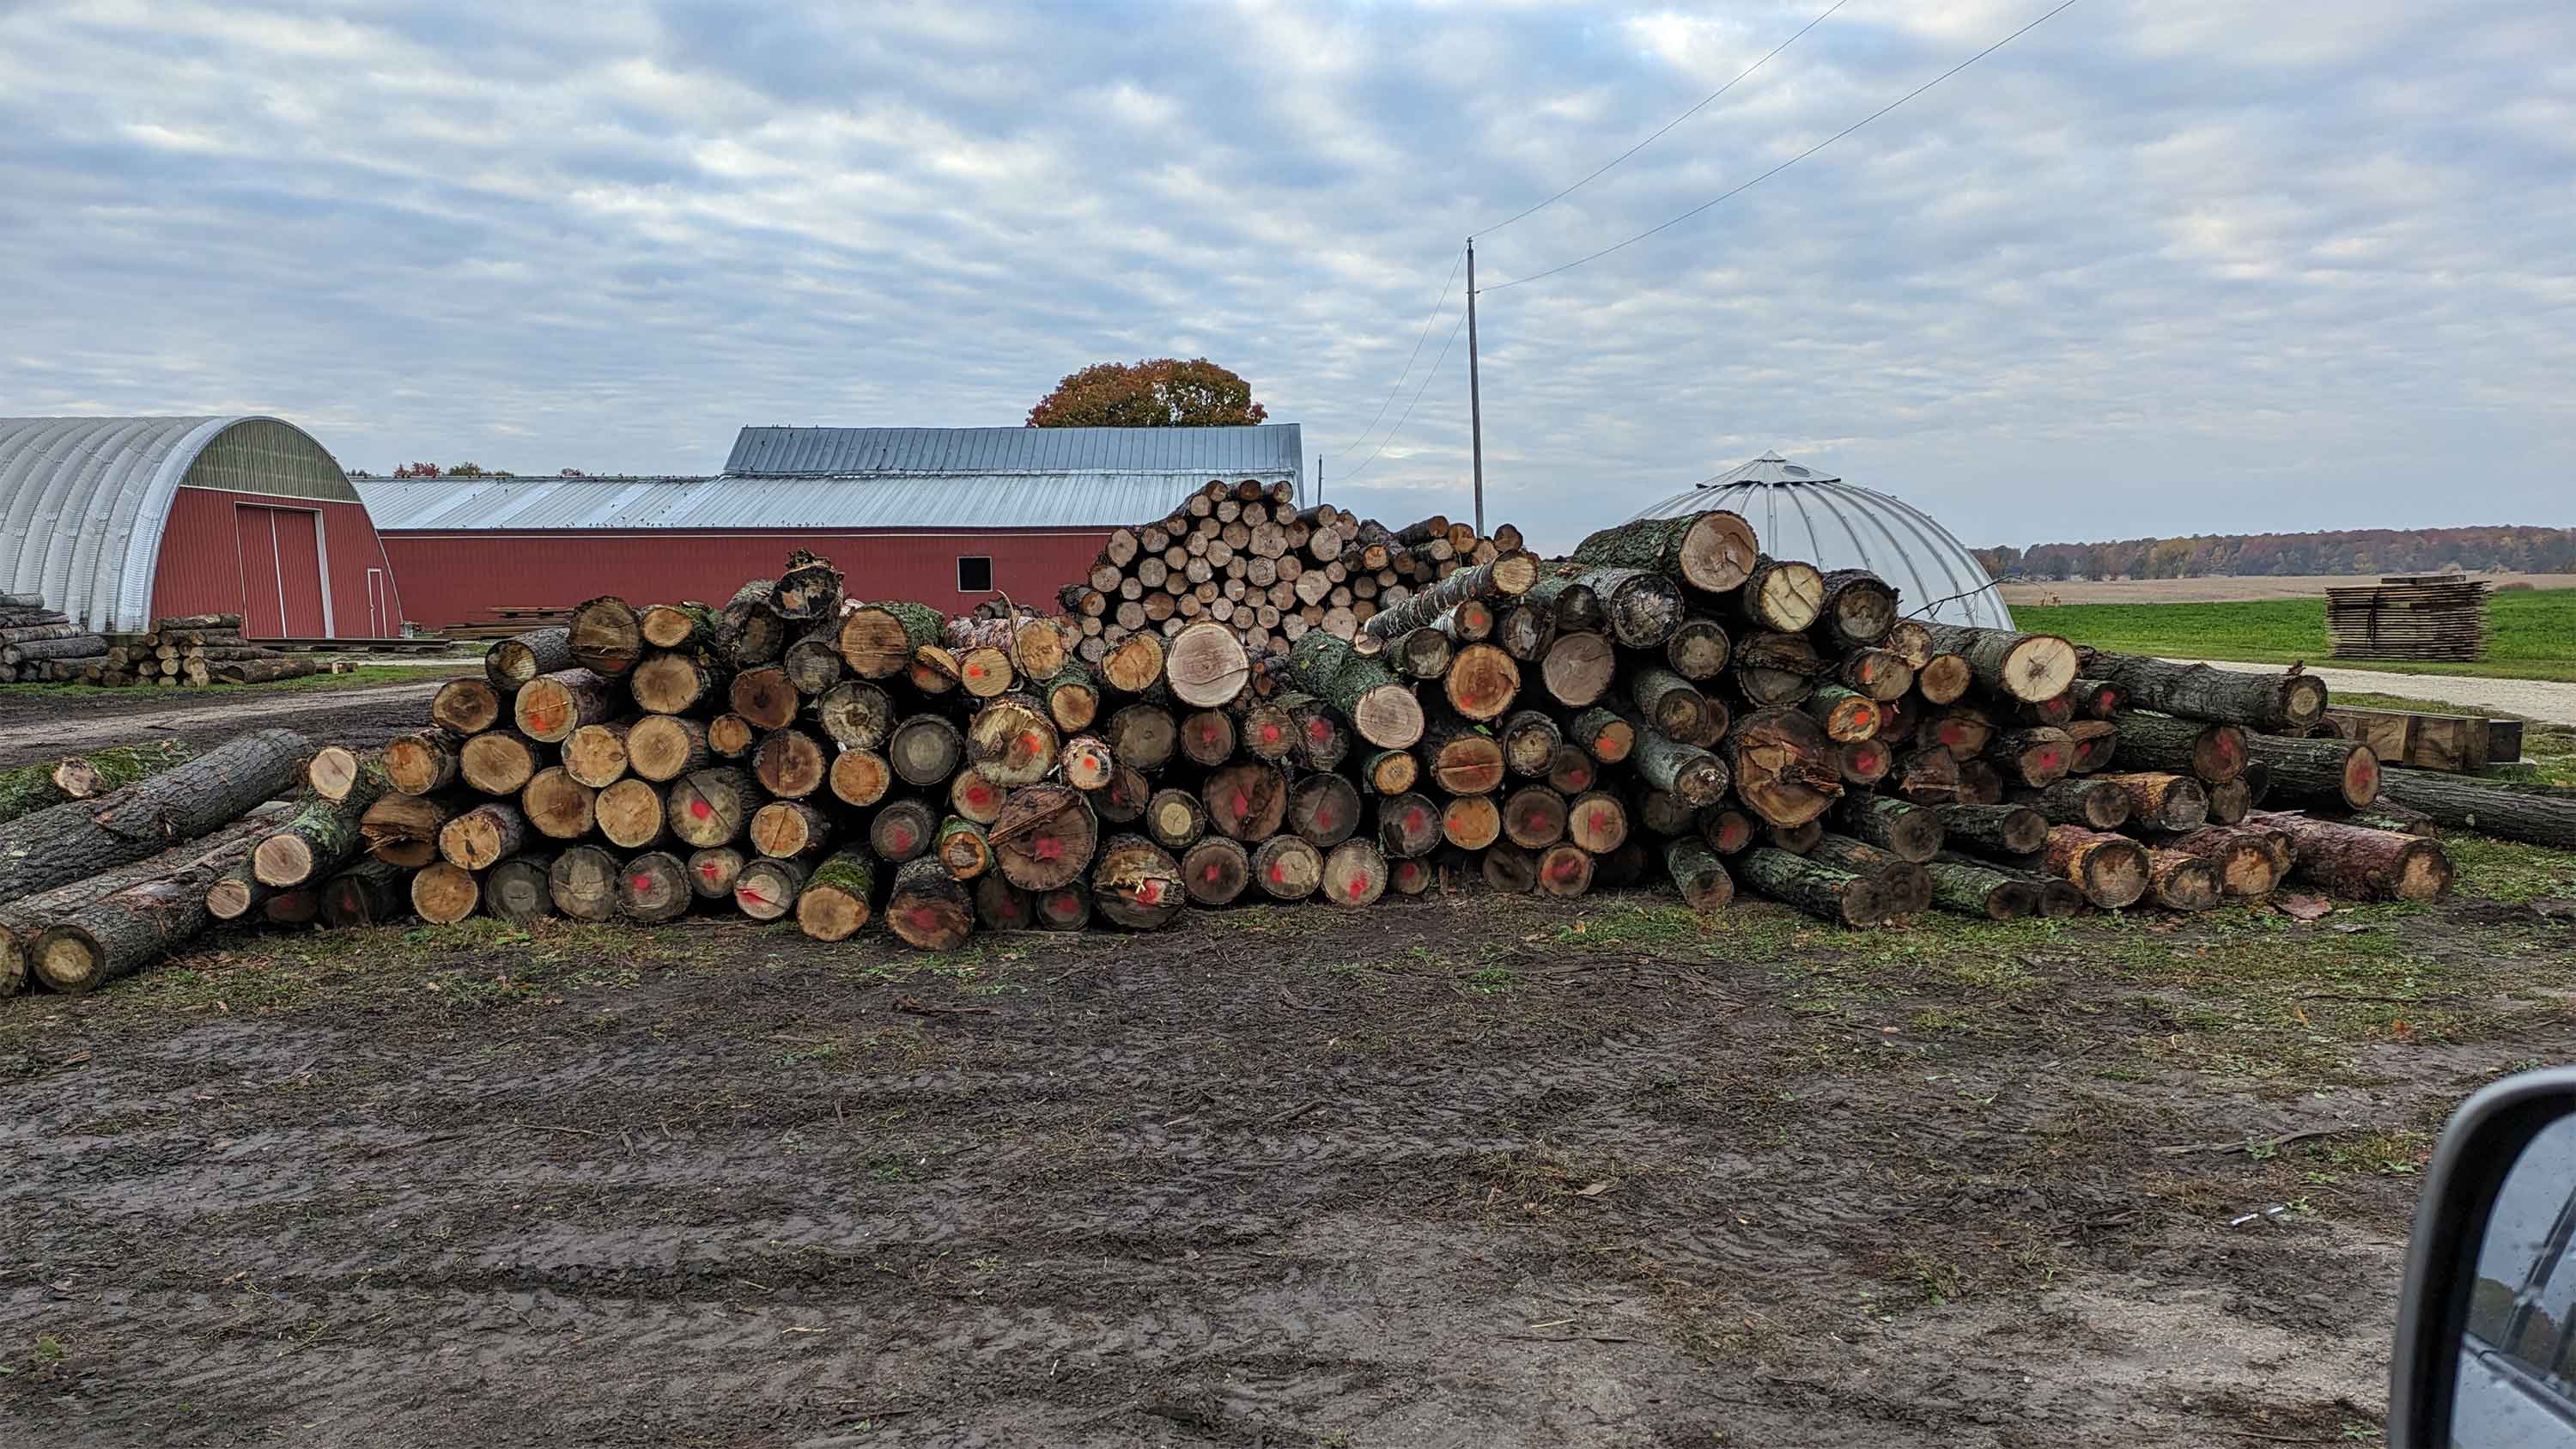
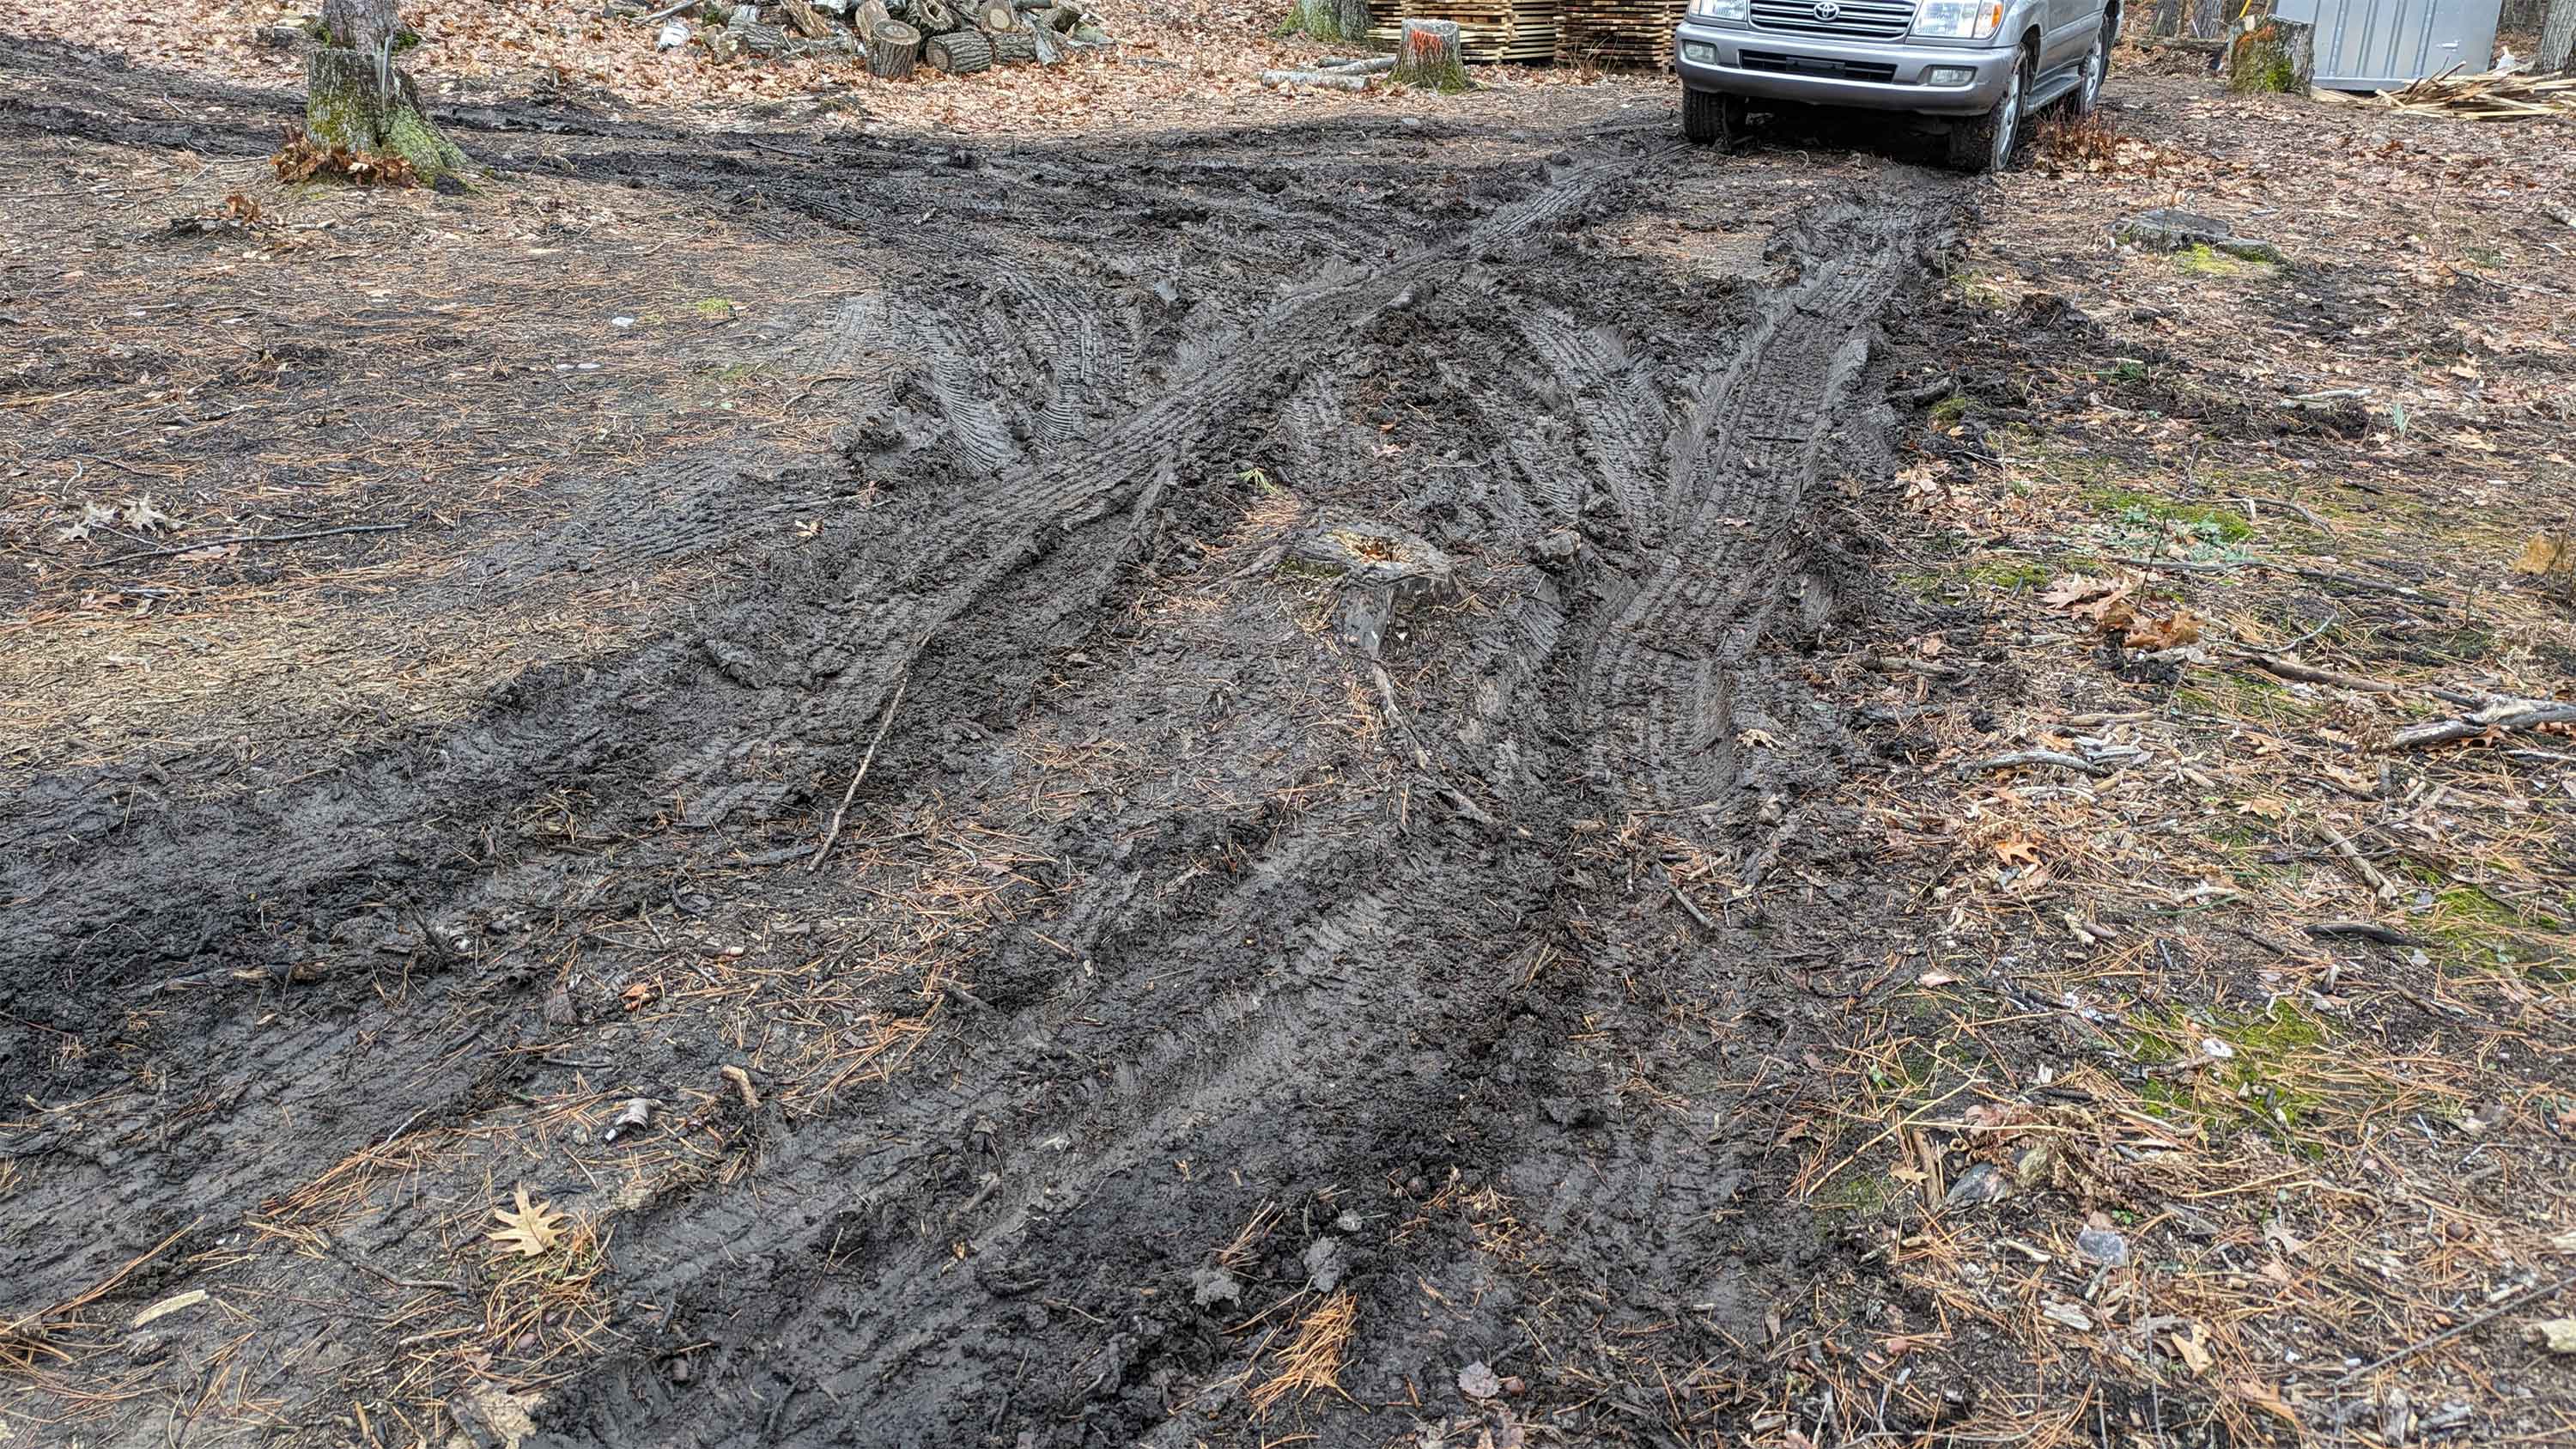
By late October I'd felled, bucked, and marked all the trees I wanted milled, then had Tim Bittorf (Bluffside Services) take them to Henschel Sawmill (the only female sawyer in Wisconsin!).
The effort was immense. Due to an unseasonably warm early winter, the heavy loads created an immense amount of mud. Several Ultra, Super and Mega carwashes couldn't clean the undercarriage. Only a pressure-washer worked. (A proper driveway is on tap for early this year.)
So glad to have this part of the project done. After drying, the 2x4s will be ready for framing. The 1x wall and floor material has to go into the kiln for drying.
Due to several factors beyond our control, we decided to delay starting the MVC (Minimum Viable Cottage) build until 2024.
What this means for you, dear reader, is a bigger focus on birds, tree felling (known as "lumberdacking" here), wood stacking and stickering, and preparations for the ski run, including rope tow hardware and engineering. It will probably also lead to at least one and possibly several more pivots on our plans for the MVC.
So, let's get to it.
Here's the entrance to the back bowl. This initial run has been cleared down to the gorgeous white pine in the distance, which is about 250 feet long with 65 feet of vertical drop. It's roughly the halfway point. It's ready for ❄️. Anticipating that I flagged some of the bigger stumps and rocks I couldn't remove by hand.
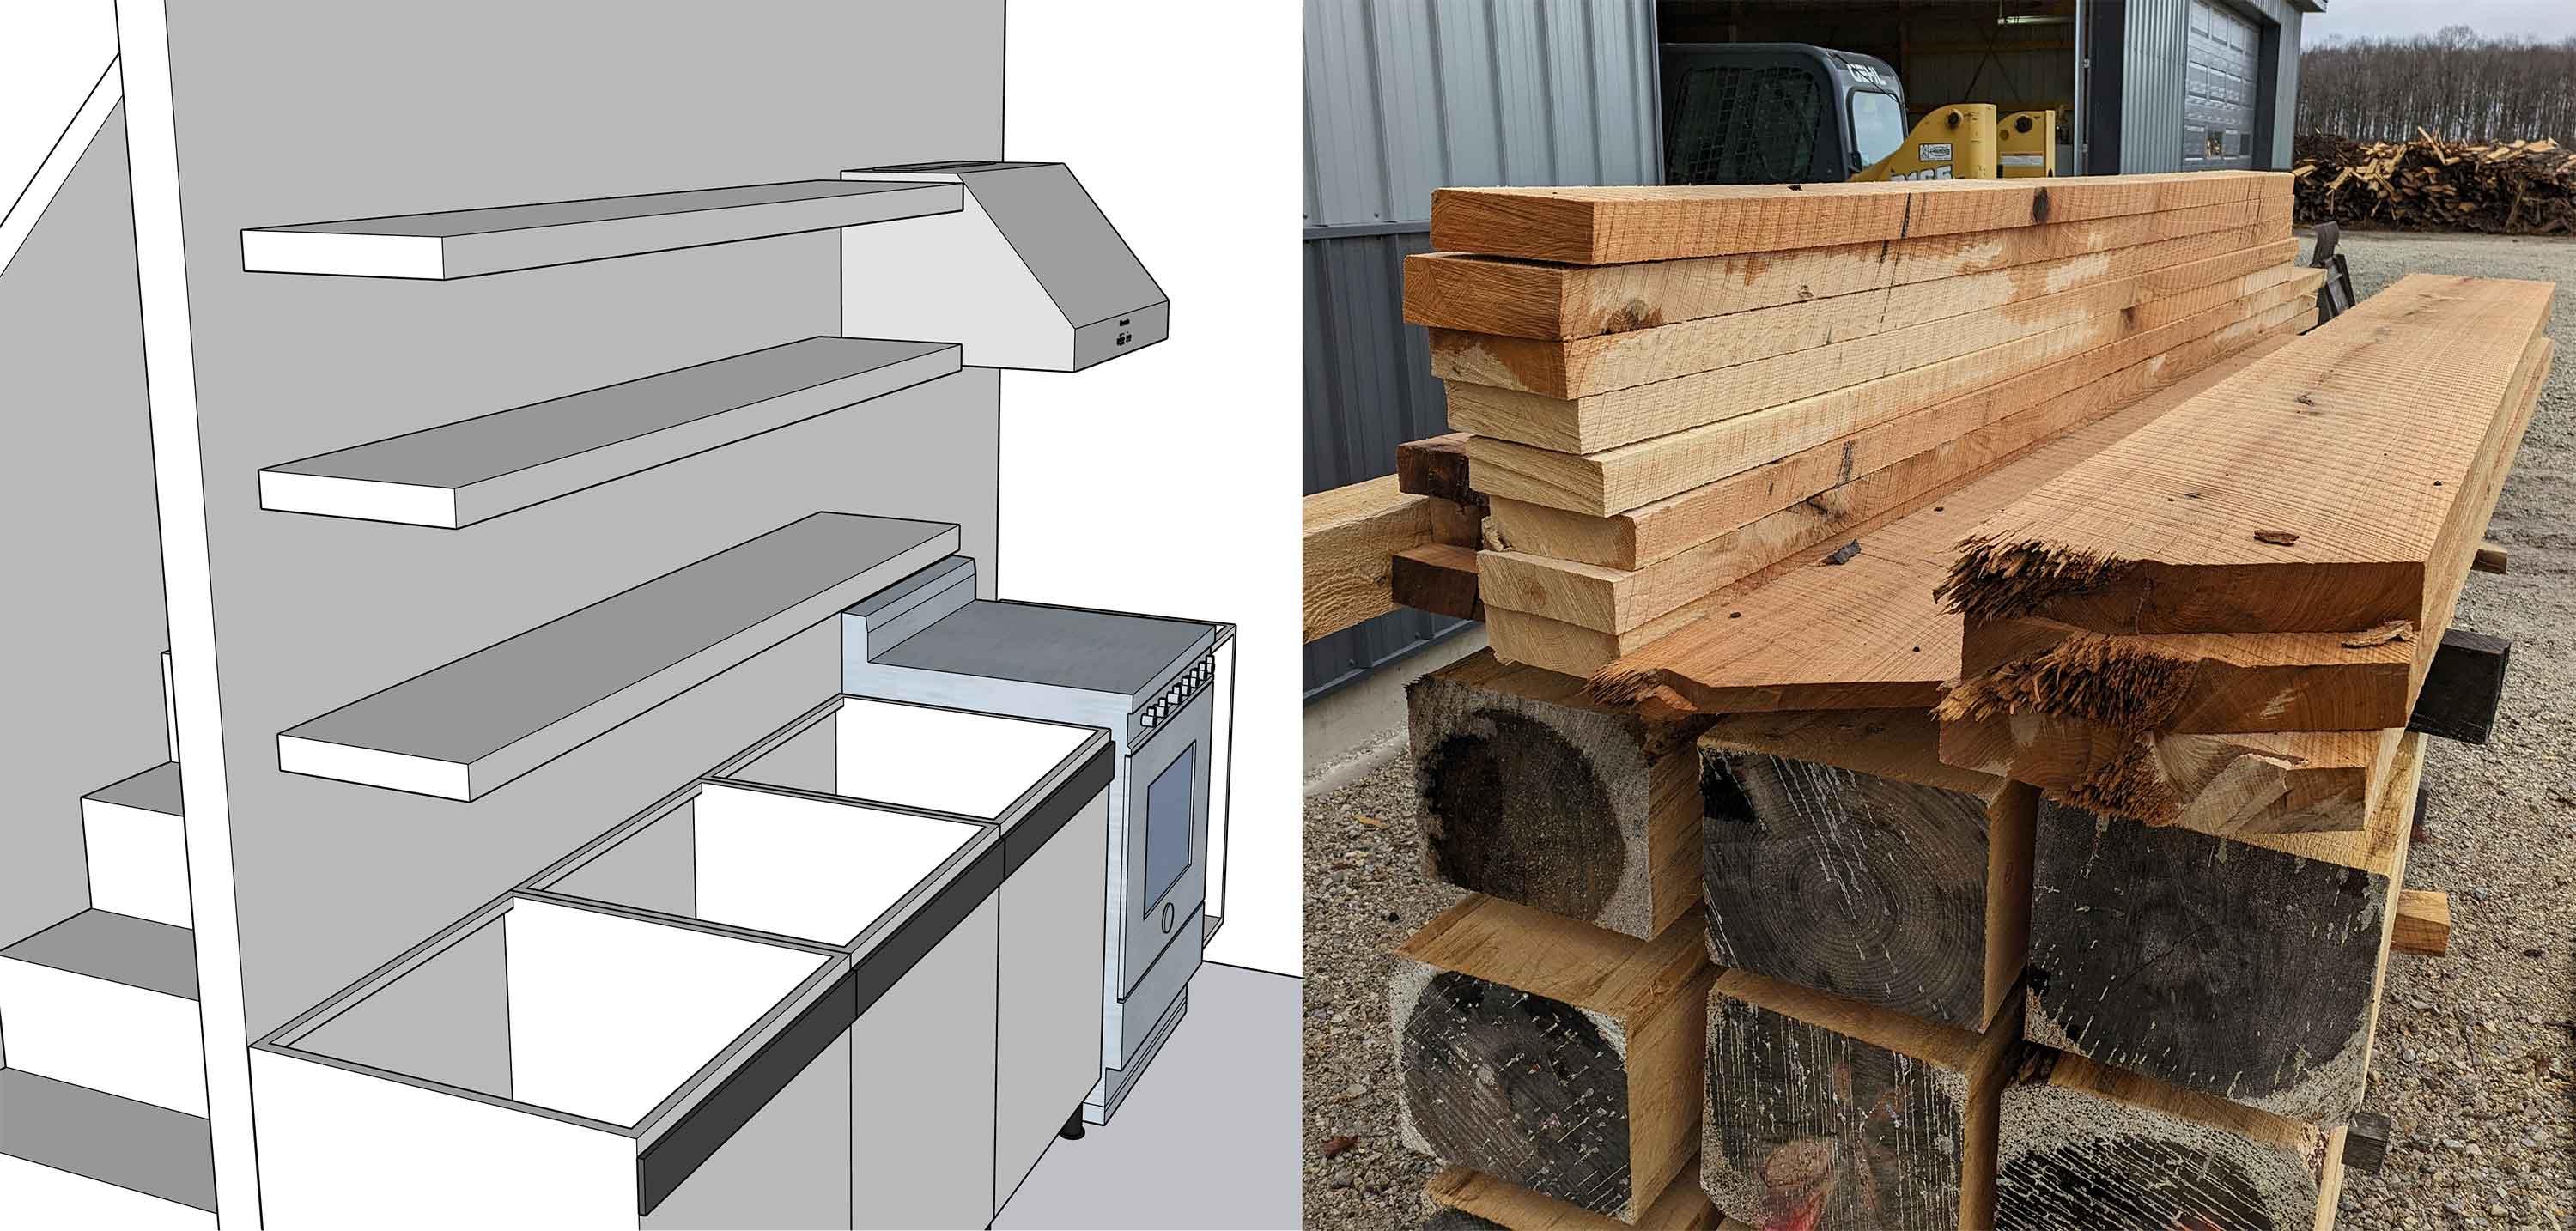
Here are our kitchen shelves, along with the some 6" stock for our pocket door slabs. The initial idea was to have these being floating shelves, but 2" x 12" solid oak will demand beefy steel brackets (and probably a steel-reinforced wall).
Yep, that's right. Fine Homebuilding podcast star Ian Schwandt (and his lovely wife Sara) stopped by High Bluff in late September to check out the lot I was always telling him about.
Their visit made podcast episode #602, with Ian not only mentioning the visit, but posting a picture of my manboobs (along with some other site shots). Too late now, but this is probably NSFW.
Gross.
Looking forward to sharing more about the build with Ian, Patrick, and the rest of the podcast team. However if there are any more photographs, I will demand final cut.
This is a full v2.0 release, with substantially fewer trees and underbrush, and I even raked part of it to expose rocks and stumps, which I then removed. With even a couple inches of snow this section is ski-ready.
The biggest pain point now: how to get back up.
A Doppelmayr quad is out of the budget. A T-bar, too. So that leaves a rope tow.
Towpro sells a full backyard lift system but it's the equivalent of about 7 seasons of IKON passes. The DIY kit is 3.5 seasons. And these are portable, whereas mine can be fixed. I may be forced to start learning about electric motors, worm gear reducers, and variable frequency drives.
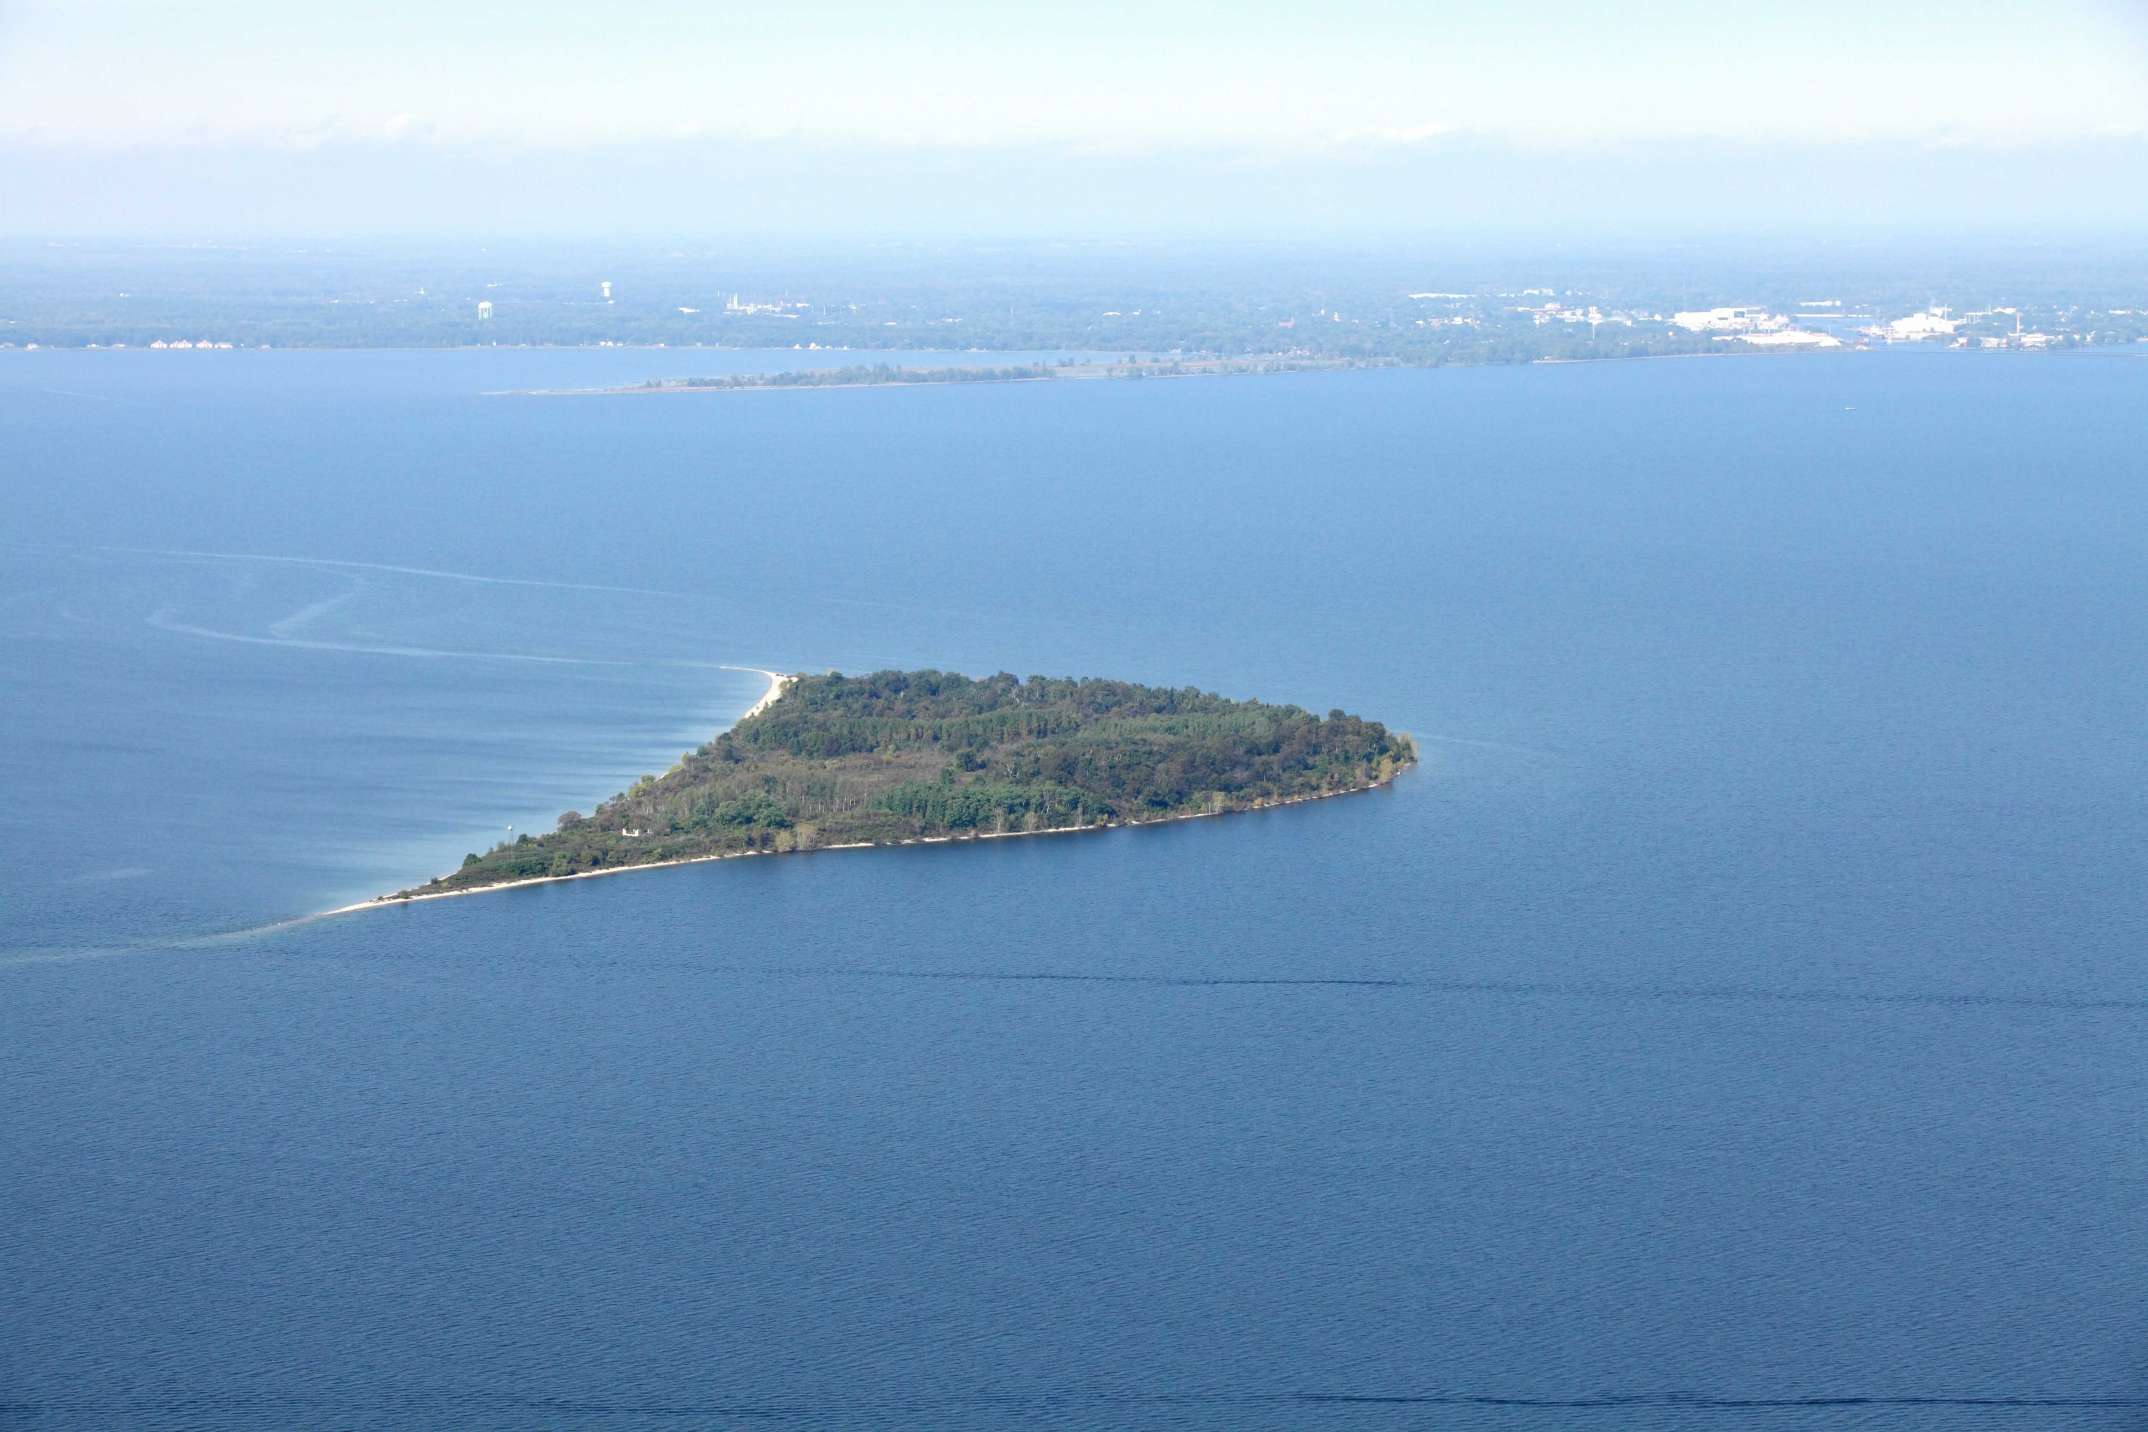
At the risk of sounding like a complete ignoramus, I didn't even know this piece of land existed, and I've been coming to DC for over 40 years. It's Green Island. It's 68 acres, about 9 miles from Door County and 5 miles from Marinette, WI (on the other side of the bay). Turns out, it's the only private island in Green Bay. And, it's for sale!
Now we're considering a major pivot that's more aligned with our misanthropy: sell our 5 and buy an island, which will include:
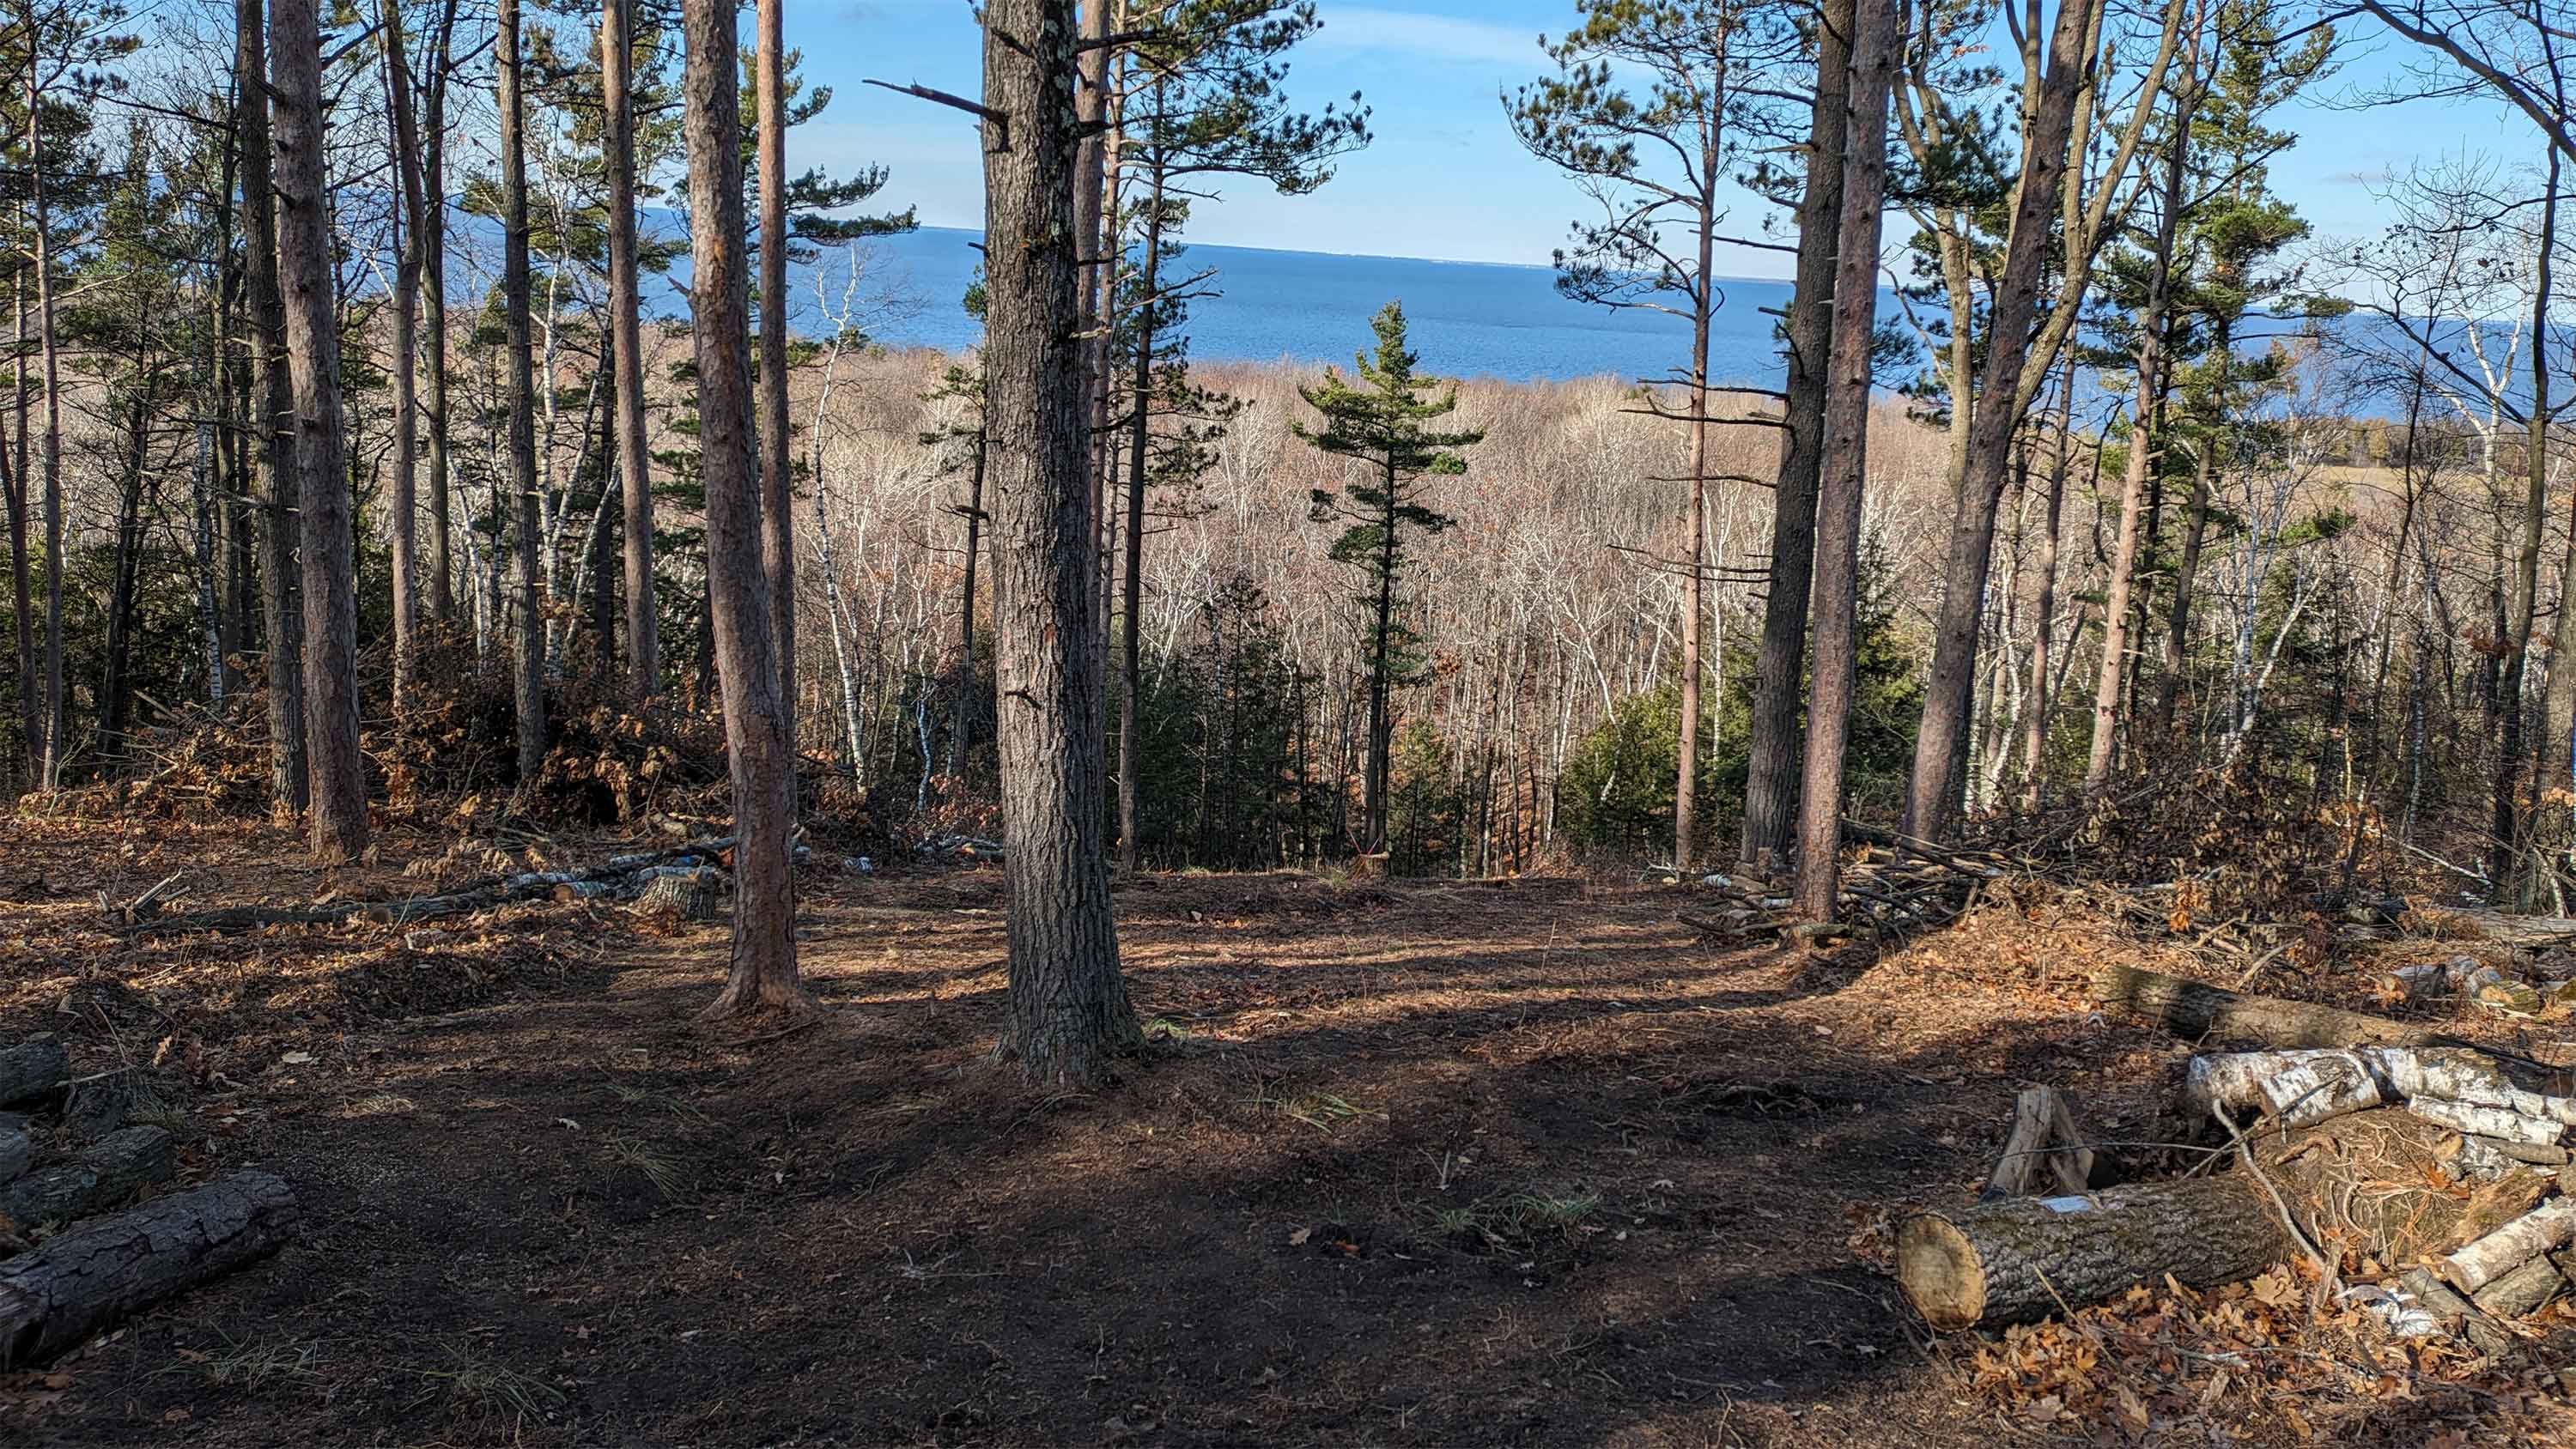
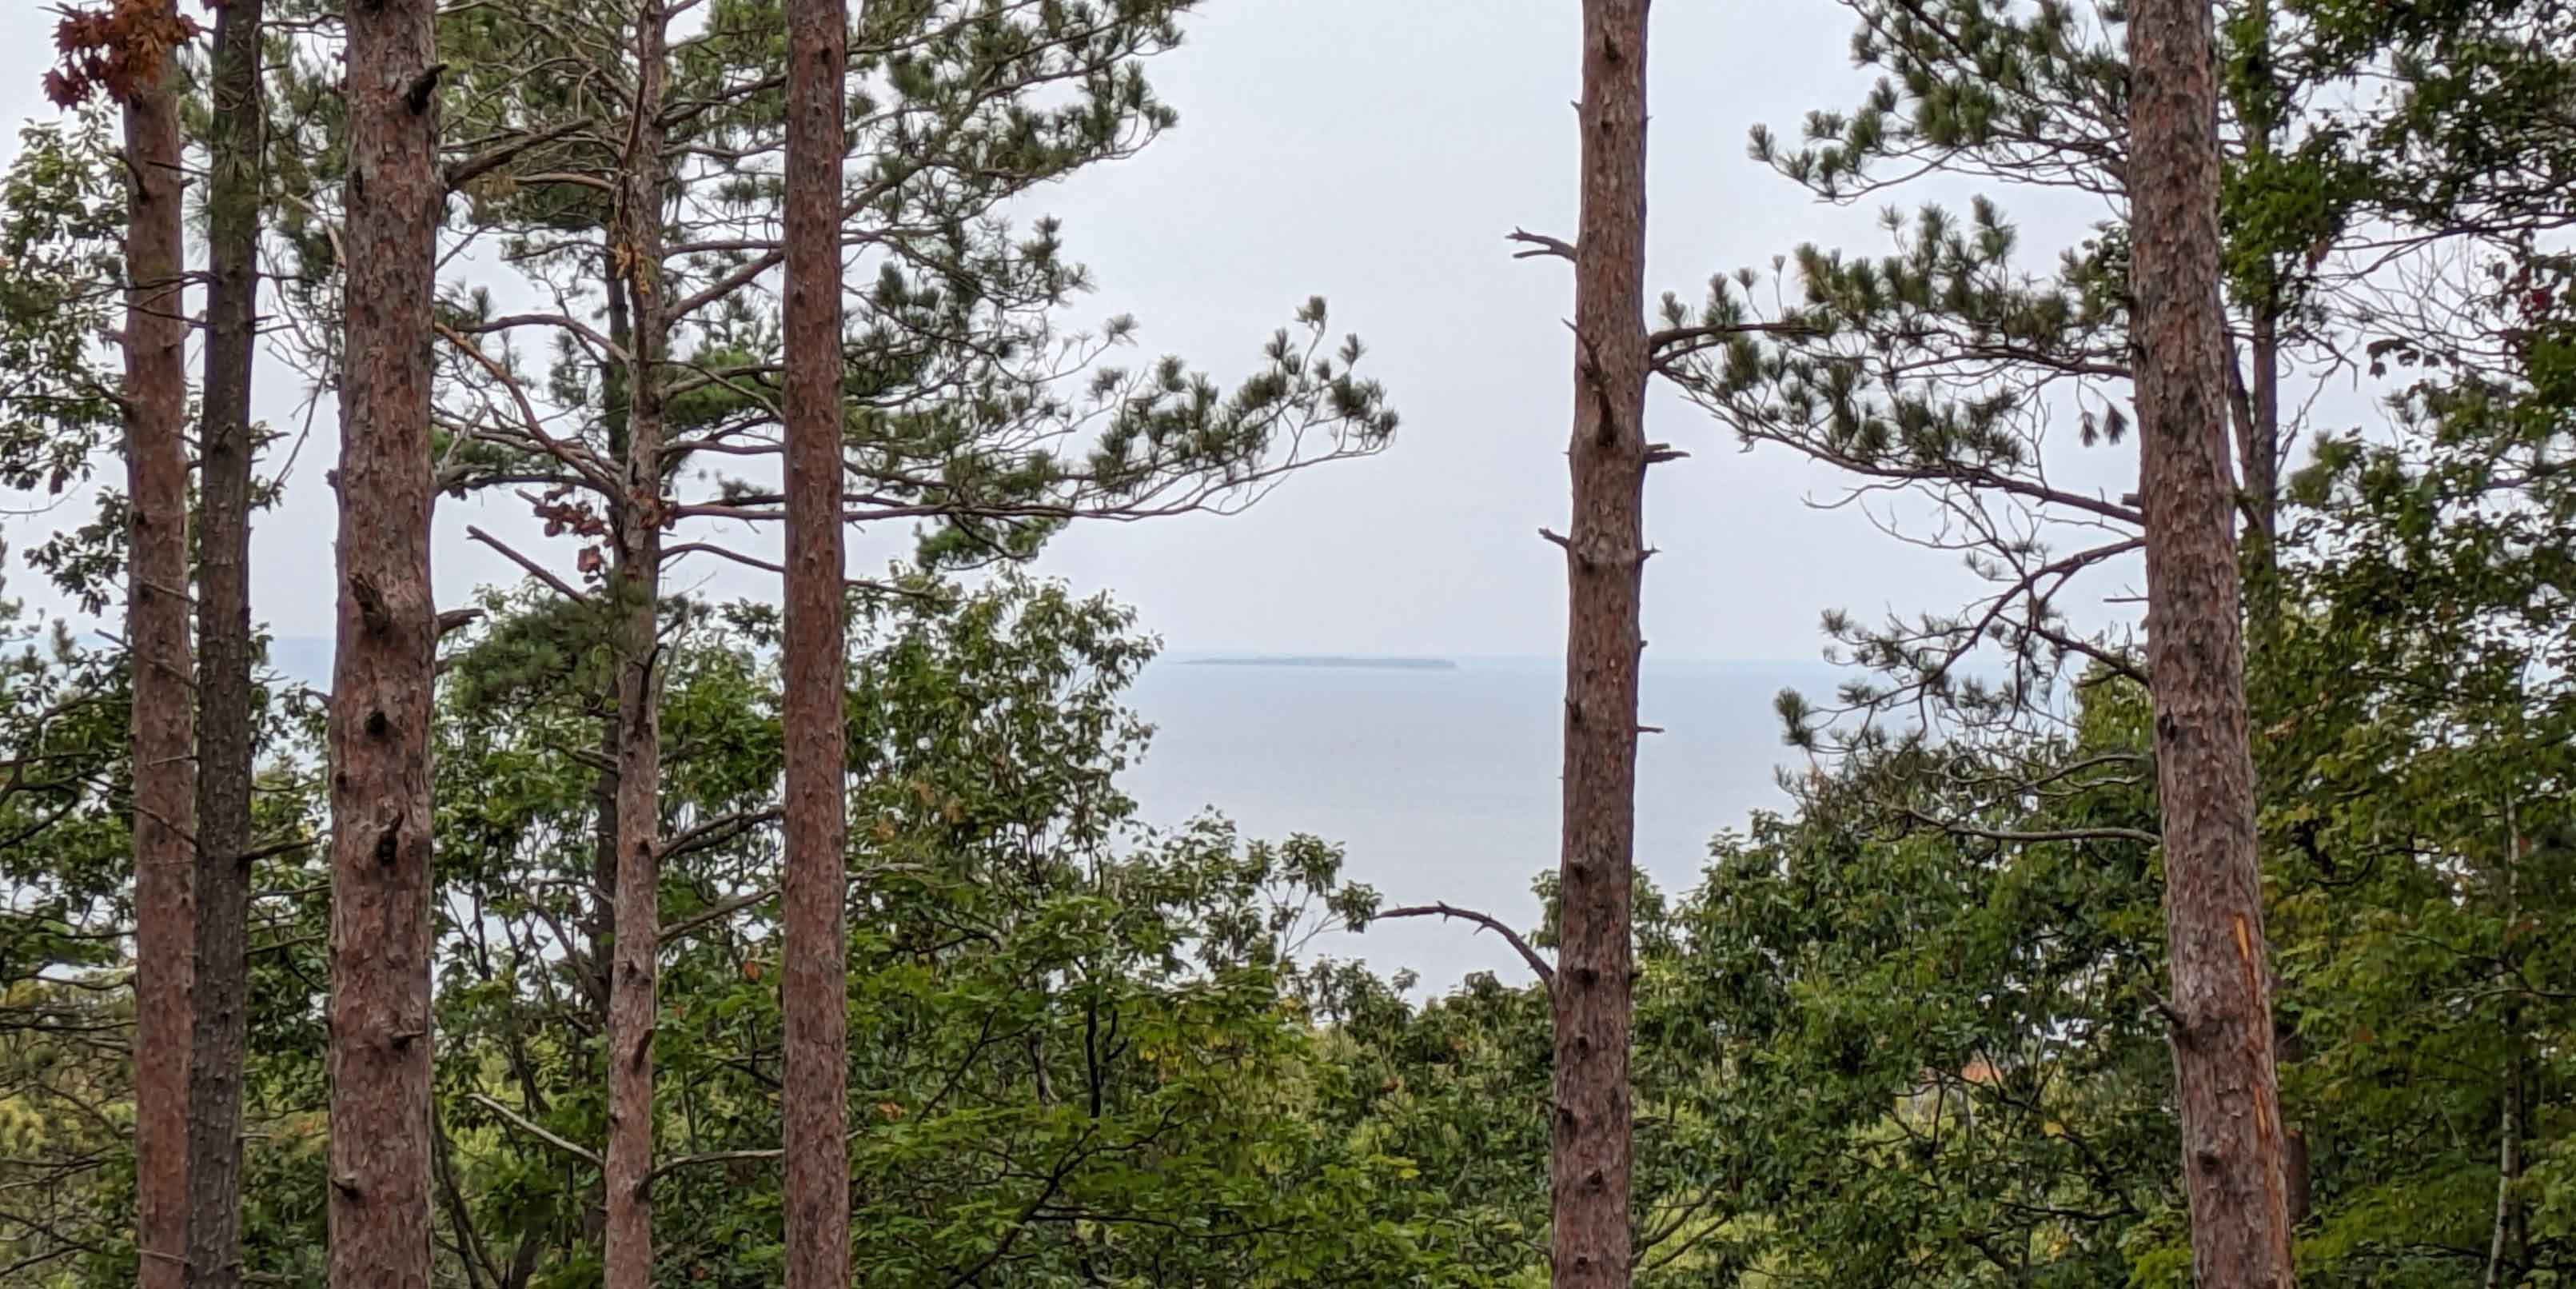
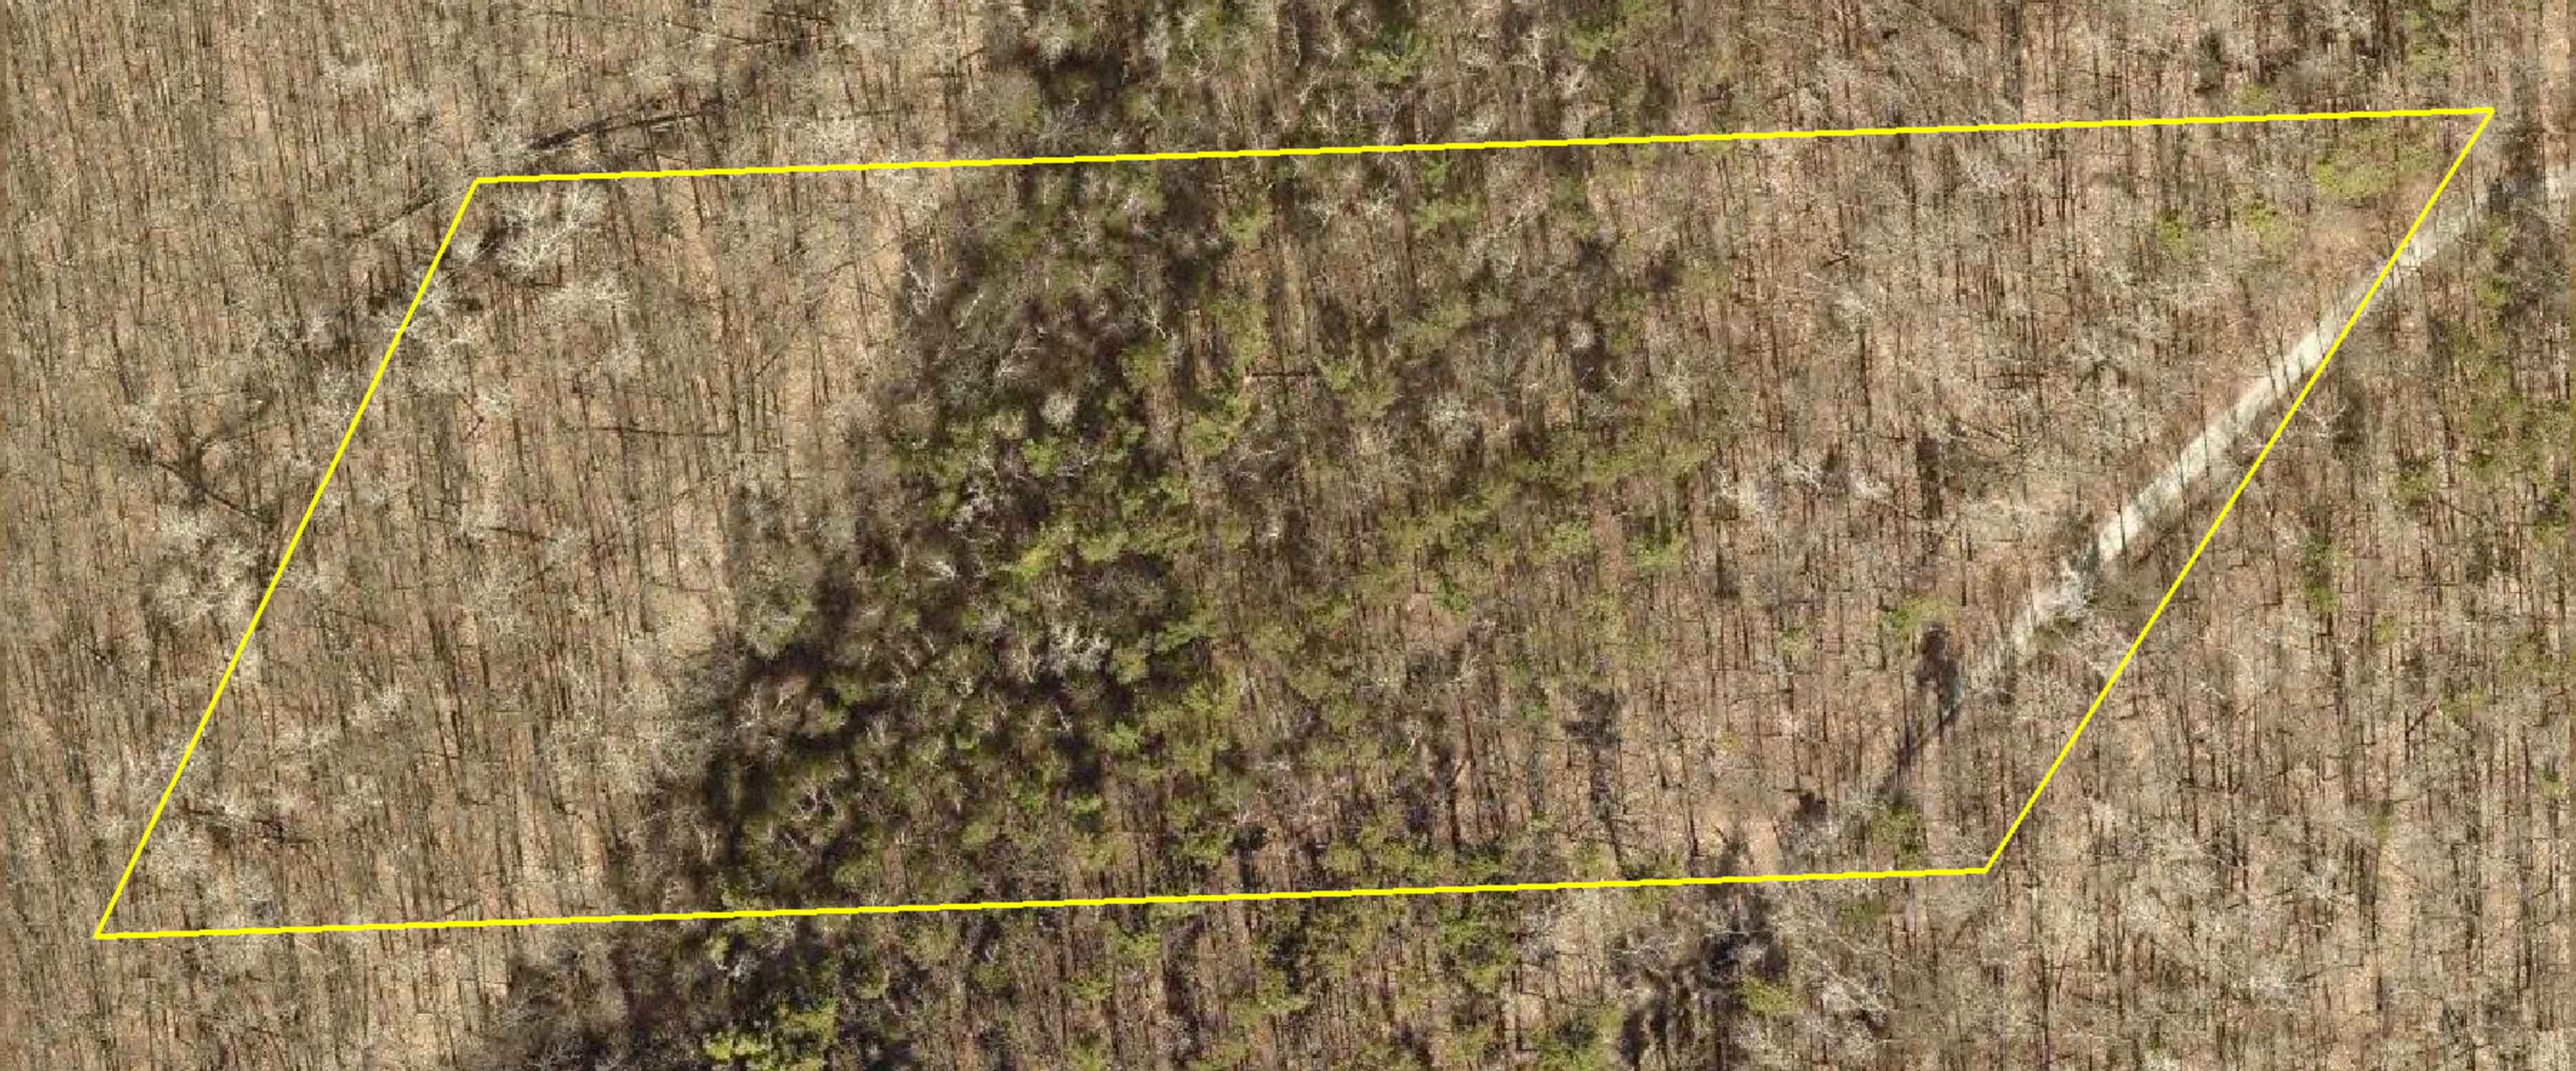
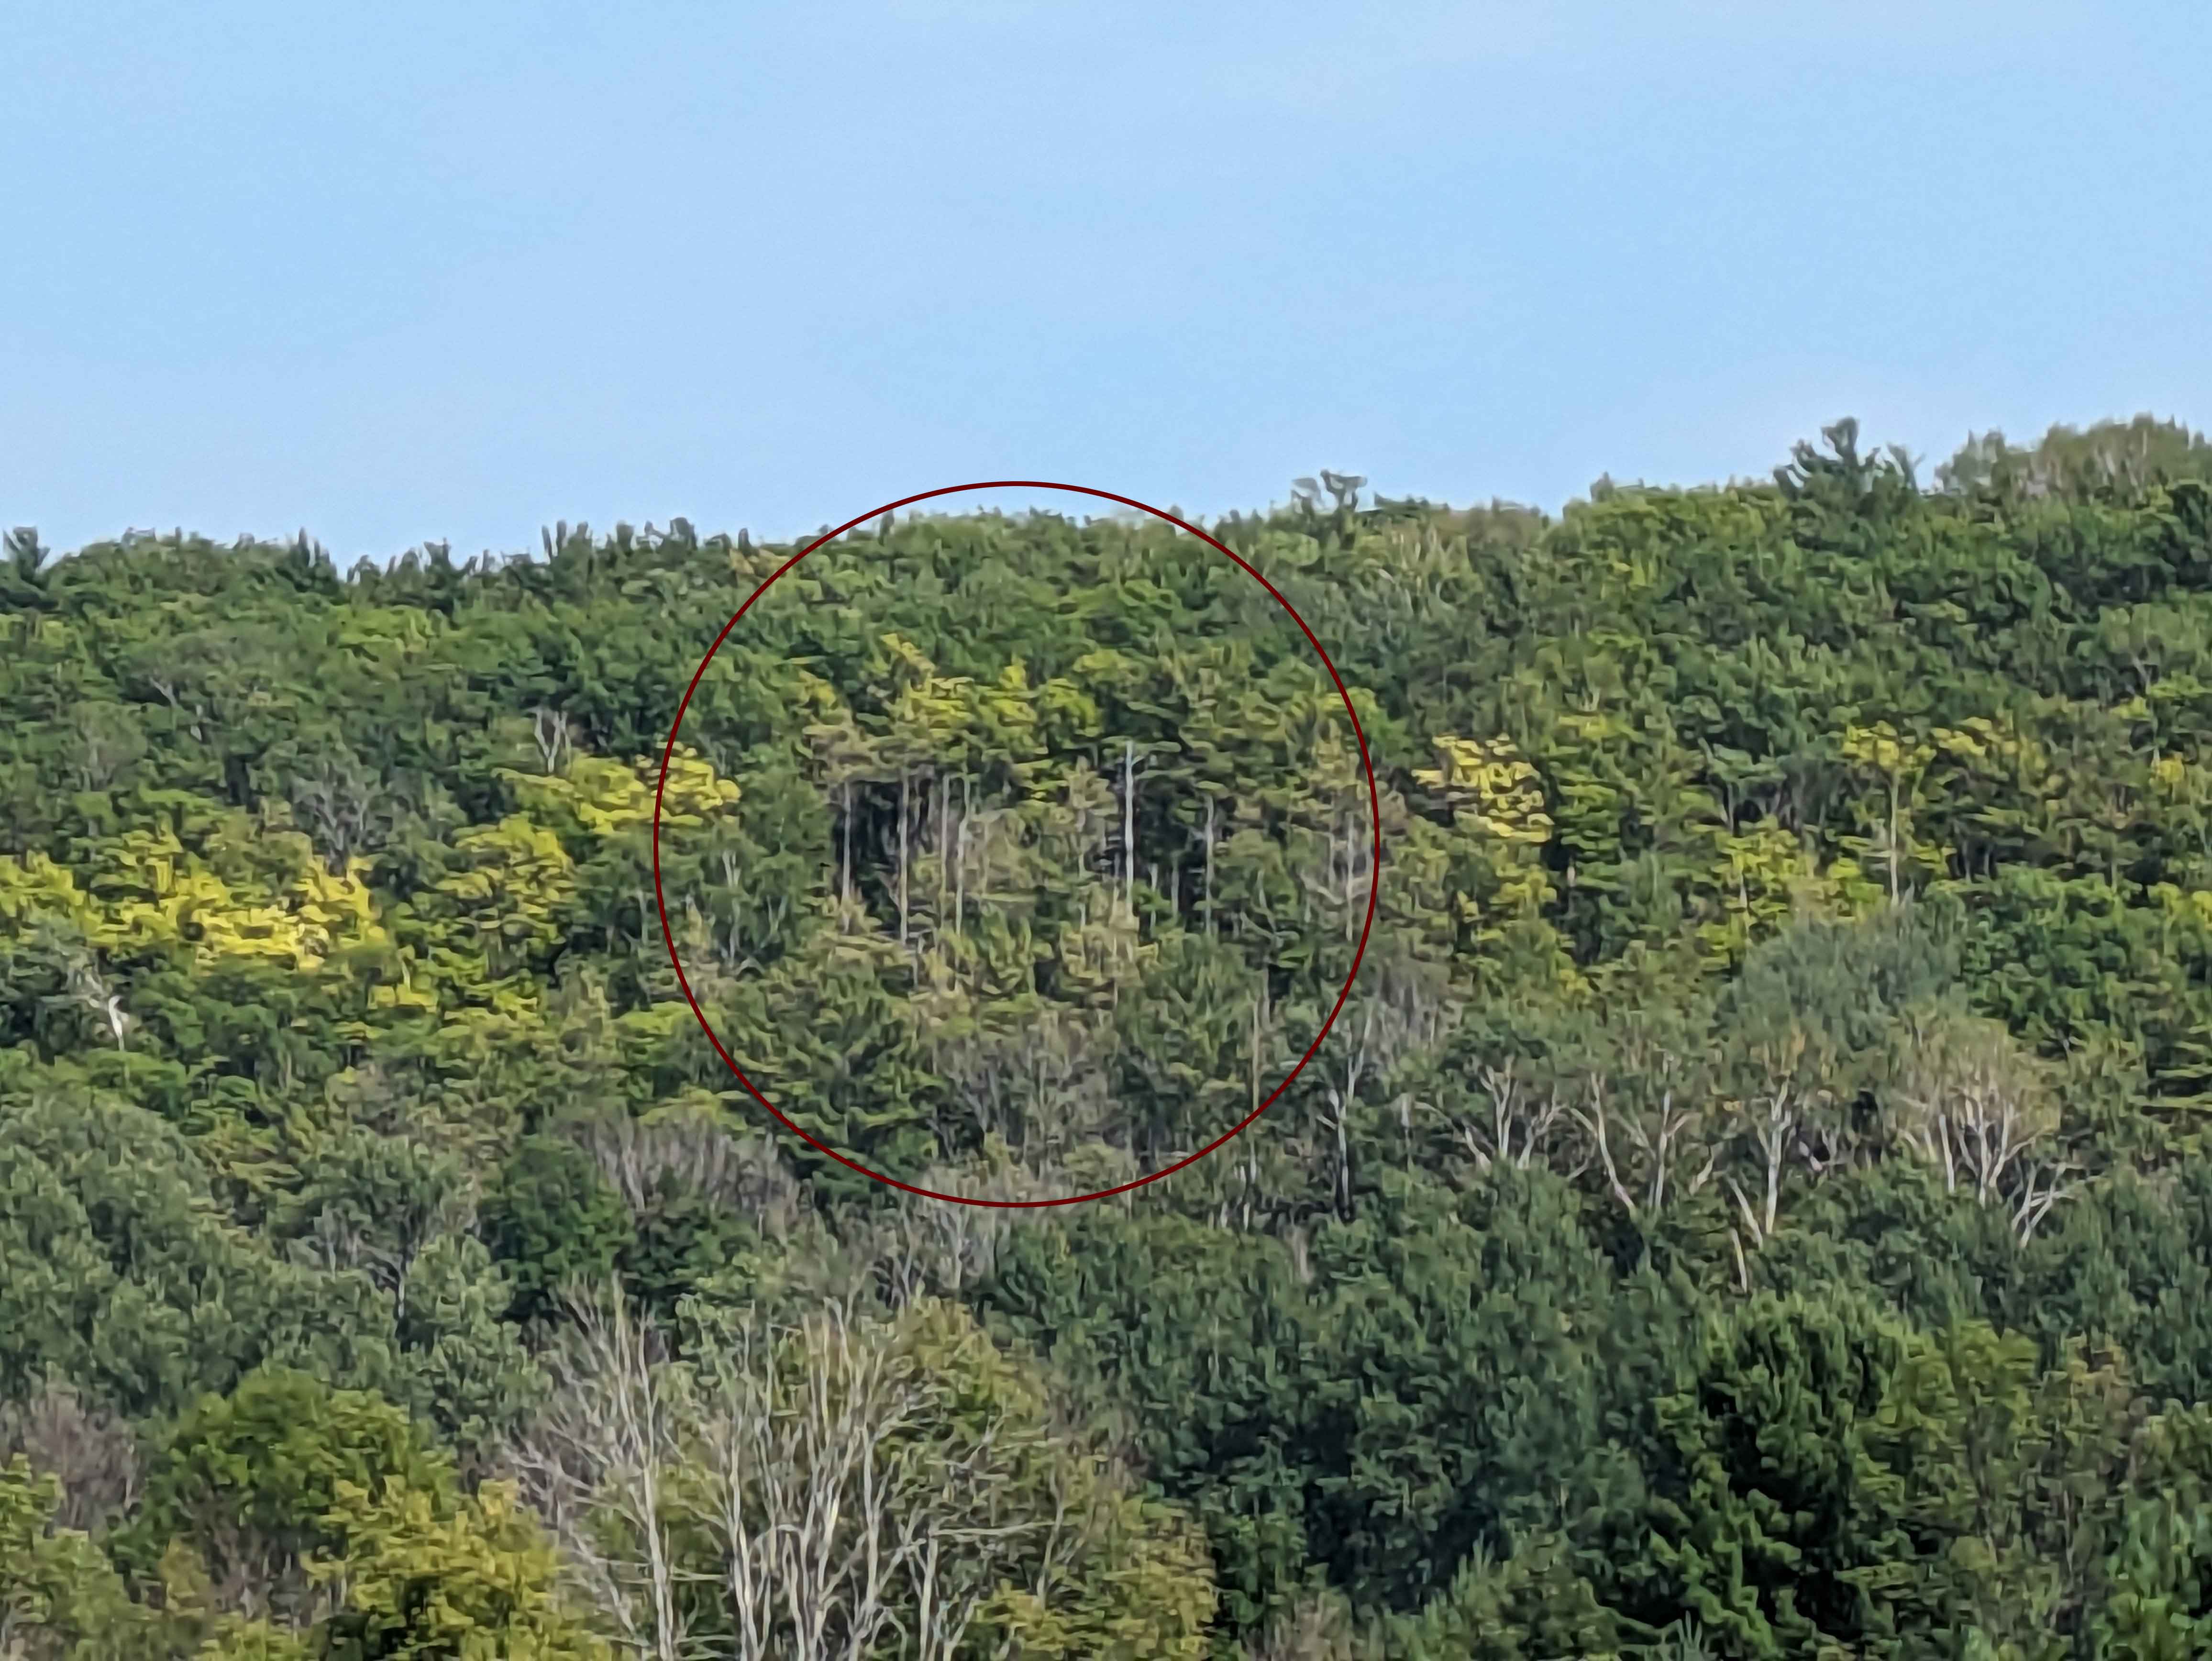
I don't know how I got my phone into Early French Impressionist mode, but it's finally happened: our clearing is visible from Bay Shore Drive. Specifically from the parking lot for Bay Shore Blufflands Nature Preserve.
Our plan is to keep most of the red and white pines — seen here — because they are such magnificent trees, and still allow a view.
I still spend a lot of time on the Door County Land Information site, looking at our lot's elevation contours (for the ski run, of course), easements, road setbacks ... and just seeing our name legally attached to a piece of the peninsula.
After doing a little more digging, I learned that this picture is taken in early spring every two years, so I got lucky putting some human activity on camera. Two years from now, hopefully, the MVC will be visible from space, too.
Here's the satellite pic from spring, 2021. If I had to bet, I'd say this year's picture was taking earlier in the day, with the shadows being cast to the west (the left of the picture). The 2021 picture has shadows casting to the north (the top of the picture).
For the past 3 or 4 years I've been really into birds. An Audubon Society membership, of course, along with local Chapter outings, feeders galore, native plants and trees, a heated bath in the winter; the whole 9 yards.
In Minneapolis it's pretty run-of-the-mill: sparrows, chickadees, finches, cardinals, bluejays, hummingbirds, robins, and a few different woodpeckers.
At the lot it's like I'm on a safari, discovering birds I've never seen or heard, and some I've never even heard of.
Using the amazing Merlin app, here's what I've heard so far this spring and summer. Just too fun!
(Side note: Help our friends. They need it. If you're not already a member, join the Audubon Society.)
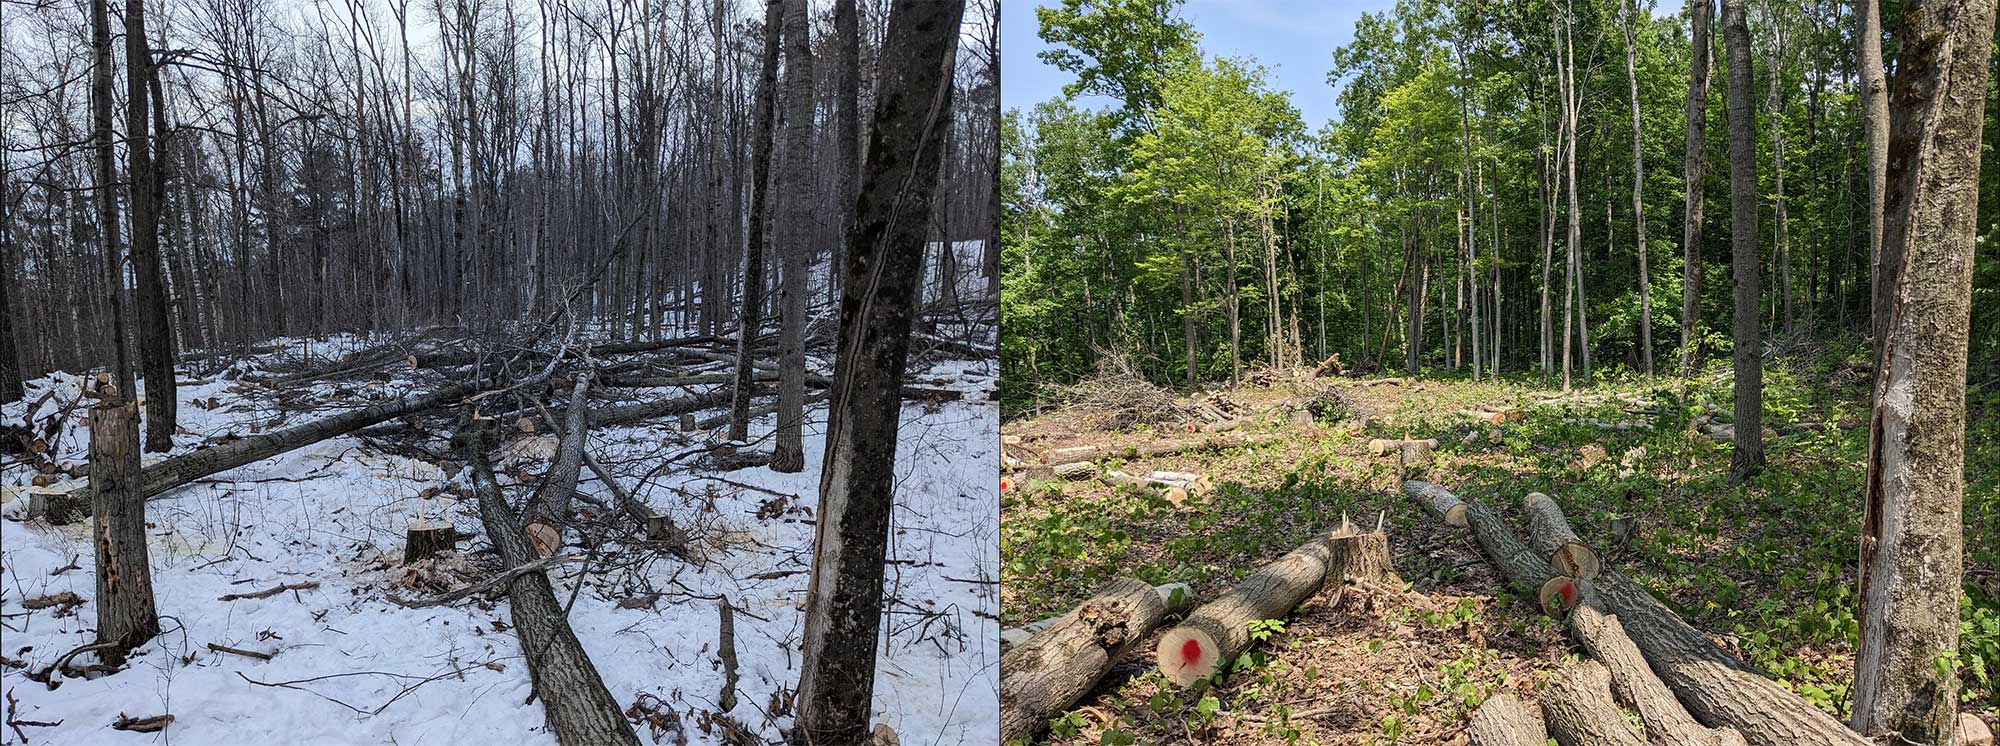
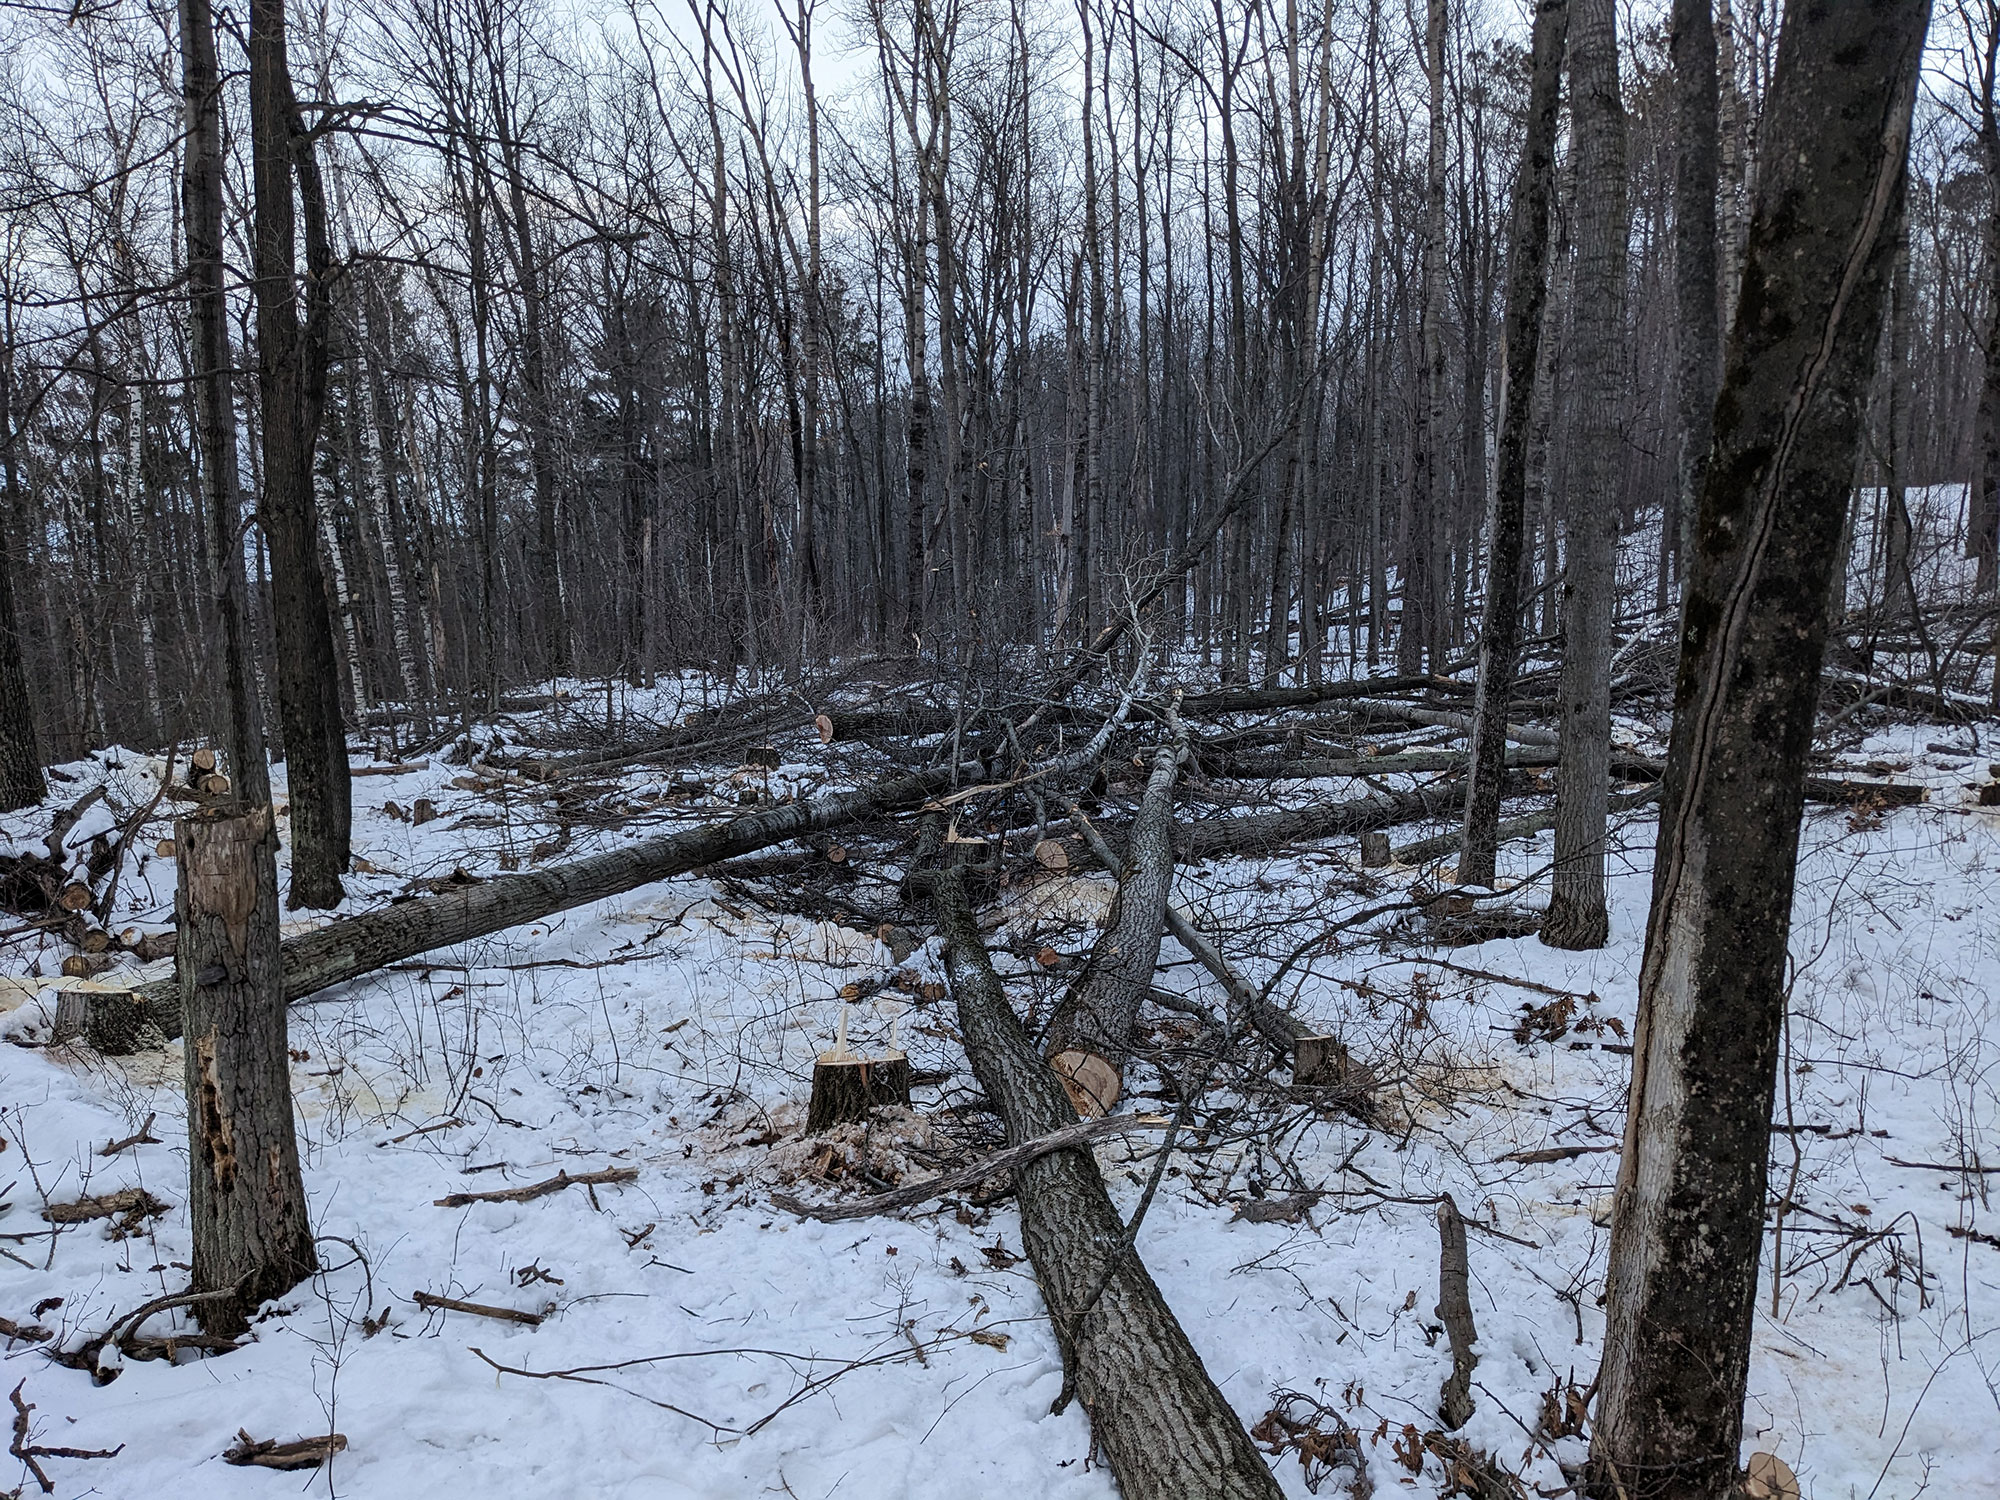
Back in February I had an itchy trigger finger and felled a bunch of trees to beat the wind. Last weekend I worked from can-see to can't-see to clean it all up. Prized timbers were marked for milling, and Tim Bittorf of Bluffside Services (920-495-8482) is taking the rest away, for wood chips and toilet paper.
It may not look like it, but we're getting close to having Nick's team at Lily Bay Sand & Gravel — the winners of the sitework bids — come to scrape the building site and remove all the stumps. They won't be thrilled, but I'll be onsite for that, grabbing as many unearthed stones as possible for our foundation and patio. Lots more to come soon.
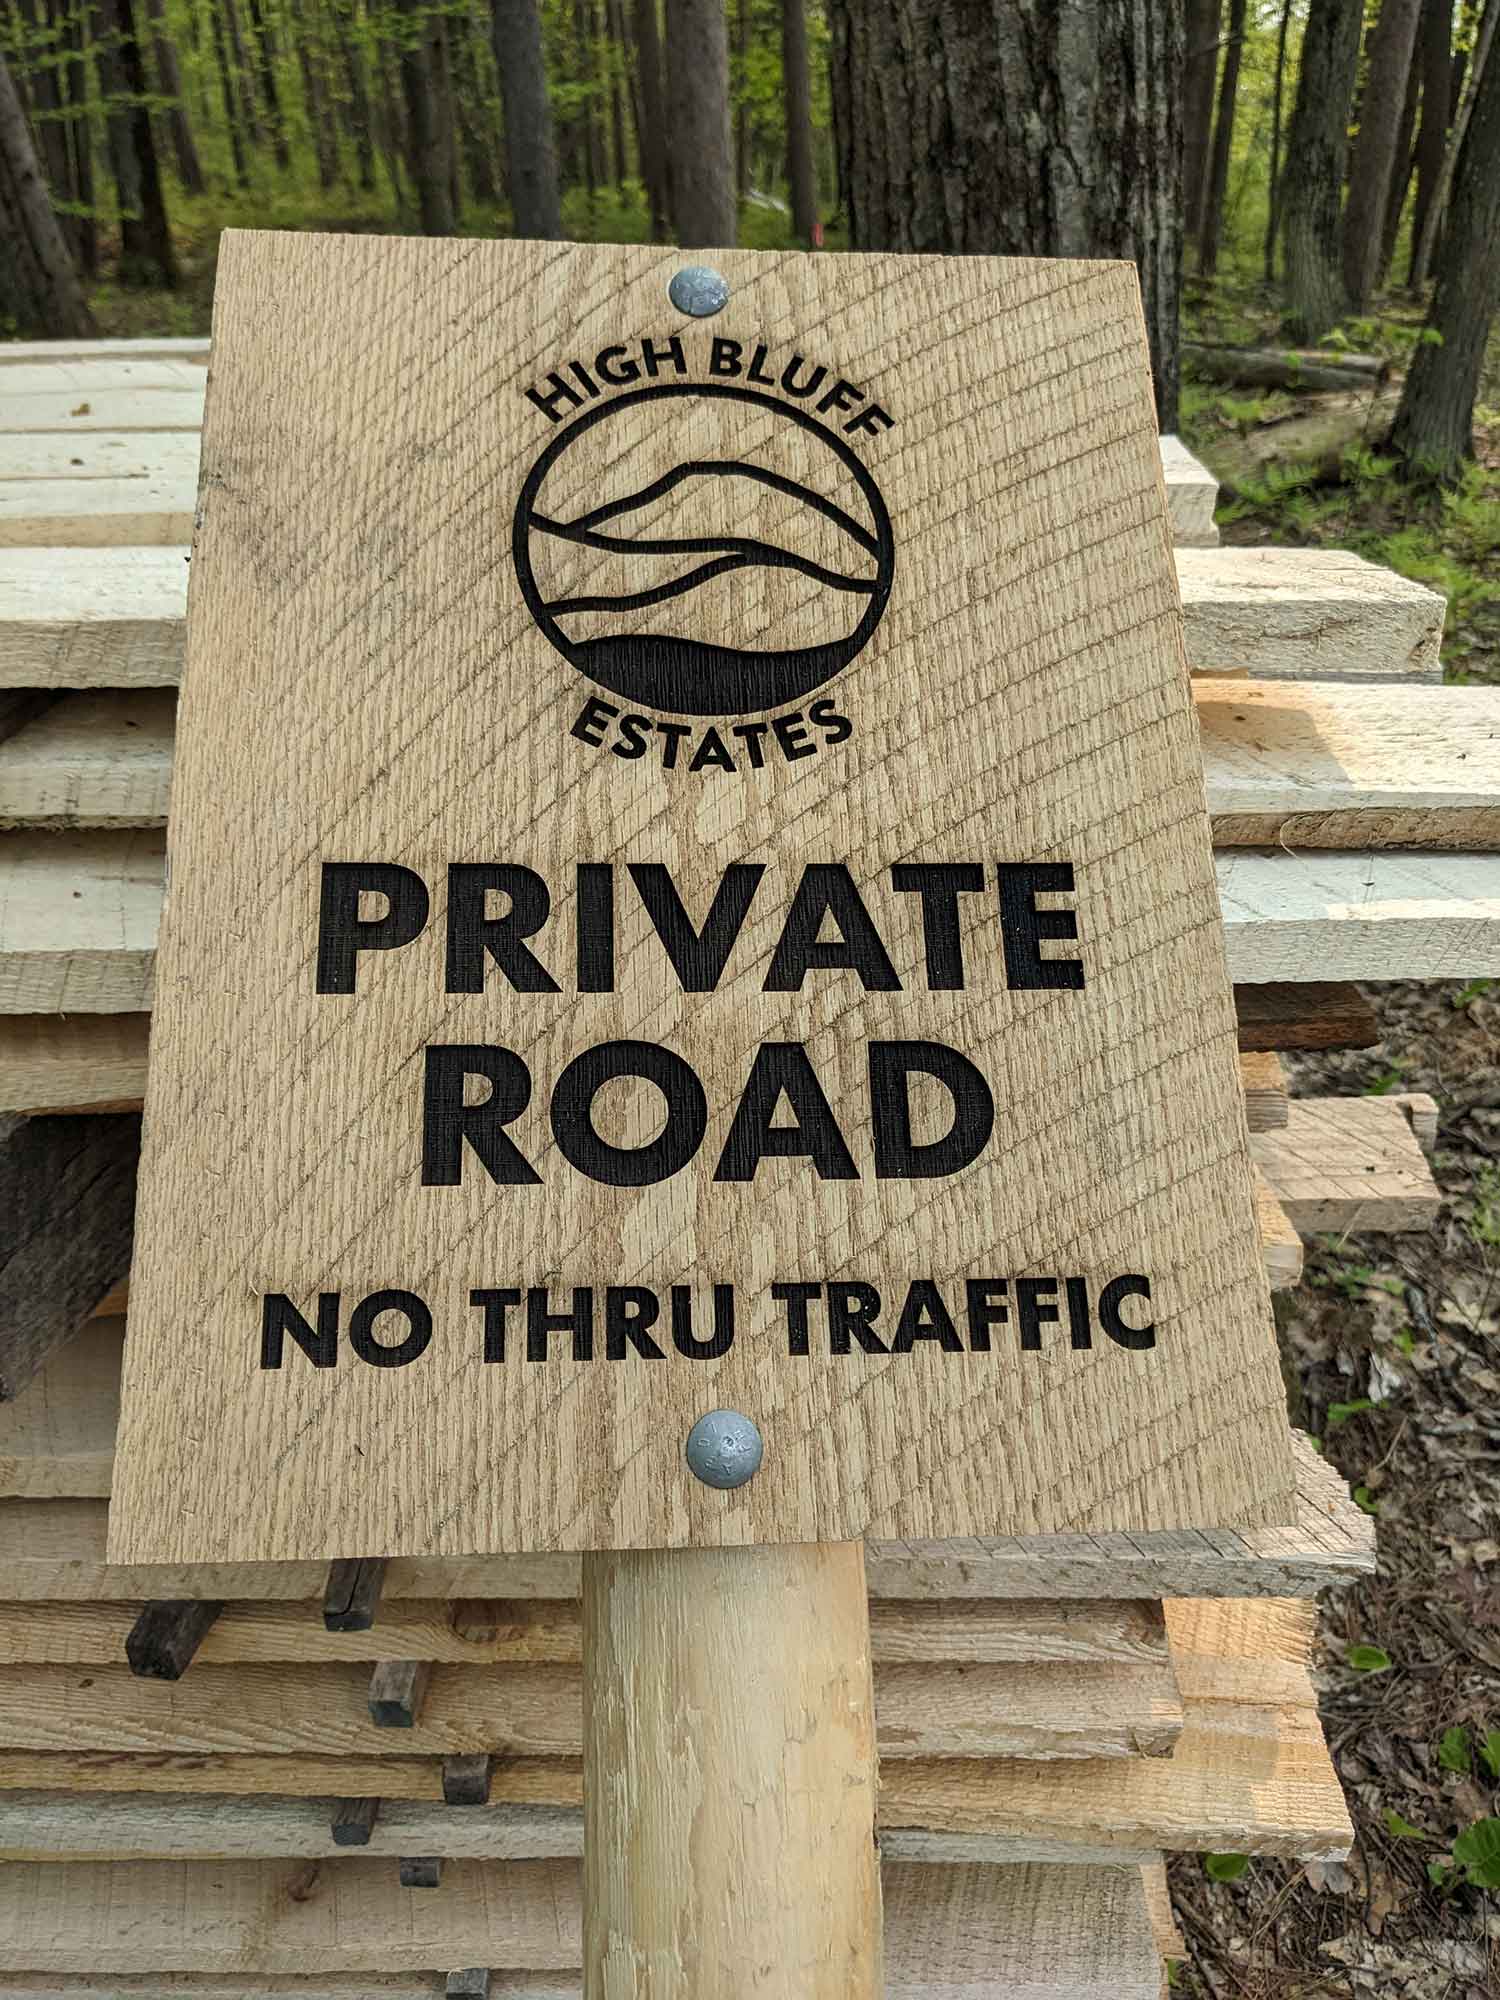
After the HBE HOA approved the logo design back in April, along with the language for our first sign, I volunteered to make it.
I wanted to try lasering it on a wide piece of oak, and it turned out even better than I imagined. Special thanks to Joe at Farmer Design for the sick burn.
Dear fellow HBE owners: if you want matching signage for your lot, just let me know!
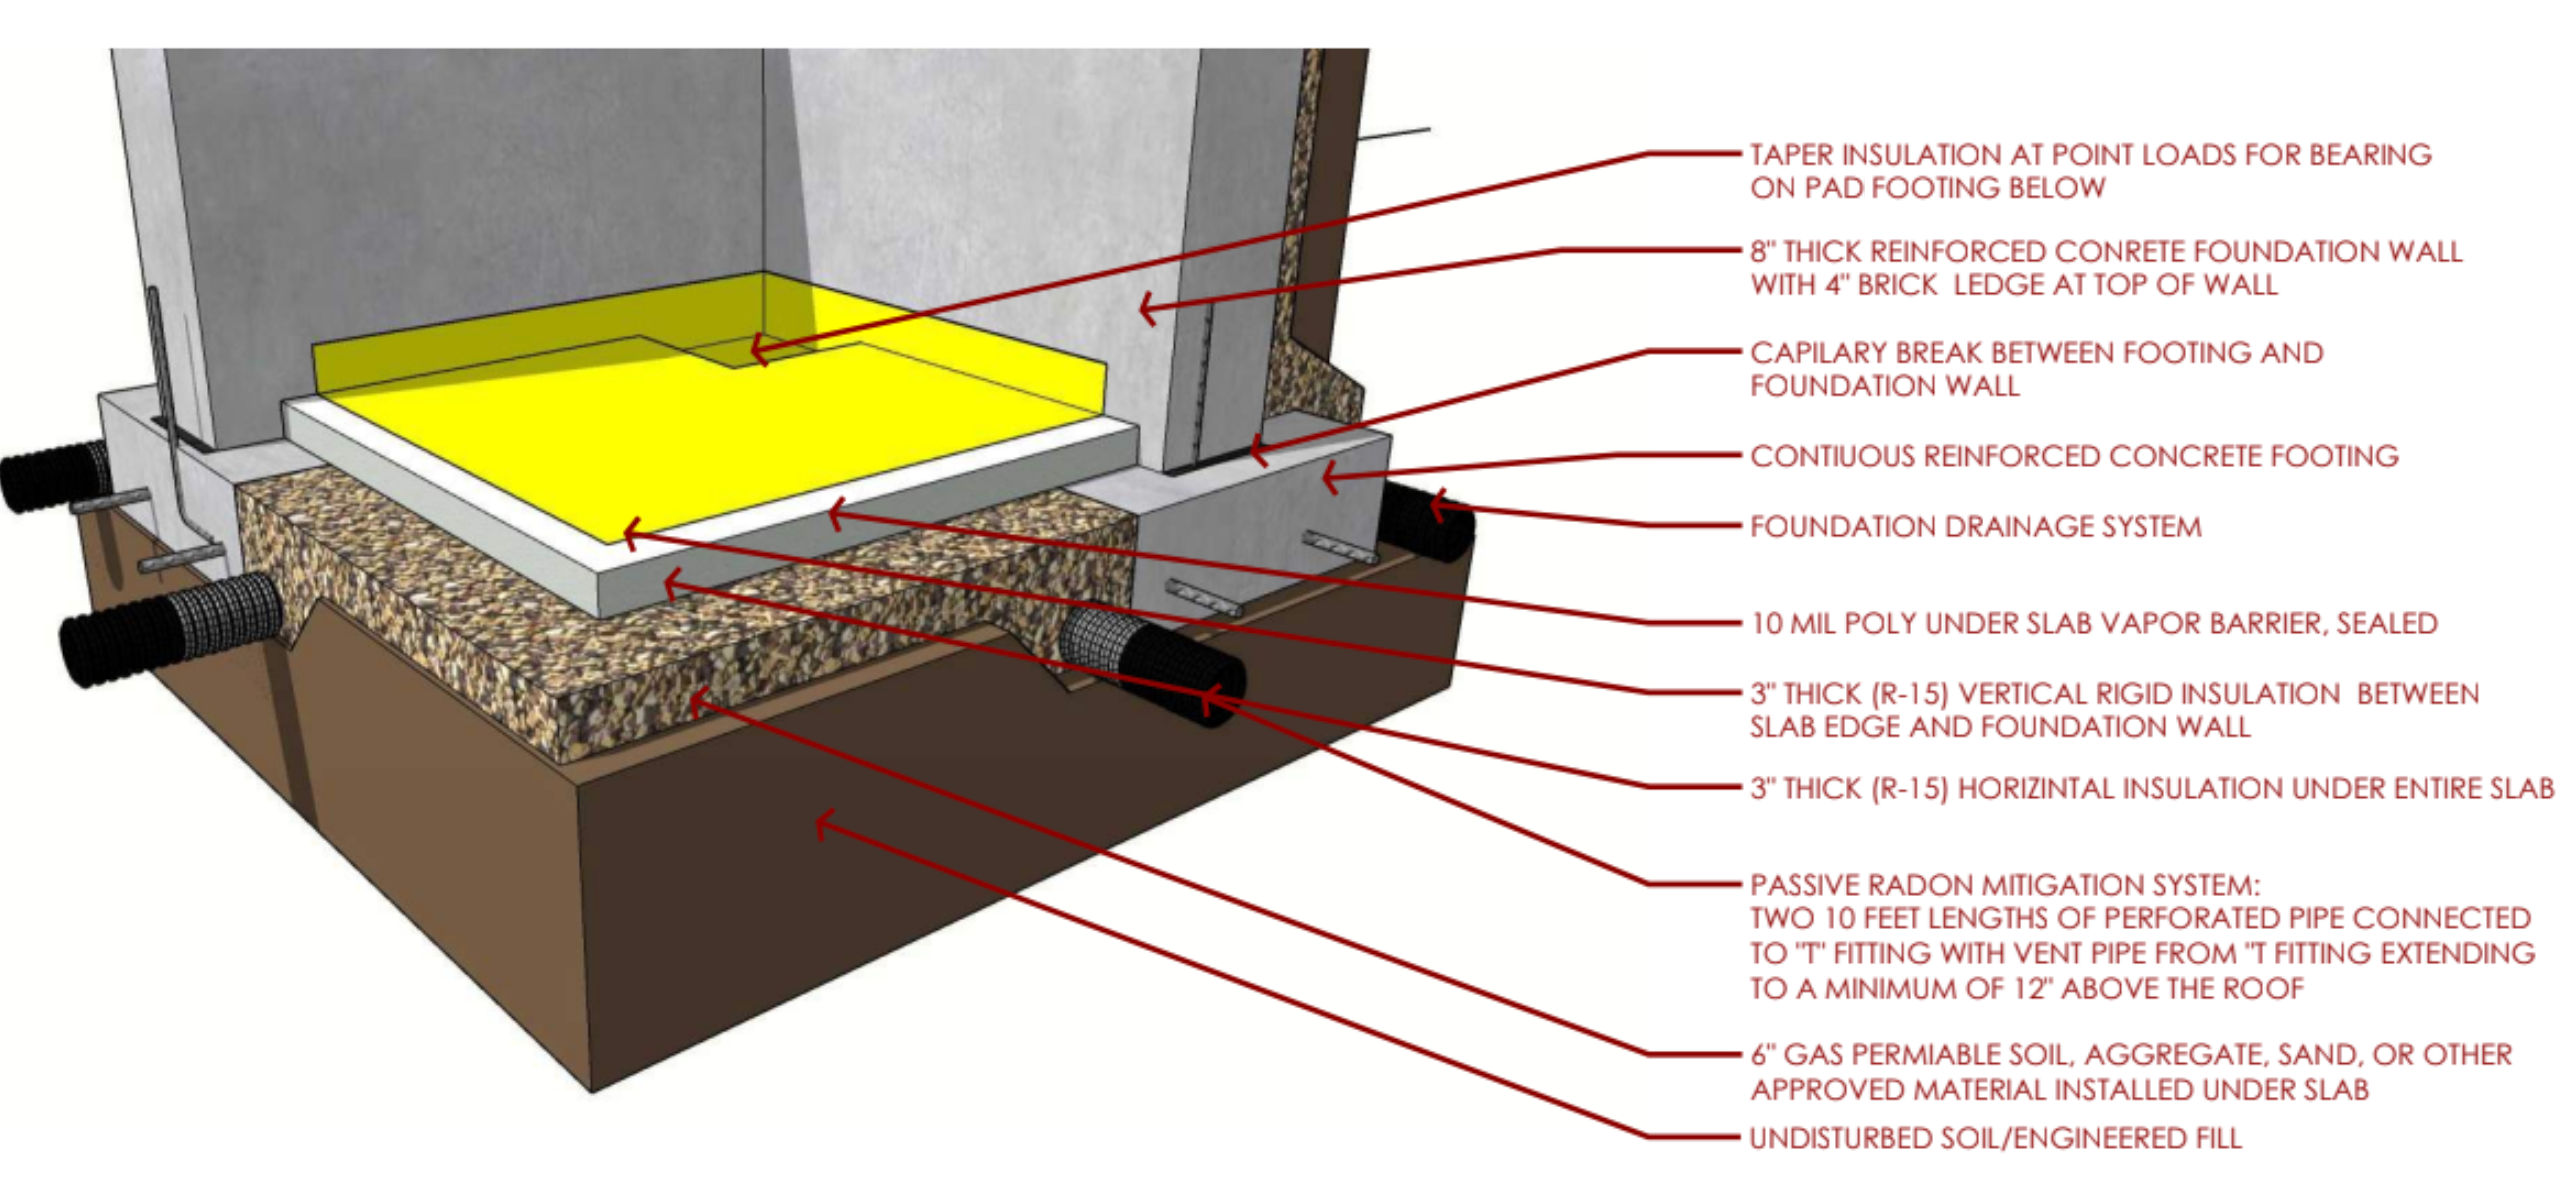
Back in the fall of 2022 we thought we'd settled on a slab-on-grade foundation. It seemed like the easiest and most inline with MVC principles.
After some more research and back-and-forth with our builder, we've pivoted and decided to go with a crawlspace foundation. There are several reasons:
Mistakes will be made. It will be a lot easier to fix them with a chase under the MVC than with things cast in concrete. This I am sure of.
We are getting old. An appeal of the slab-on-grade was the notion of simply using the slab as our floor. But standing on concrete sucks, especially as cartilage has become thinner (or non-existent). A forgiving wood floor on top of a forgiving wooden floor truss — combined with Hush Puppies and Dr. Scholl's inserts — will make everyone happier and healthier.
We can put some mechanicals down there. We're not sure what, exactly, quite yet. But given the MVC's petite 24x36 figure, even an additional square foot is precious.
Here's the drawing for the crawlspace subslab. Once this is in place, 3" of rigid insulation goes on the interior of the foundation walls, and then a 4" slab is poured on top of the 10mm poly (the yellow part).
My mom — one of the 5 readers of this site and a fellow Door County lover — shared this awesome 2-part doc on Door County's history of conservation.
I'm in awe of the vision and tenacity of our predecessors in the creation of Peninsula, Potawatomi, and Whitefish Dunes state parks (to name a few). Without them there would be Eagle Bluff Lighthouse Condos.
I also gained further admiration of Abraham Lincoln. He created Yosemite in 1864, when he had some other shit going on.
The MVC (Minimum Viable Cottage) is part of an 8-lot development called High Bluff Estates.
We're not crazy about the "Estates" part, though anything more than 5 acres is an "estate" in Door County, Wisconsin.
"High Bluff" makes sense since these lots are on one of the highest points in the county.
Anyhow, I signed up to design the logo for this tiny development, and here's what I came up with (which was approved during the 4/19 HOA meeting).
Wait. Before I show it, I should note the objectives:
Simple
Legible on signage
Highlight the Niagara Escarpment
Highlight the highness of HBE compared to the other Door County bluff sites (hence the name).
With some imagination, show the surrounding area and even the eight building sites.
Surprise and delight, with an element not everyone will see at first, but will say "Ahhh." when they see it later.
Here's a description of each part of the logo. Very little of this will make sense if you're unfamiliar with the area. Even if you are familiar with the area you need to use your imagination as I've taken some liberties with the overall elevation (i.e., it's not to scale).
The logo has already appeared on our inaugural annual HOA billing statement, and will next show up on signage: I'm laser etching this on some of the oak I've had milled. Can't wait to see how that turns out.
I haven't posted in a while because we were in France and Spain visiting the surfer son who is "studying" in Barcelona this semester.
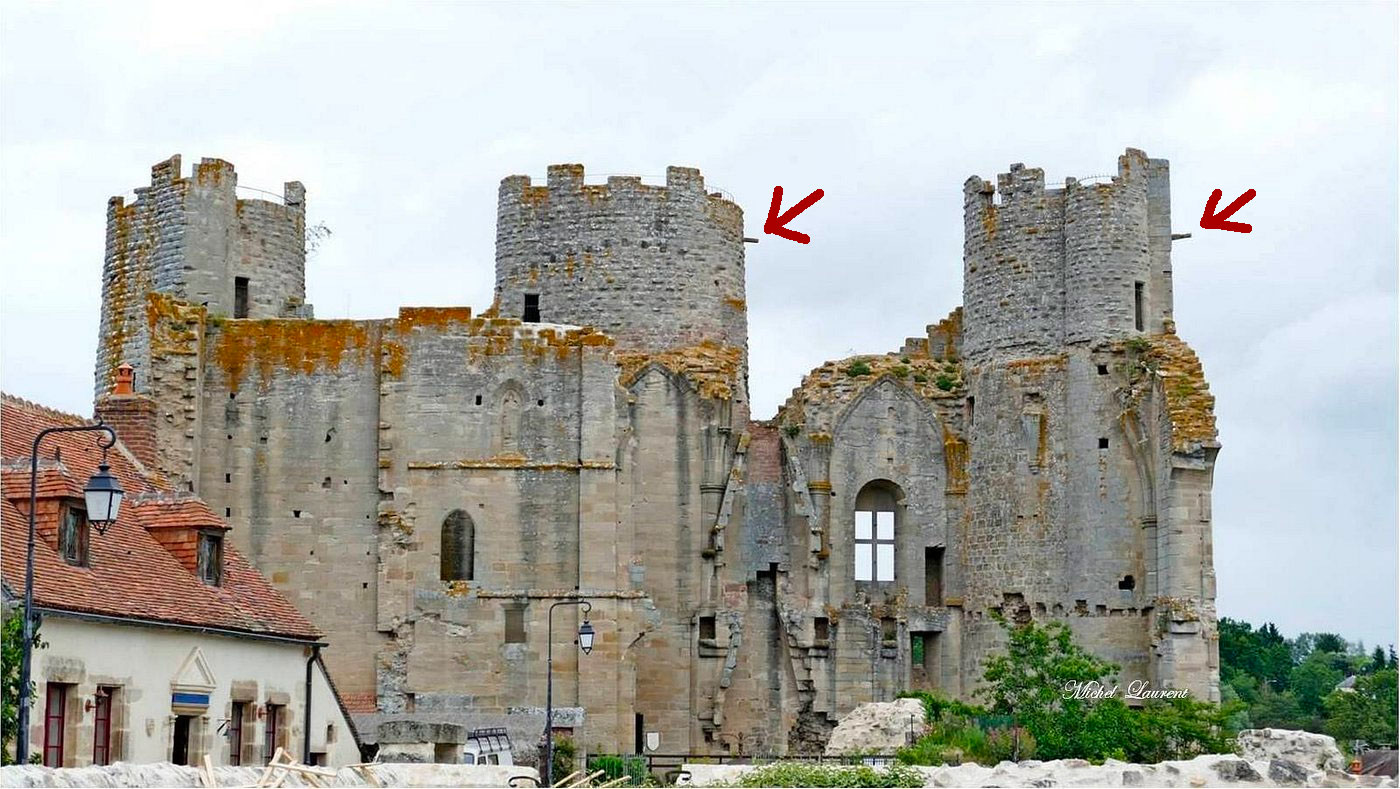
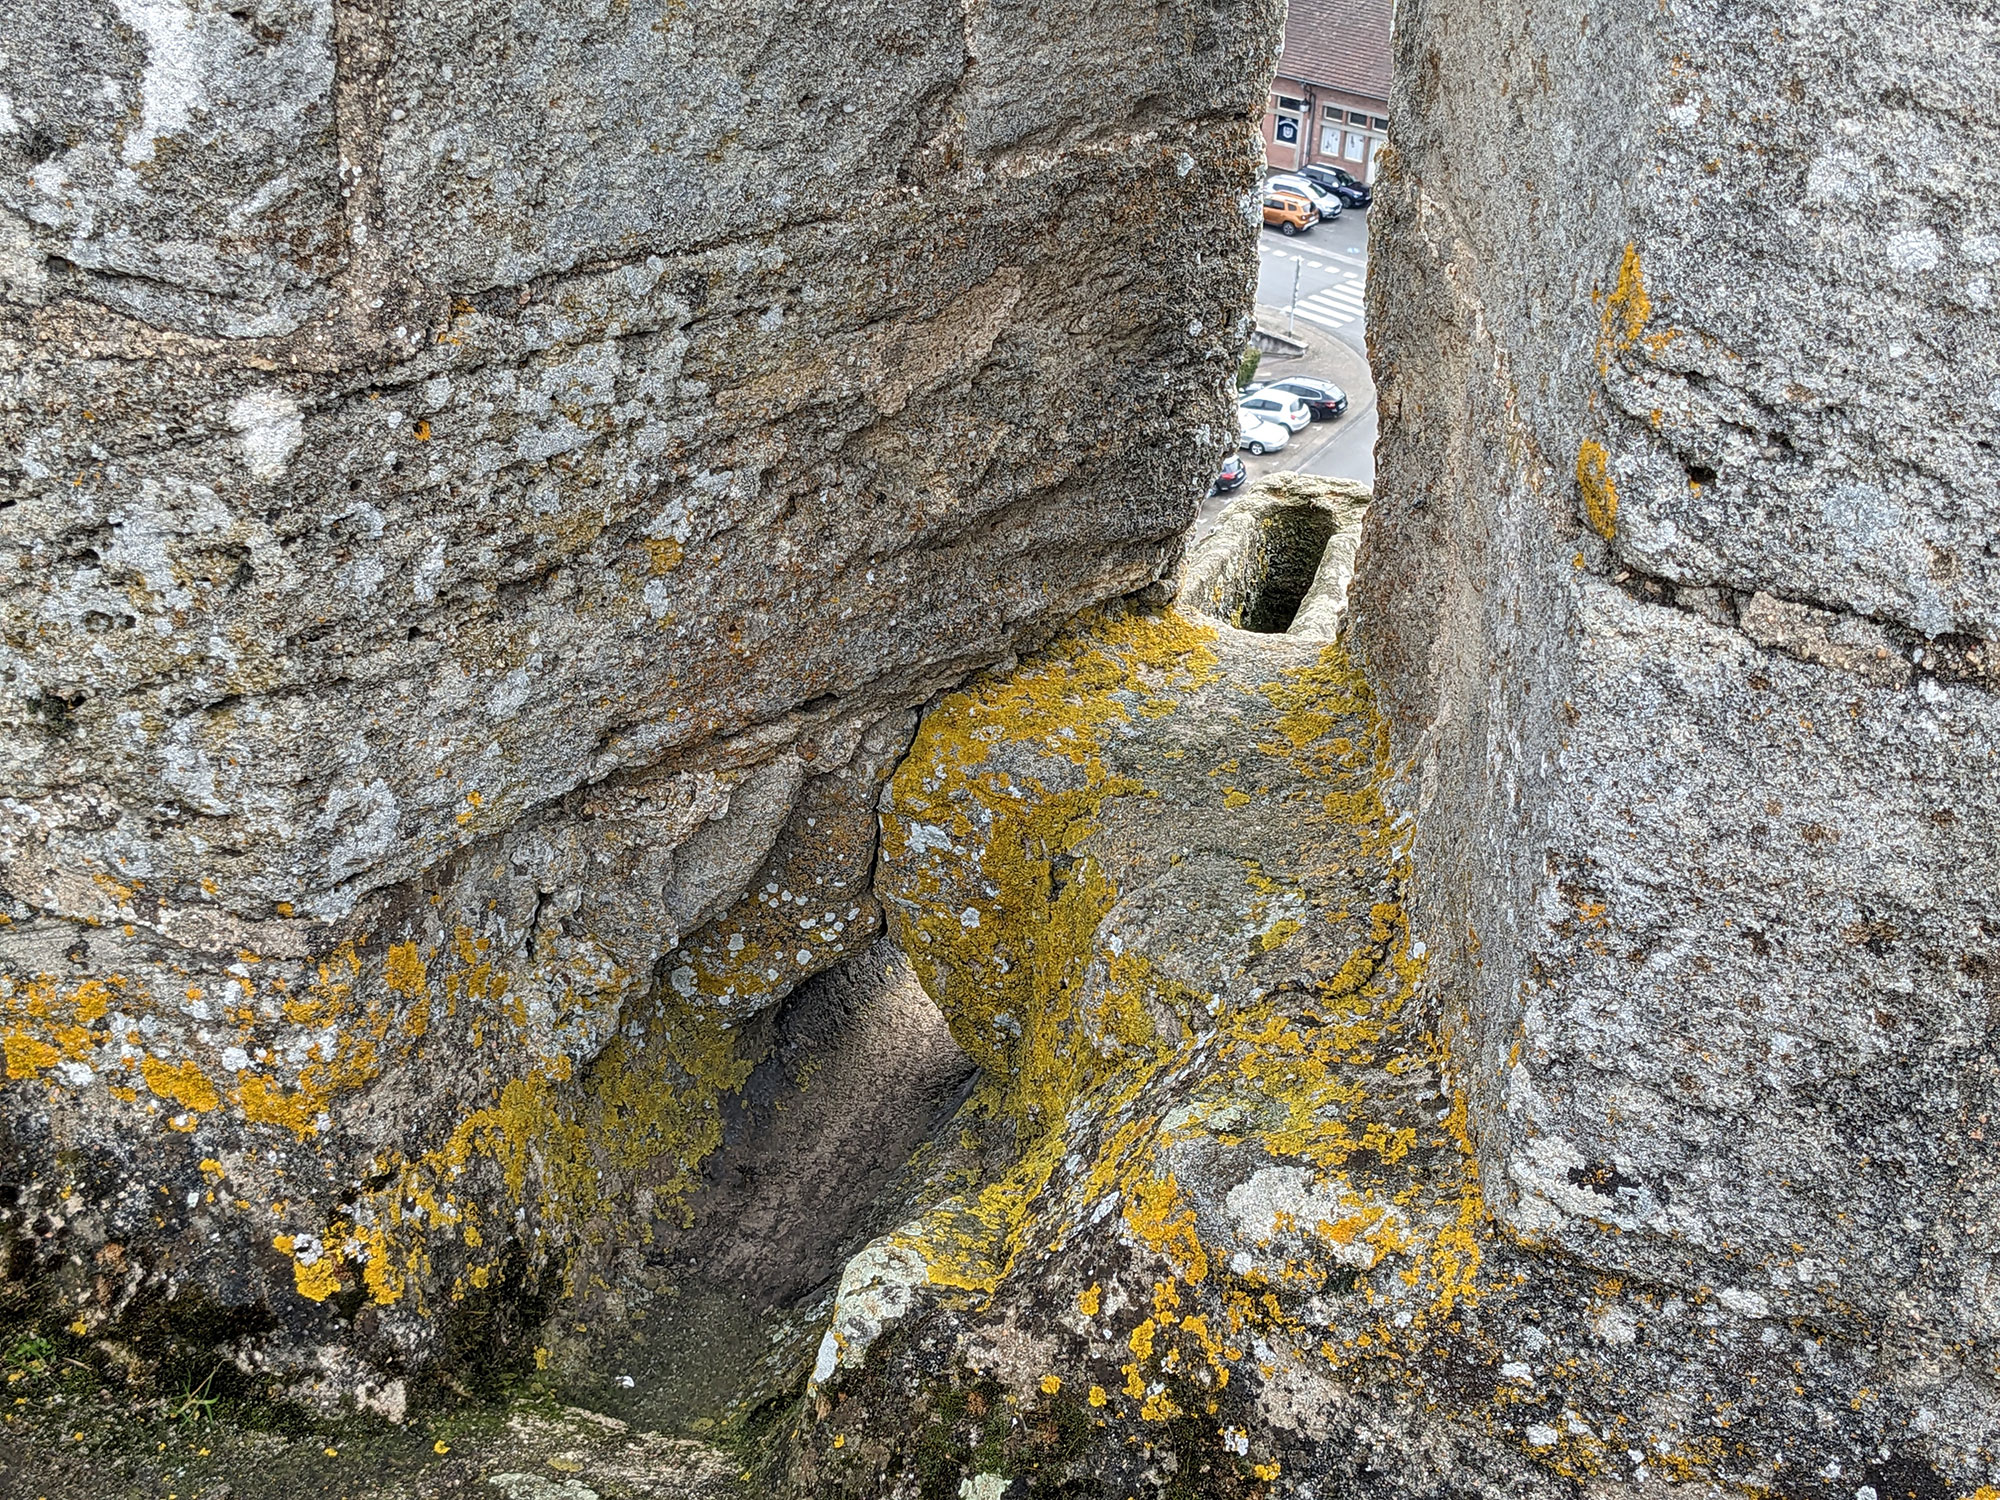
One of the highlights was driving way off the beaten track to Bourbon-l'Archambault to visit the ruins of Château de Bourbon-l'Archambault. For just 7€ — and with *zero* other tourists present — we were allowed to climb to the top of 2 of the 3 towers (one is closed due to safety concerns) of a castle built in the 1300s.
On the second floor of the east tower (the one to the right in the picture below), the duke and duchess quarters had an en suite fireplace and an open-air "toilet" where the 💩 landed two stories below, presumably left for some servants to scoop up.
Even more impressive was the builders' water management on the top floor. Without proper drainage this would quickly turn into a rooftop pool — sans DJ — but multiple drains carried the water to extended carved stone gutters (that looked like gargoyles from a distance) to get the water away from the foundation. Fantastique!
OG readers of this site will recall the Xanax and Valium-hazed* felling of a big red oak back in September.
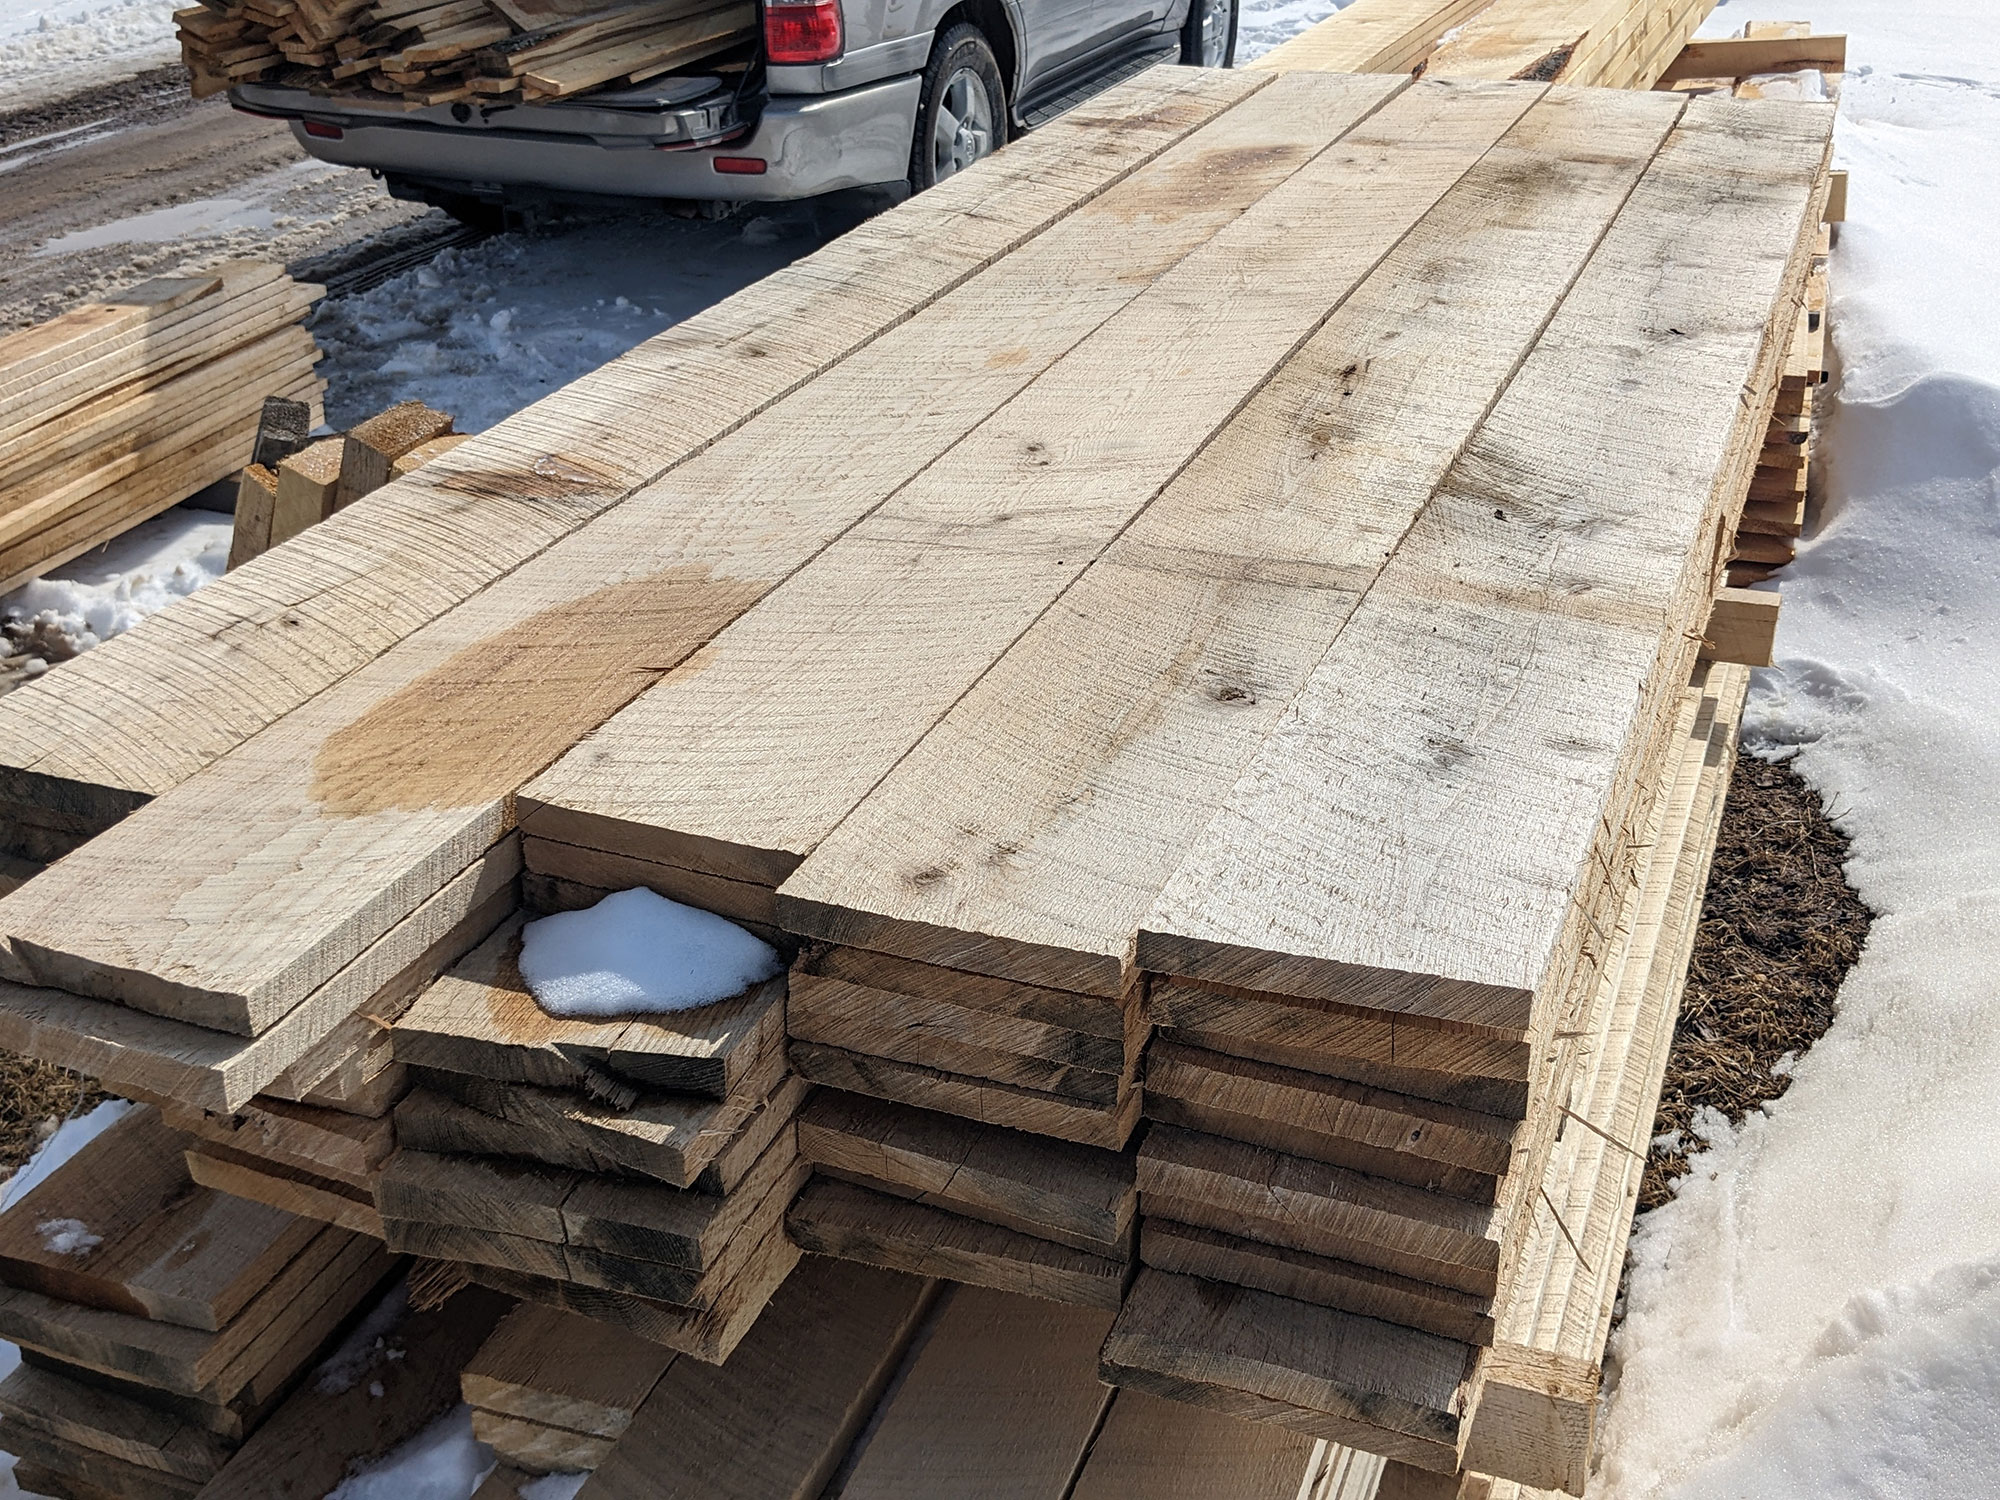
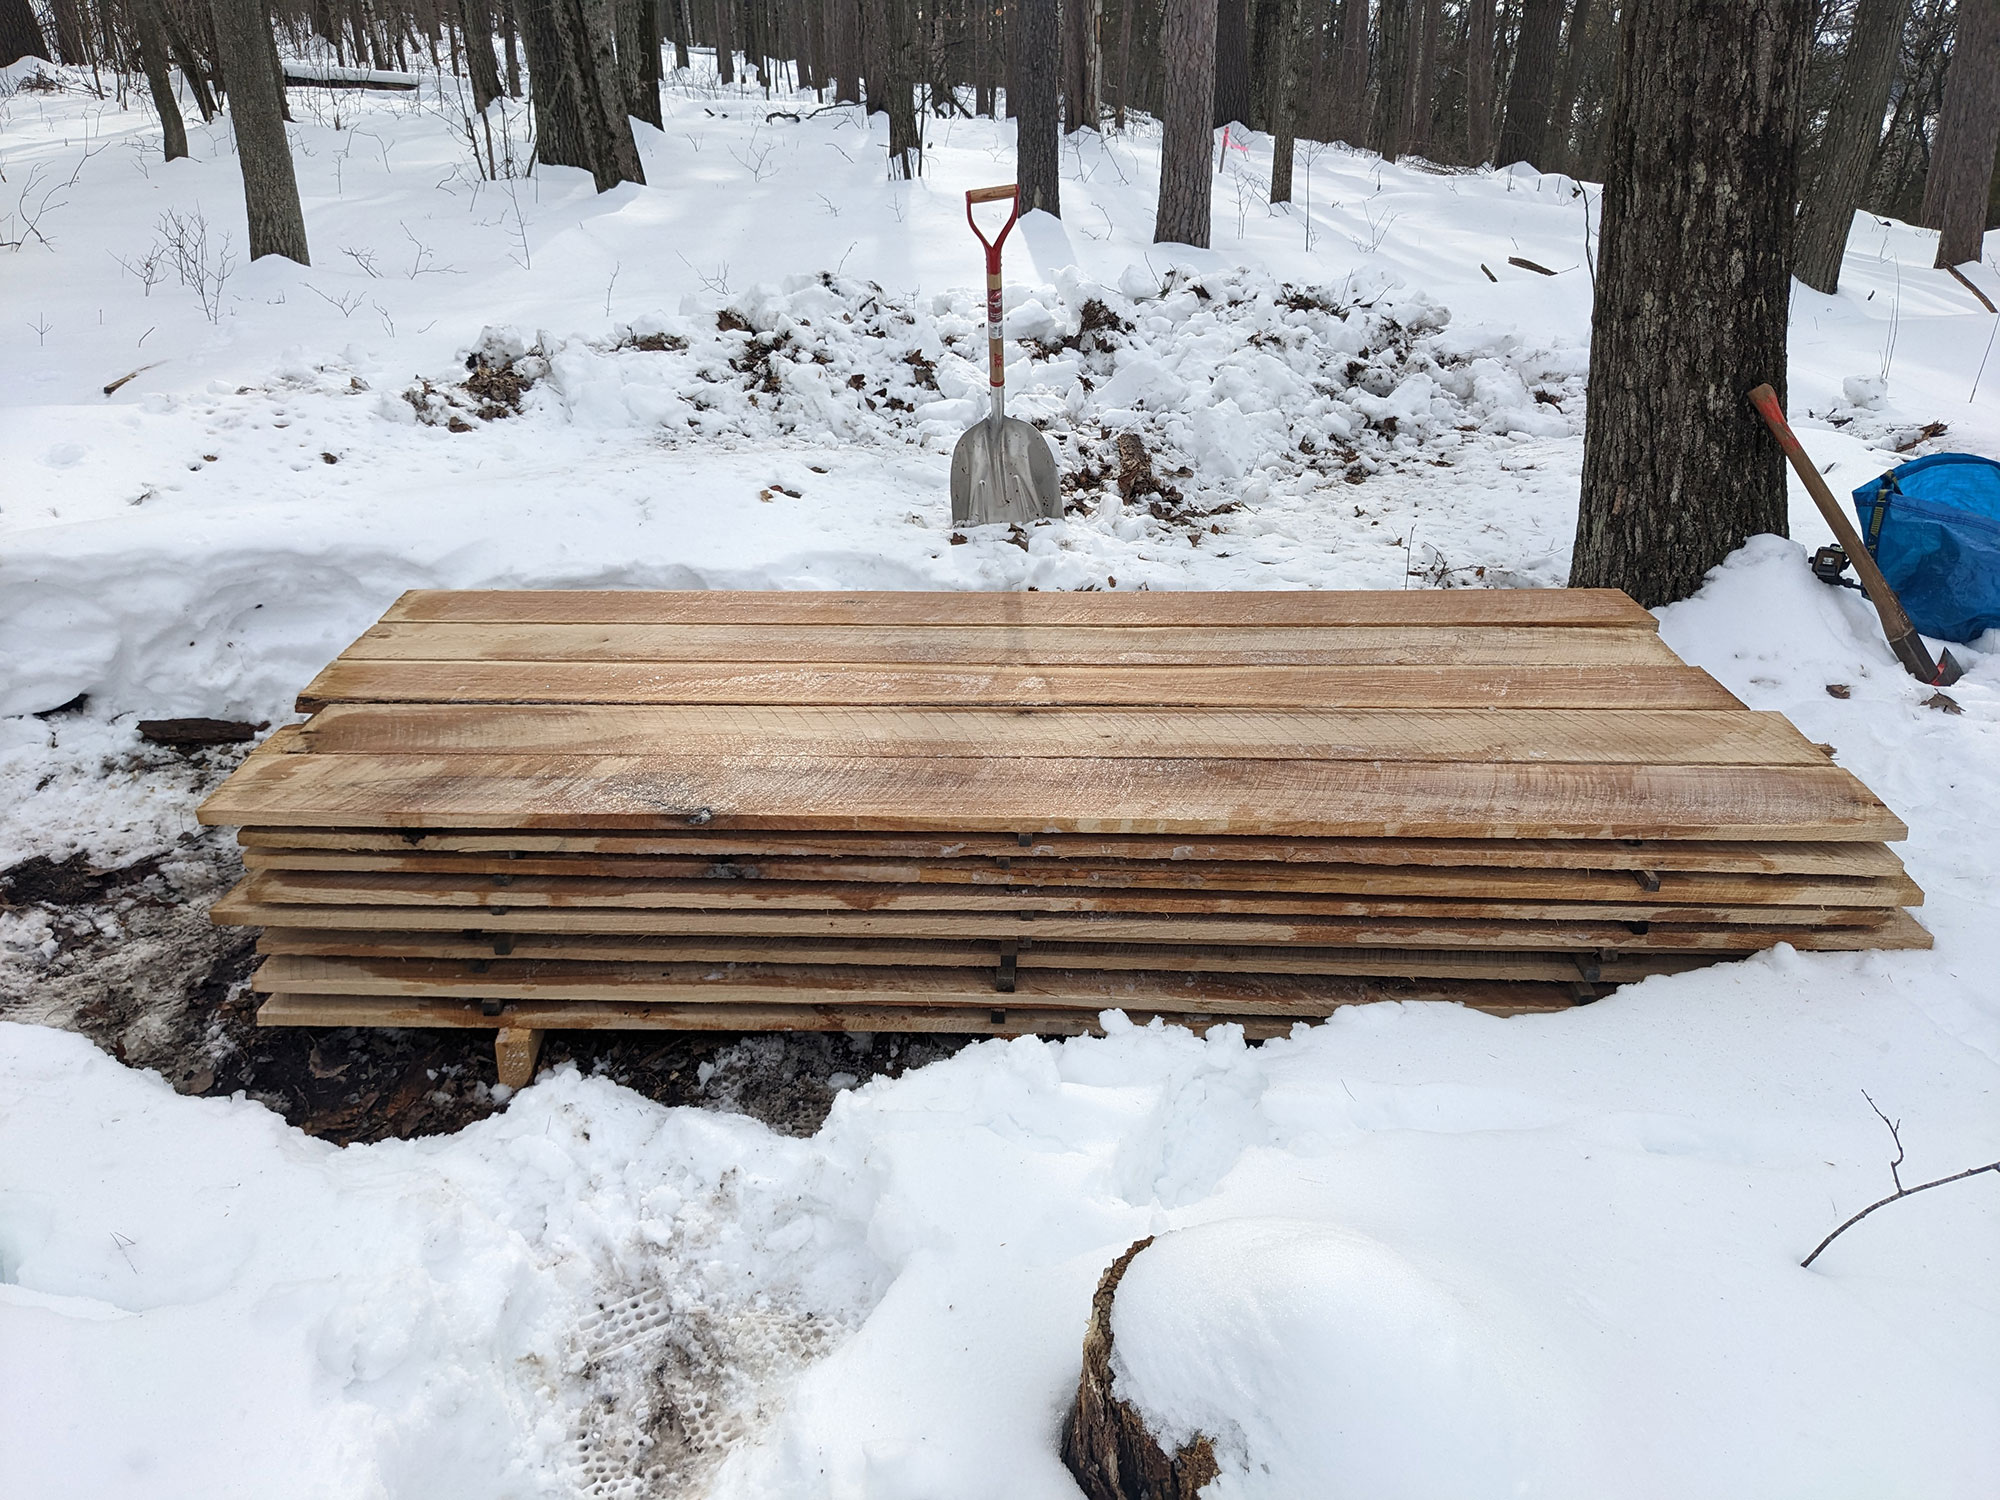
In December I had the oak (and a bunch of other hardwood) timbers taken to the only female sawyer in WI, who's just 5 miles away.
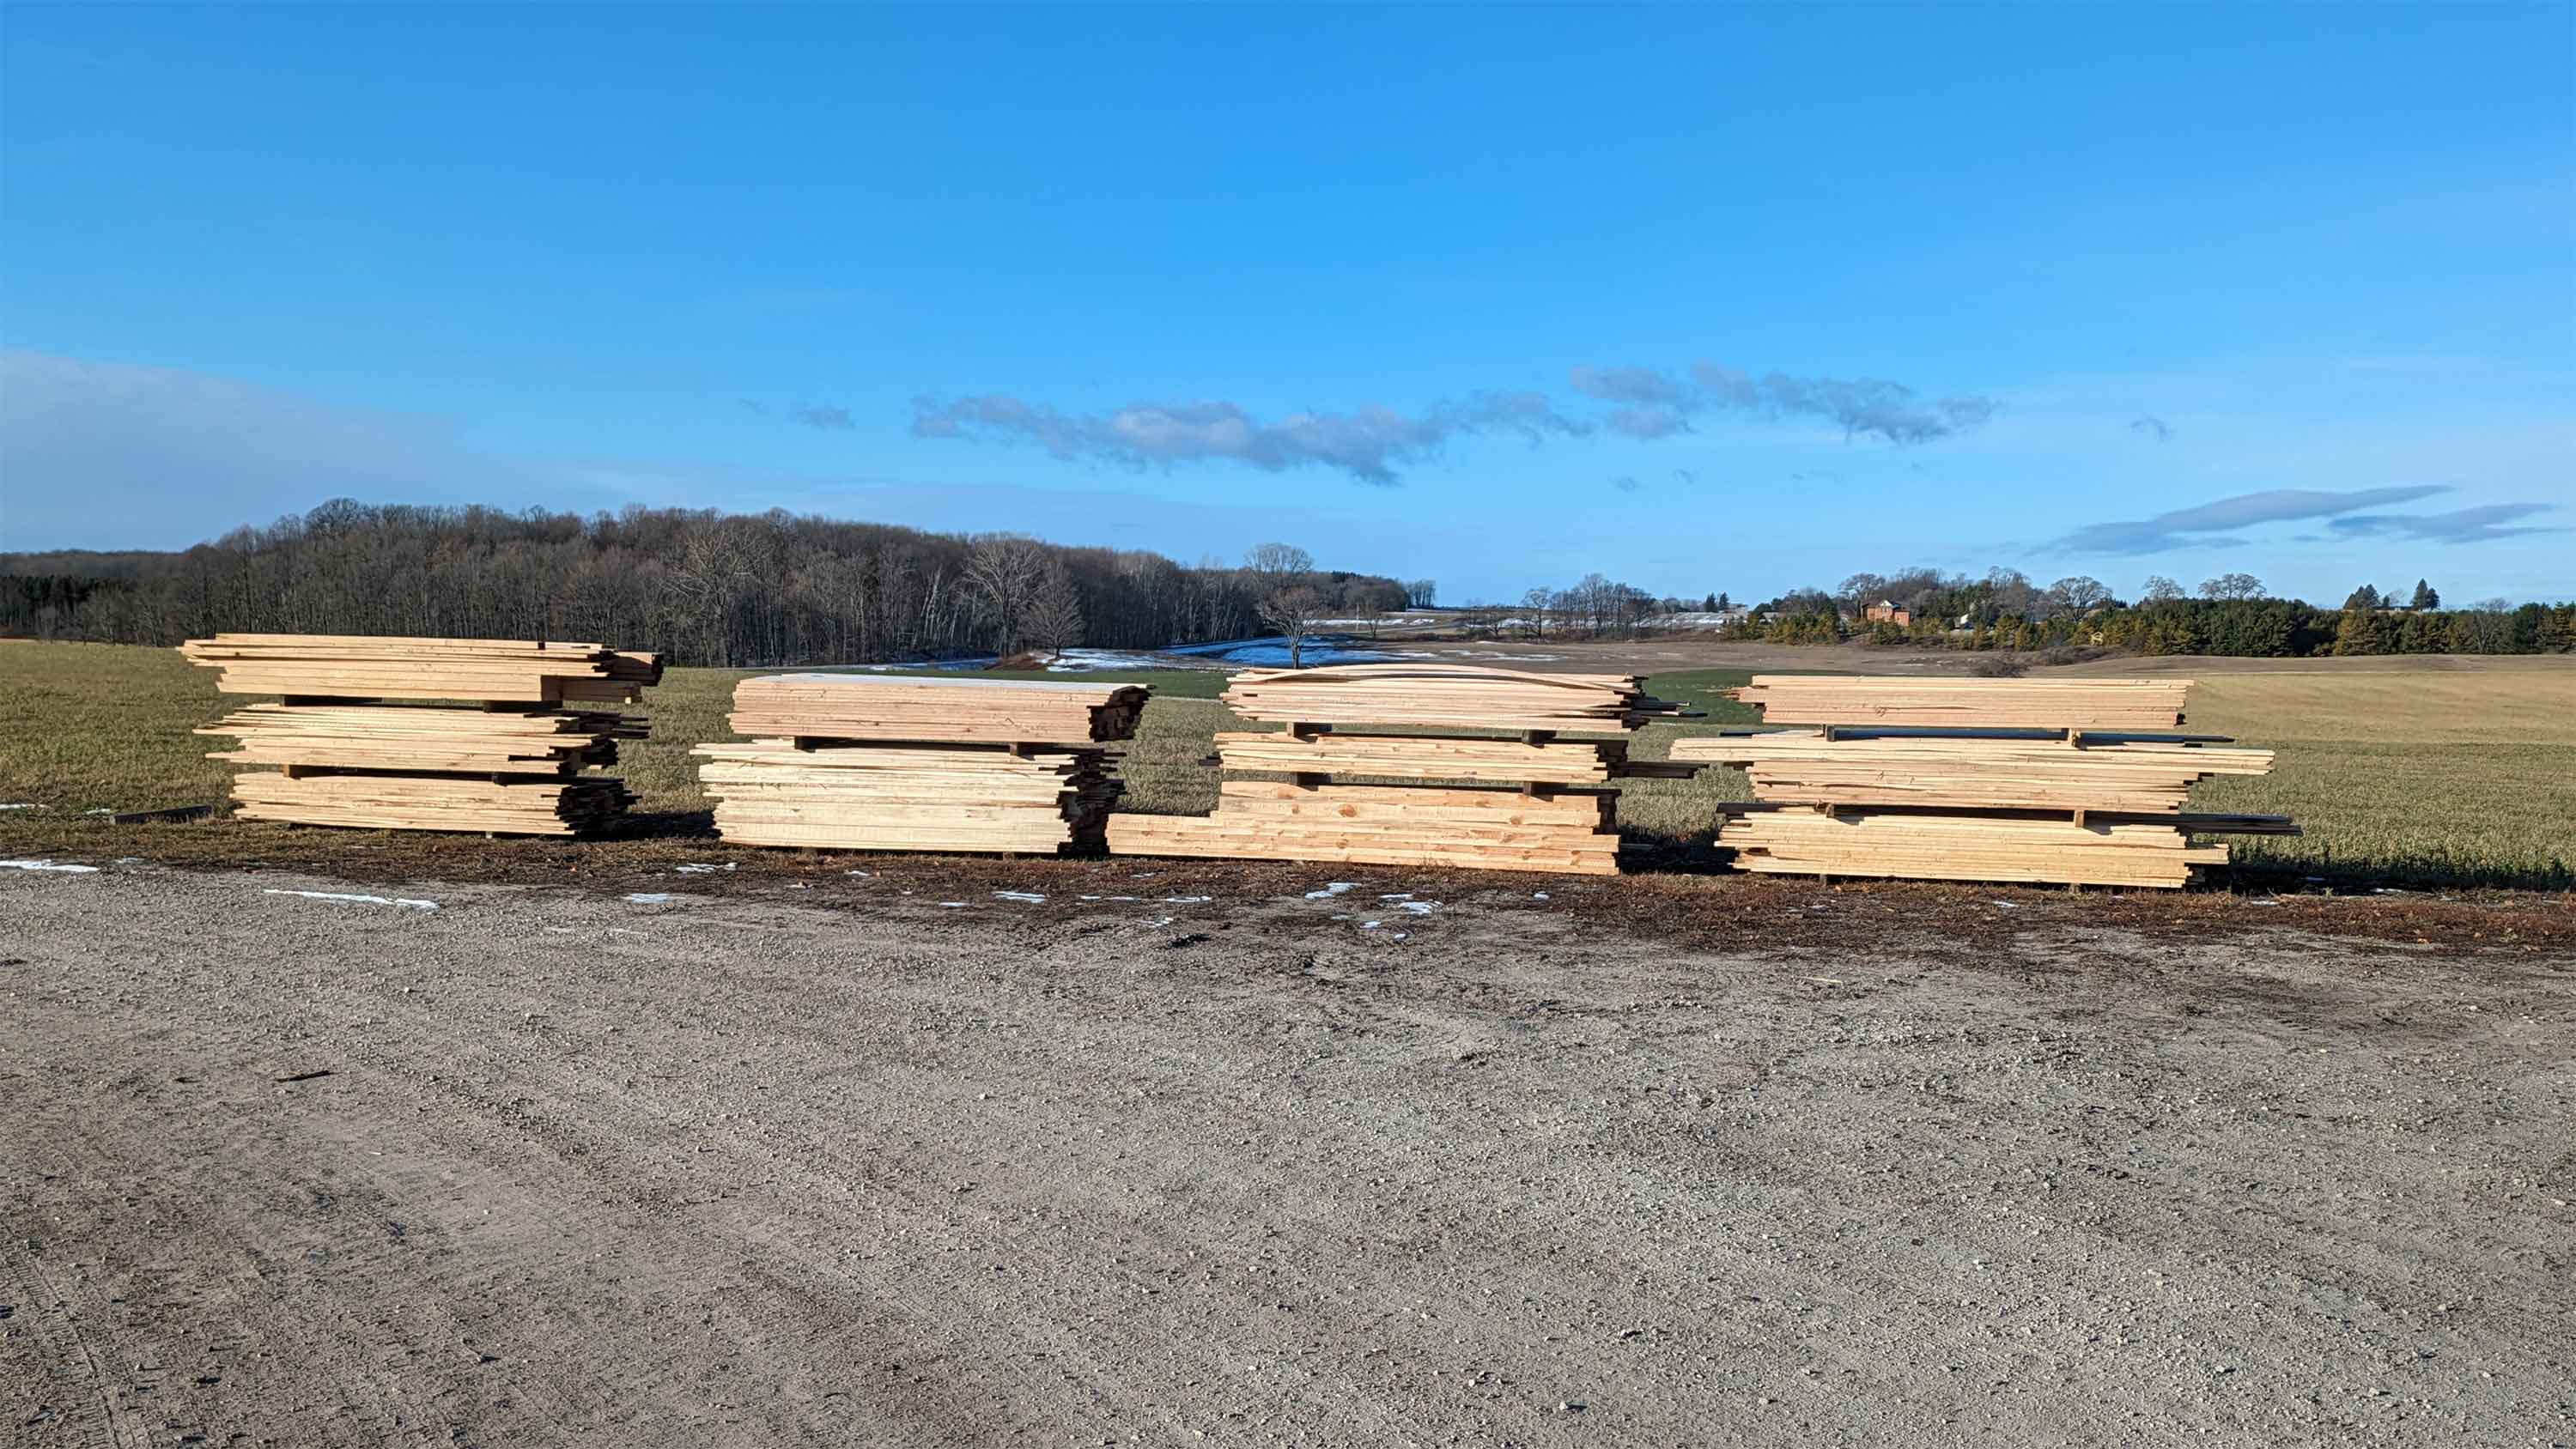
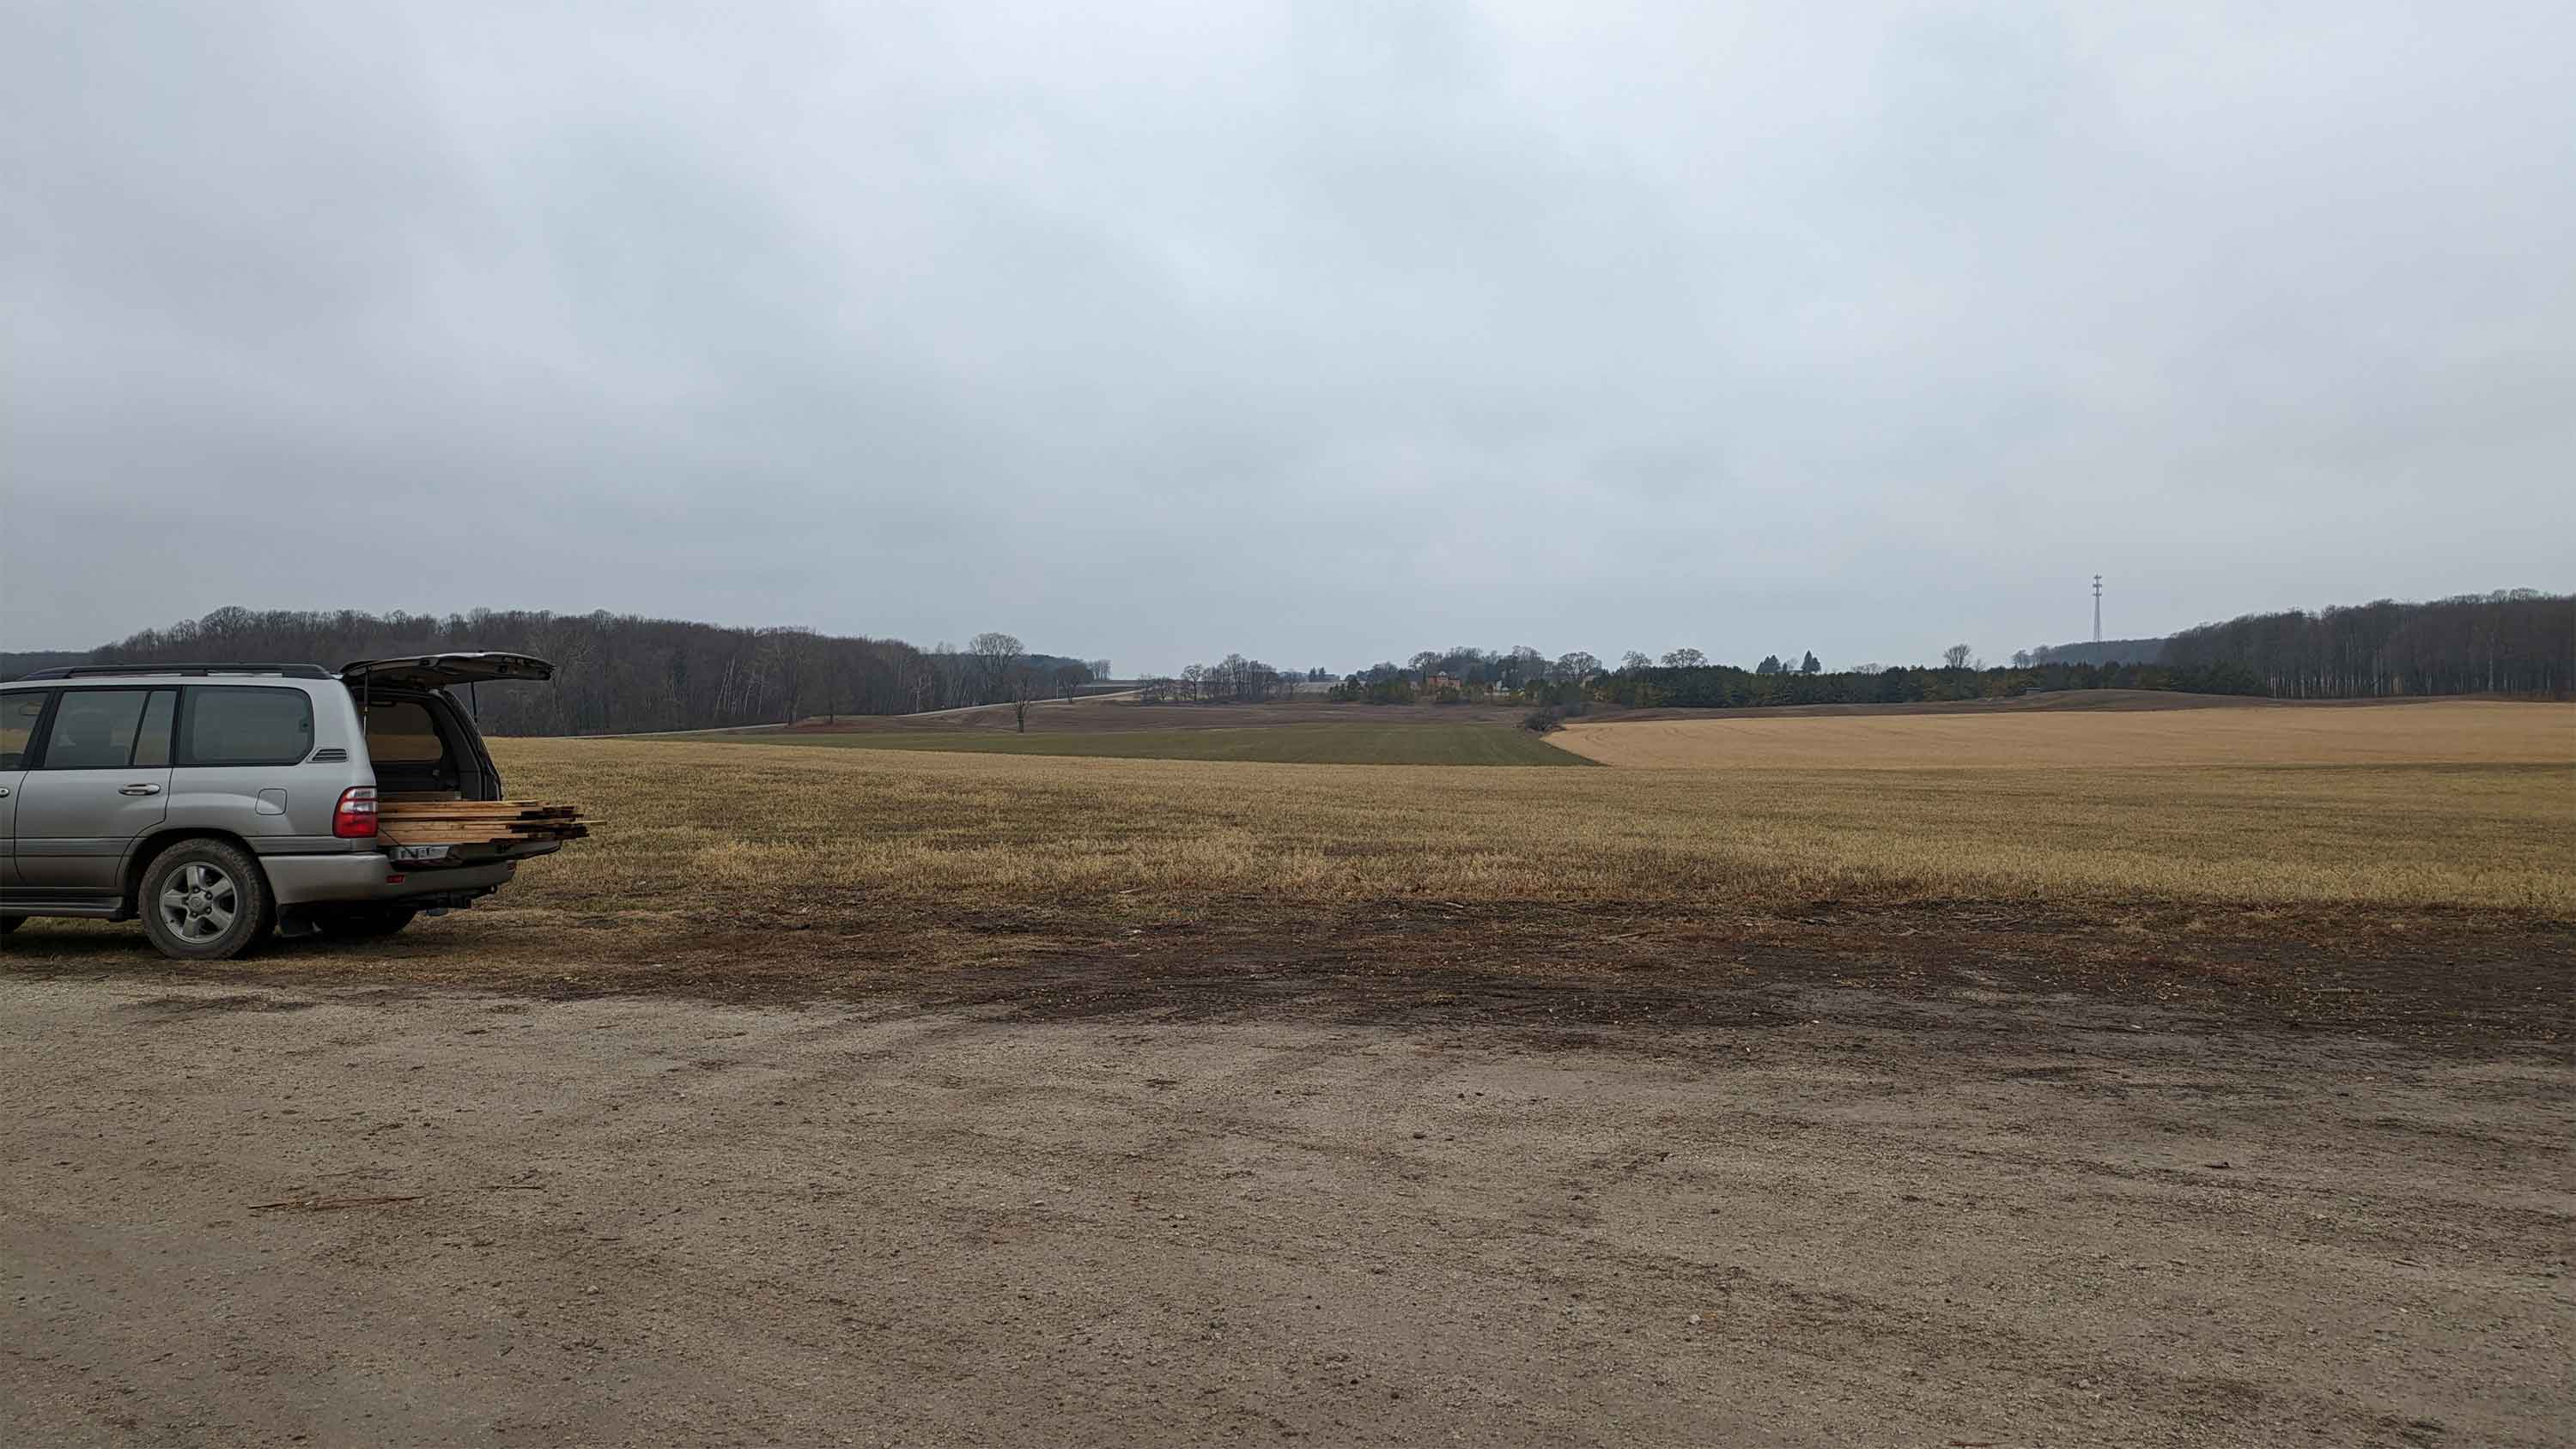
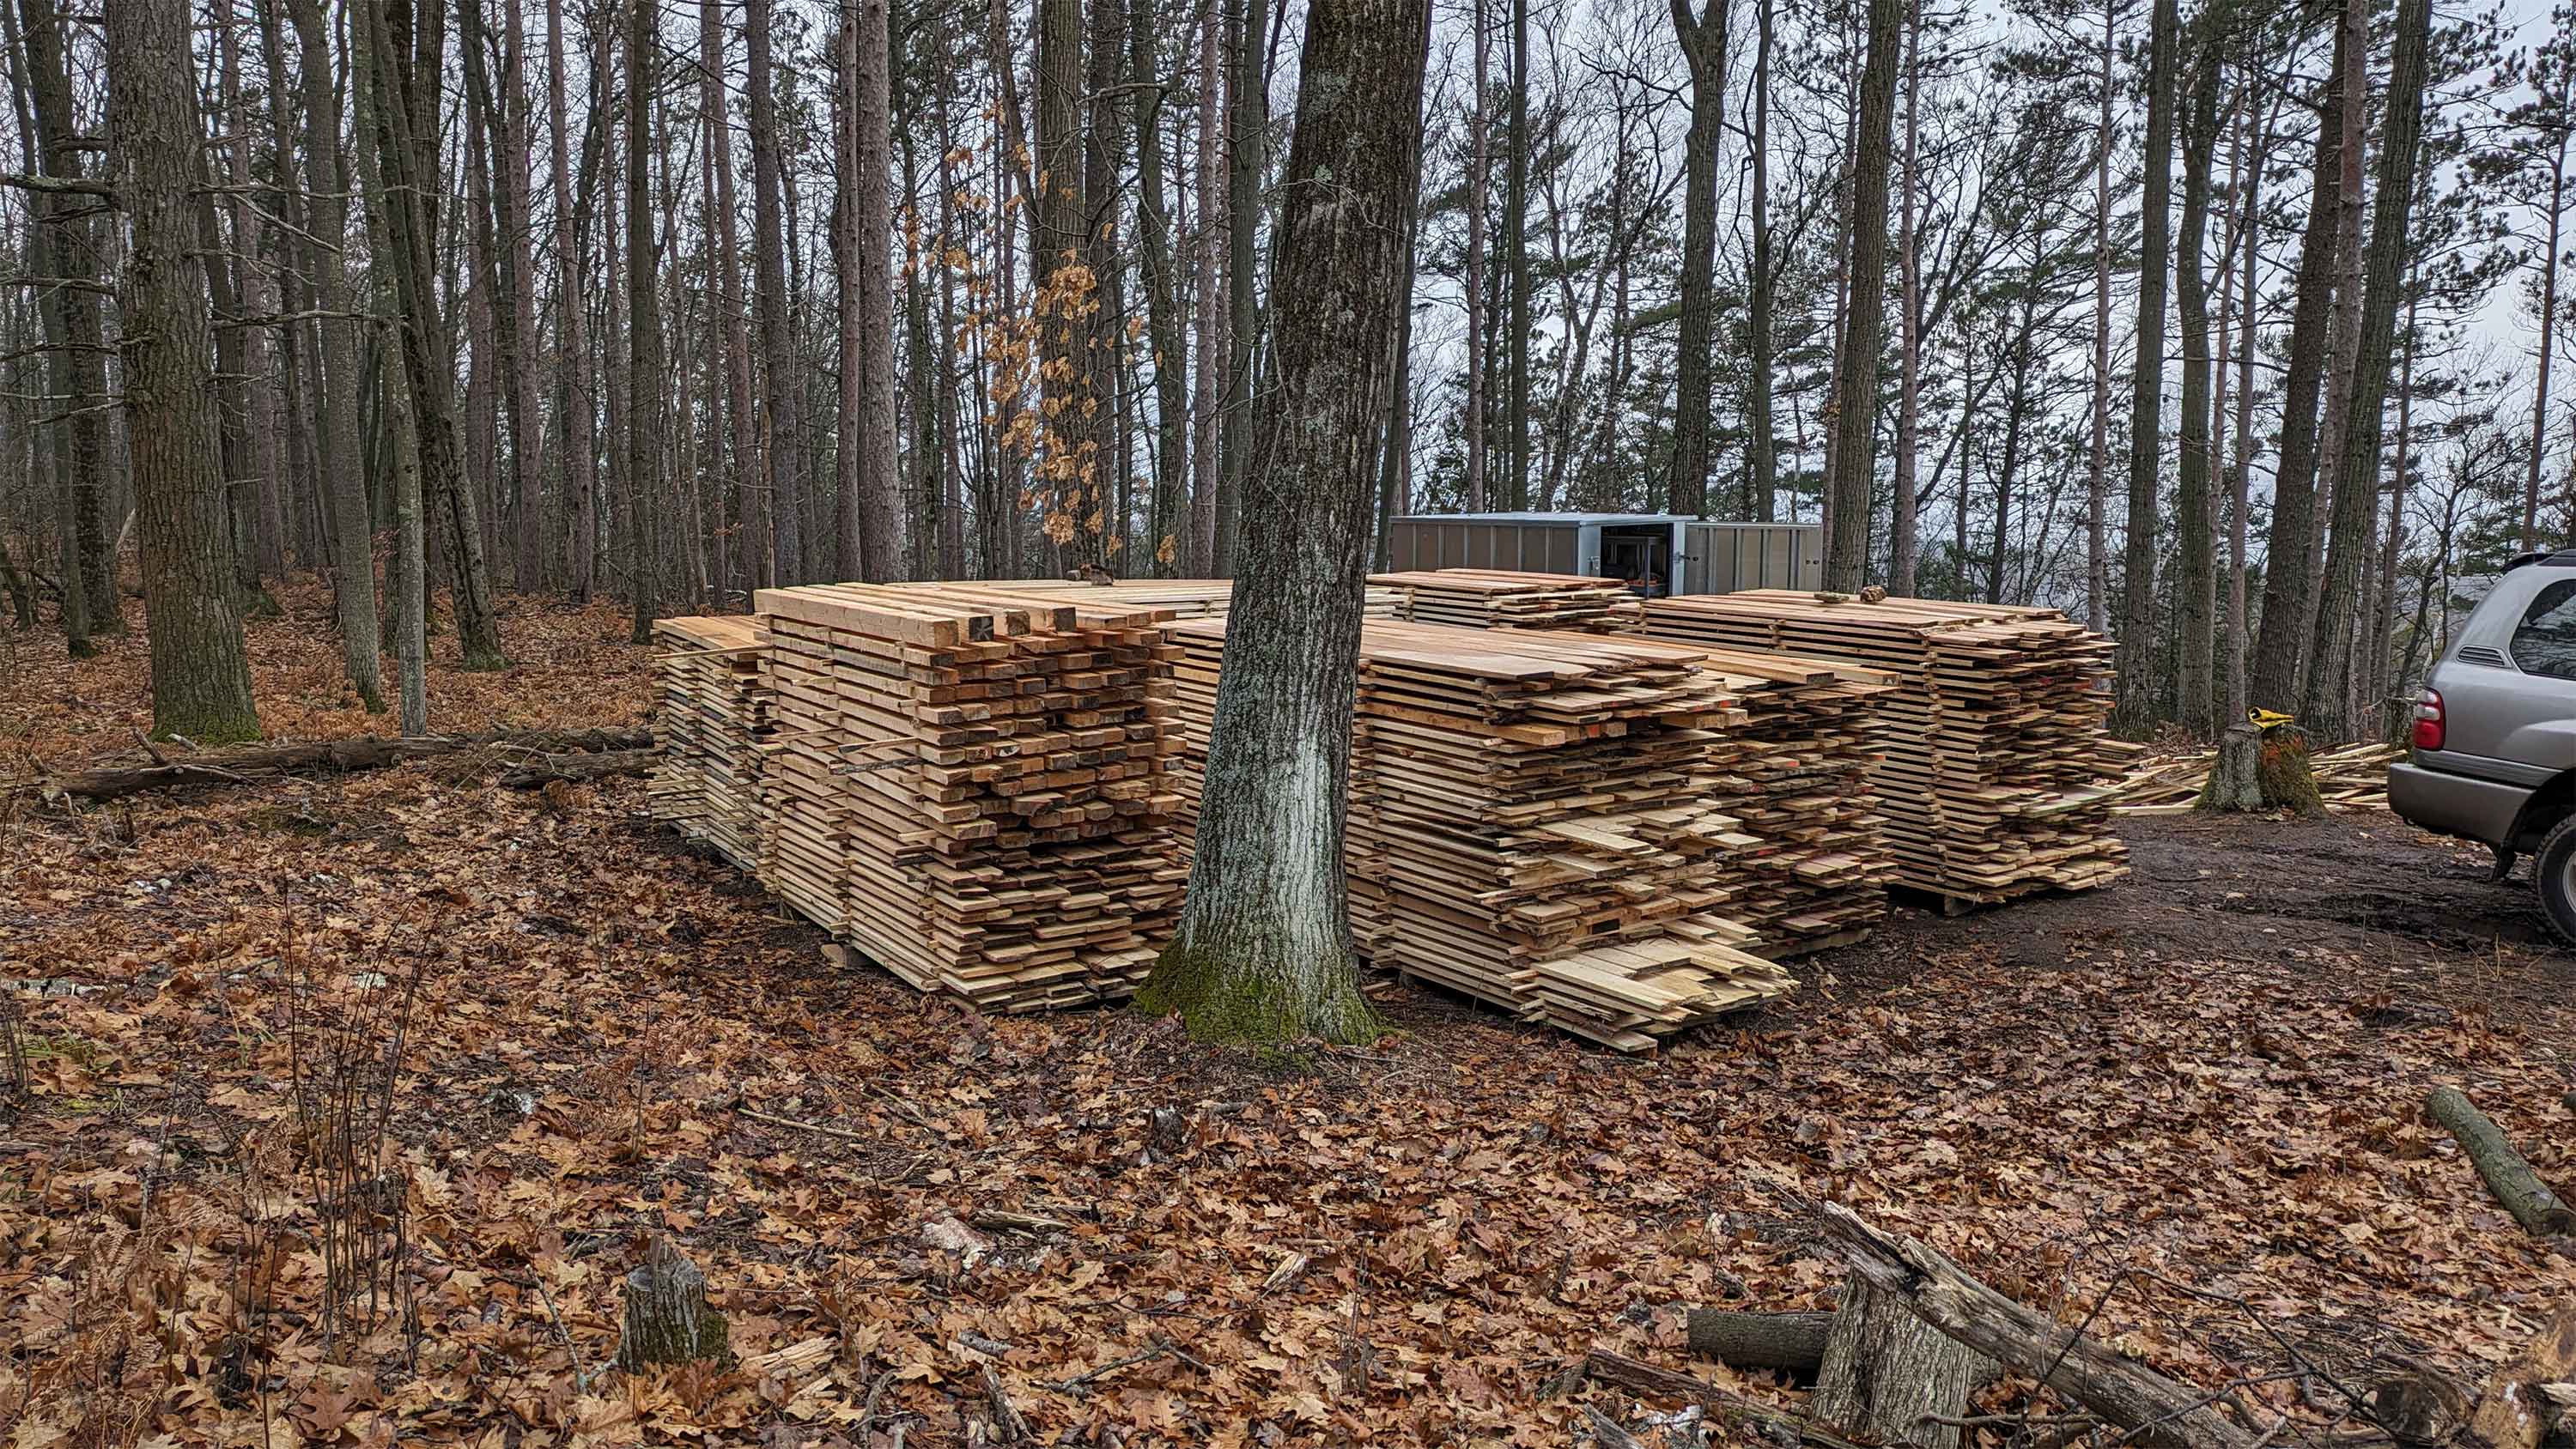
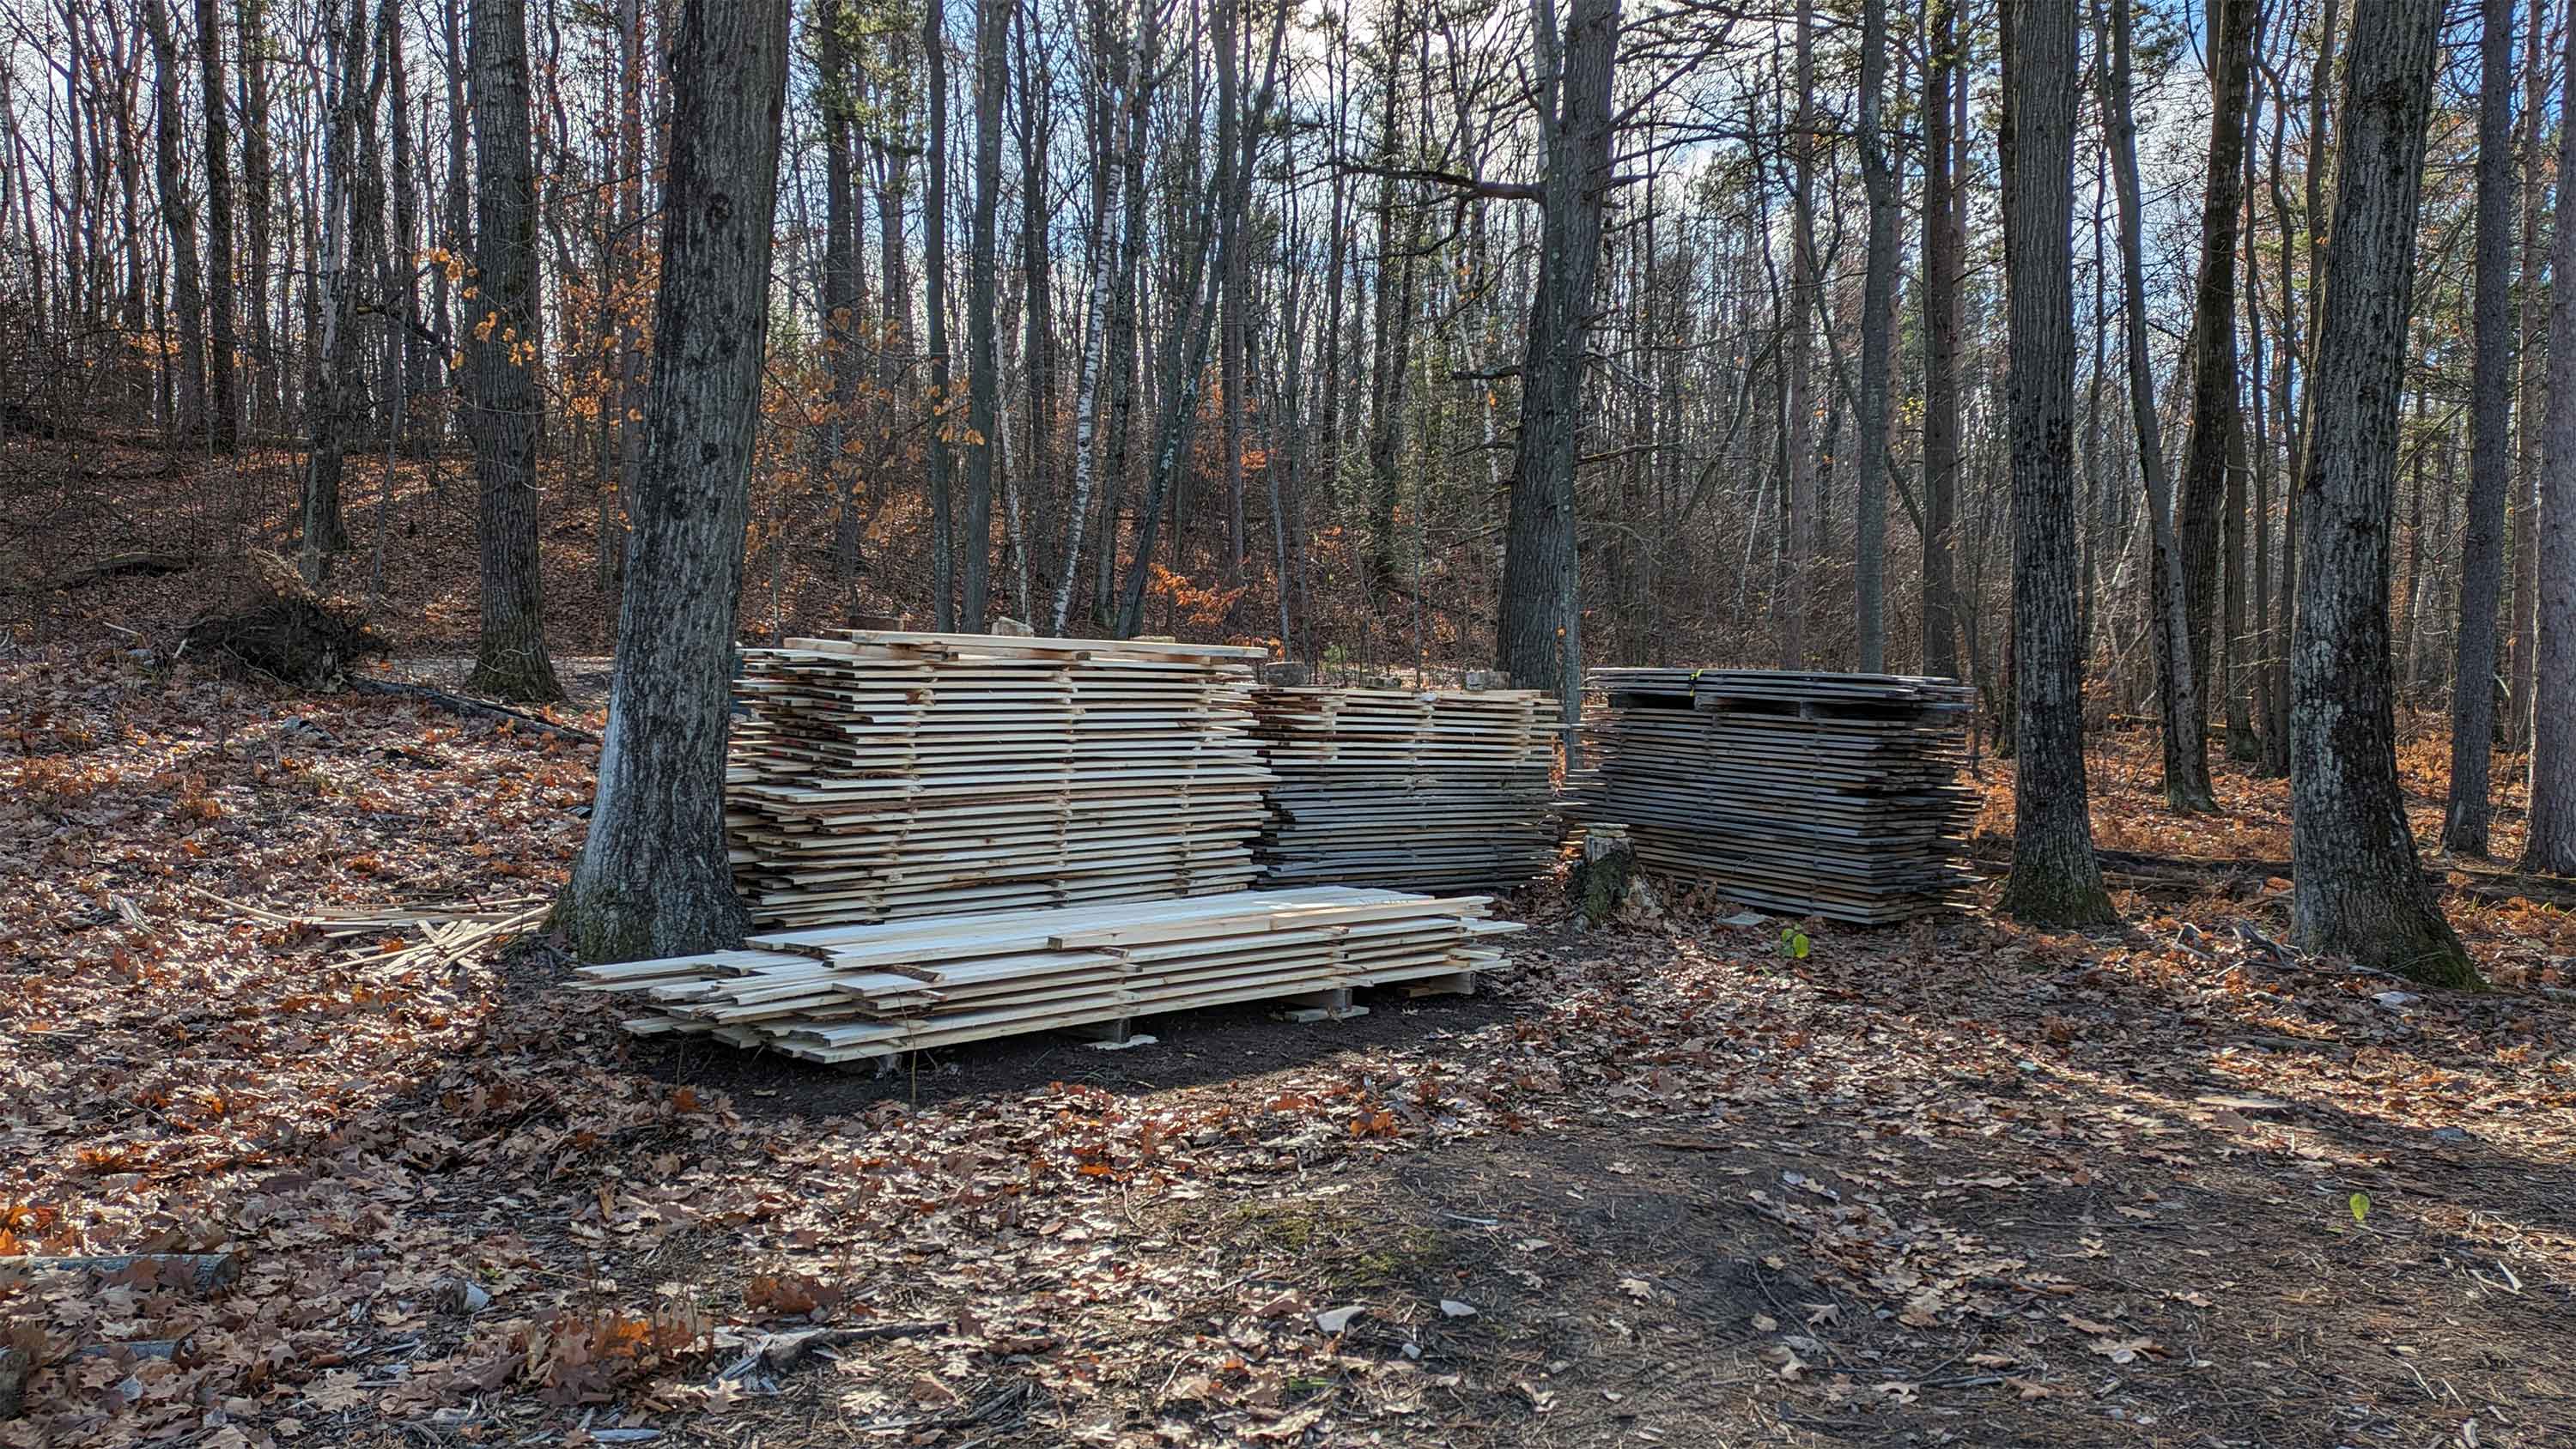
What you're supposed to do at this point is trailer your lumber back to your site for air drying. A forklift loads the trailer. But Door County received a bunch of ❄️ in February that made that impossible. So I used the brute force method that recalled Door County settlers: I hand-loaded it all into the back of the Land Cruiser (4 trips!) and then shoveled out nearly 2 feet of snow in two spots to stack and sticker it. It was just an insane amount of work that had me considering Lumber Liquidators.
It'll all be worth it. It's wide and pretty and there's enough flooring to knock out most of the main level. This is what I'm telling myself.
A few weeks ago I rationalized not doing *three* folding patio doors on the western elevation due to being in Climate Zone 6 and a shit-ton of giant 🦟🦟🦟.
After getting feedback from my hair stylist that we *should* do three folding patio doors — Nikki: "Bring the outside fully in!" — we pivoted and submitted our window and door package to Lincoln last week.
Now I have a new rationalization for not doing three folding patio doors on the western elevation: price.
Each one of these 10' x 7' folding patio doors is $14,332.70 (including the screen). In haircut math, that's ~286 of them (including tip). That's roughly 24 years of my wife butchering my hair in the den with a Conair w/#5 attachment, Covid-style. For one folding patio door with a screen. Nikki, I'll see you on Saturday at 1.
The rest of the pricing is in the table below, and it's all pretty reasonable. I've researched a bunch of window and door options and landed on Lincoln for the following reasons:
It's based in Merrill, WI. Merrill is on the way to the MVC. We can pick this order up on a trailer.
It's based in Merrill, WI. It's important to me to support either the MN or WI economy.
Good value. If price was no object, we'd probably go with H out of Ashland (WI), but Lincoln beats H on value.
Good vibes. I toured the facility about 18 months ago and the place and people were classic Wisconsin laid back.
Good recommendation.An architectural power couple — that's *way* out of our price range — lives 6 doors down and they're using Lincoln on a couple of projects. That alone is good enough for me.
They have what we want. We love the folding patio doors, the casement windows, the cladding and paint options, the grill profiles, and the hardware.
Qty
Description
Price
Total
1
3' x 7' door
2,475.17
2,475.17
4
30" x 36" casement window
1,048.38
4,193.52
2
24" x 24" casement window
906.40
1,812.80
2
42" x 48" casement window
1,225.18
2,250.36
1
66" x 48" French casement window
3,018.37
3,018.37
1
30" x 48" casement window
1,141.18
1,141.18
TOTAL
13,891.40
NB: This total includes zero glass on the western elevation. We're still deciding on what to do now, and of course will post the grand total here soon.
There was a gale warning in Egg Harbor for Sunday night and sustained 15-20 MPH forecast for Monday, so Sunday afternoon, with winds at 4-5 MPH, I took down as many trees as I could, and left the limbing and bucking for when it's blowing.
Don't cut timber on a windy day.
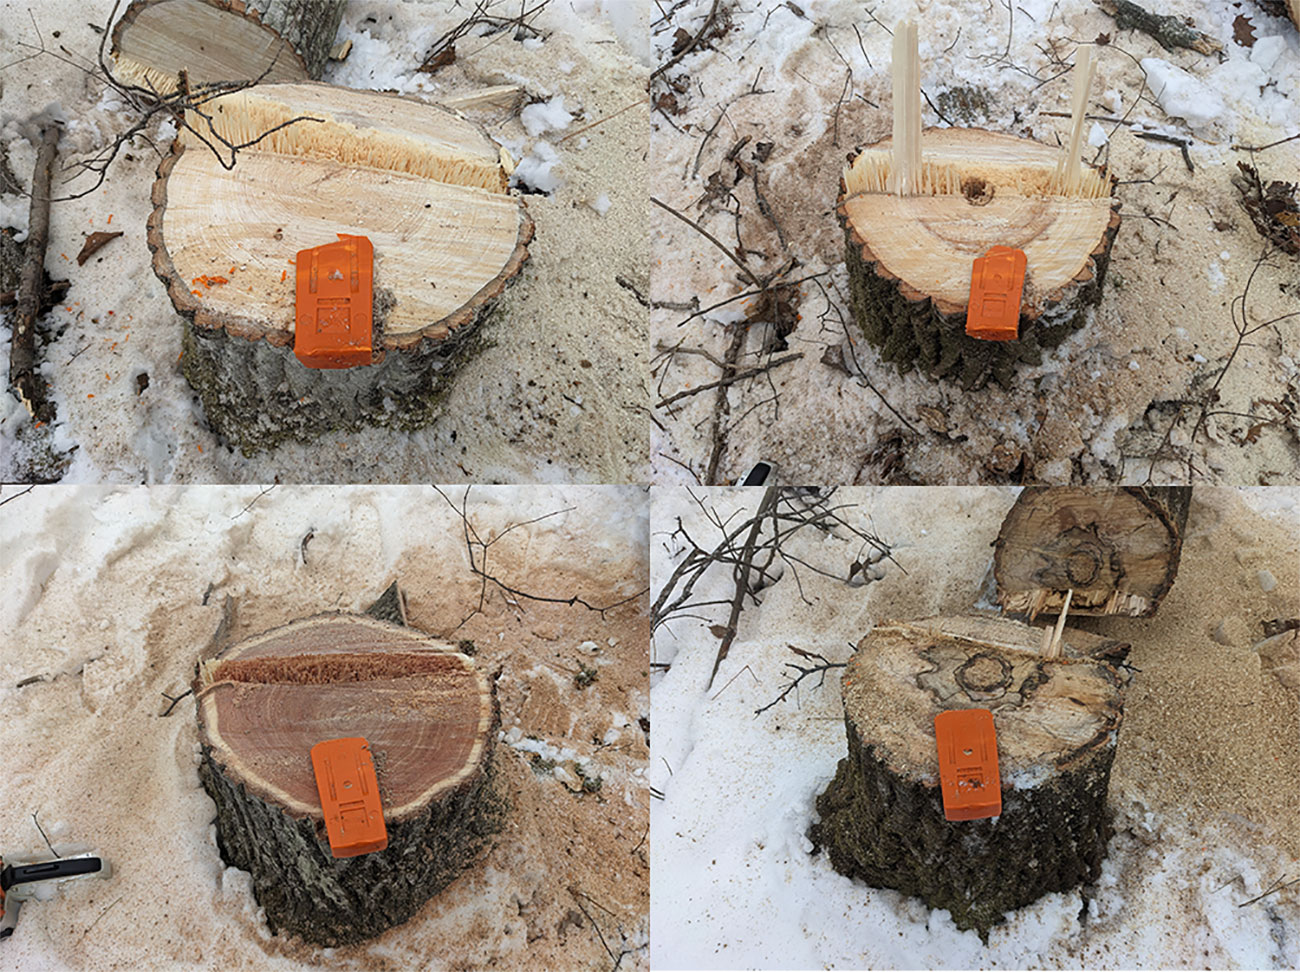
It was so fun. I probably felled 20 trees and even managed to make three or four felling cuts that didn't bring embarrassment and shame to the point where I needed to re-cut the stump to hide the incriminating evidence. I'm posting those here (see below). Also, the video is not bad. I didn't make a totally even back cut, which is why the tree twisted a little on the way down. My technique still has a long way to go. By the time the lot is fully cleared I hope to be intermediate.
This is where the driveway goes.Still have a lot to learn.
About two weeks ago I met with our architect for a deep dive into wall height, roof pitch, and what makes a cottage a cottage.
We couldn't figure out that last one — cottage architecture is all over the place — but we did agree on abandoning our original 10/10 plan (10' wall + 10/12 roof) and pivoting to an 11/11 approach. In short, to make the MVC more Silvernailsy.
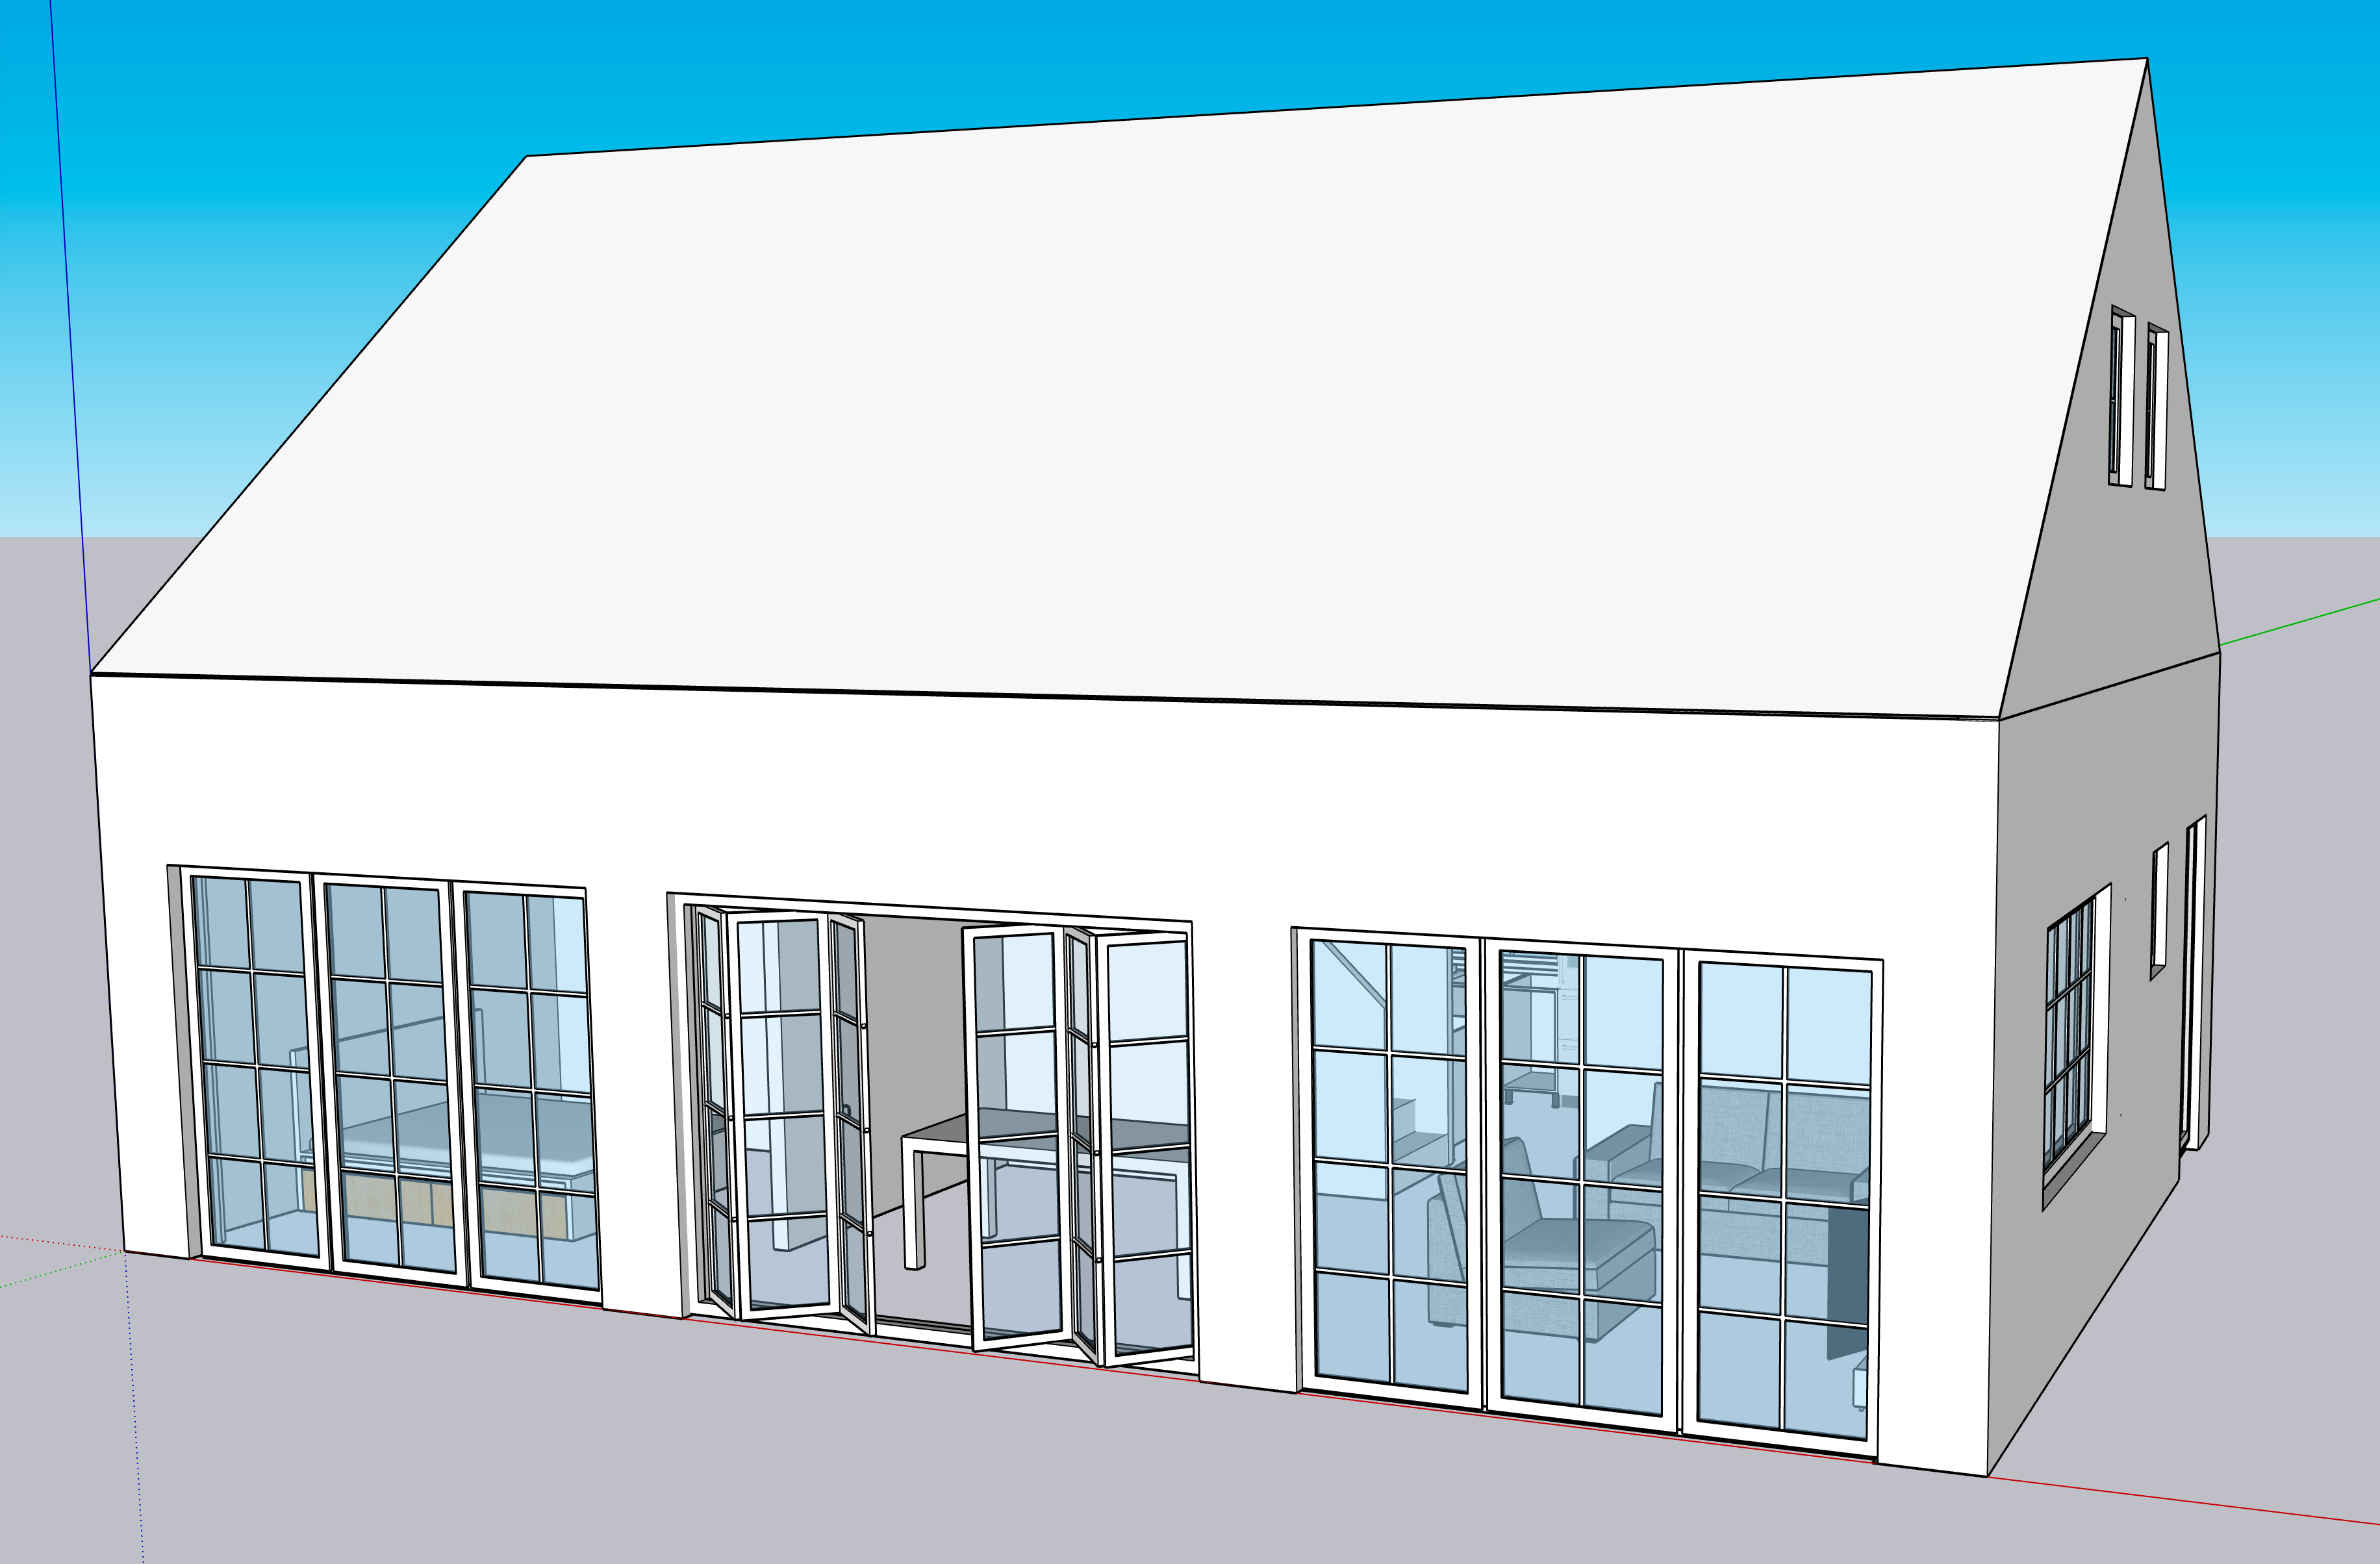
I pulled the idea into SketchUp and I think this is where we're going to finally land. I love how this looks.
Glazing galore
Why all the glass, you ask? The view! We want to see it as much and as often as possible. This is the front of the house. The money side. The entire reason why people pay a hefty premium for escarpment lots in Door County.
We're putting folding patio doors in the center bent to connect the indoor and outdoor spaces, and also enlarge the size of our mere ~850 square feet. If we weren't in Climate Zone 6 and at ~45° latitude and have a shit-ton of giant 🦟🦟🦟, I'd put these doors in all three bents and have them open all the time.
One thing I did discover in doing this was SketchUp's new Live Components. So cool. This feature is clearly MVP — there are so few LCs — but these windows and doors are all drawn with components built by and hosted at SketchUp, so they can be configured live and presumably updated with new features as the SketchUp team adds them. My favorite part was playing with the window and door openings to see how things look open, closed, and in-between. SketchUp team, if you're reading this, kudos and please add way, way more.
So fun!
We've now got two sitework bids, and I've added the second one to the table below. The numbers are pretty close for the most part, except Contractor B is coming in way below on the backfill price. I need to find out if we're all talking about the same thing.
Also, I am going into the stump-grinding business.
Item
Contractor A
Contractor B
Remove stumps for septic, driveway, and cottage site
4,000.00
5,700.00
Strip topsoil for cottage and driveway
400.00
750.00
Excavate for frost-wall foundation
860.00
included above
Install driveway
4,389.00 (approx. 3850 SF)
2,970.00 (approx. 2200 SF)
Backfill foundation with excavated material and imported fill
5,790.00
825.00
Supply and place screened stone inside foundation
3,360.00
4,285.00
Install a 3 bedroom mound system including design and permit fees
The first slide of our Google Slides inspiration deck lays out the requirements:
timber frame
barn style
net positive
fireplace
west-facing outdoor space
These are the non-negotiables. Without these, there is no MVC.
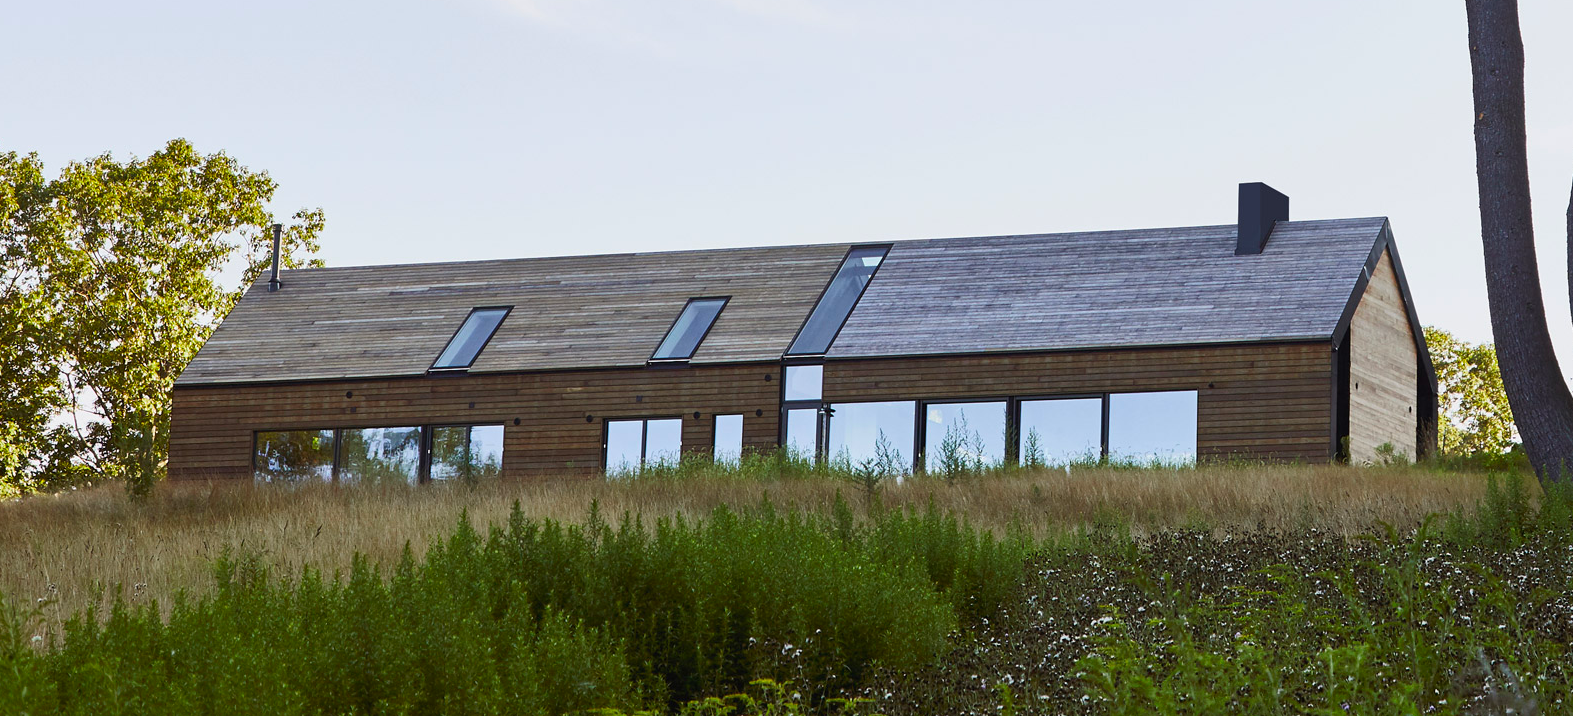
One of the first images pasted into our deck was Silvernails, a 5,000 sq. ft. barn-style house designed by Amalgam Studio, and built in Rhinebeck, New York.
Silvernails
The interior isn't really our cup of tea — nor the glazing style (skylights 😱!) or exterior cladding for that matter — but I'm deeply in love with its shape, and even after I paste something else I find cool into the deck I always return to Silvernails.
It got to the point that I needed to know *why* I find Silvernails so visually appealing. A big part of it is the clipped eaves and rakes, like most barns. But it goes deeper, and it's so simple.
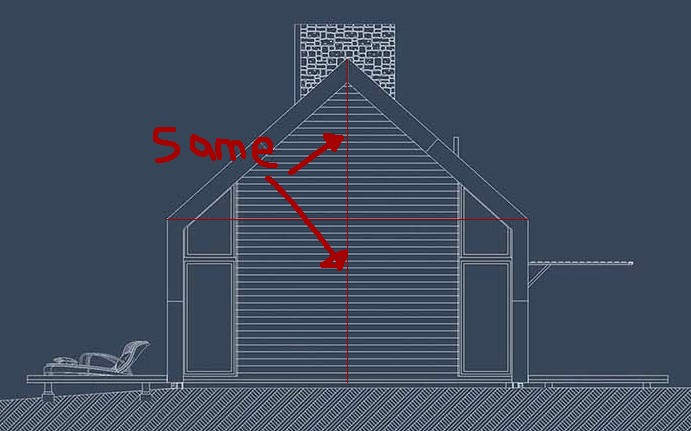
The house is 22' wide, with an 11/12 roof. Based on this trusty pole barn ridge height calculator, this means the total roof height is 10' 1". Guess how high the walls are? Yep, 10' 1". They're balanced, and in harmony.
same same
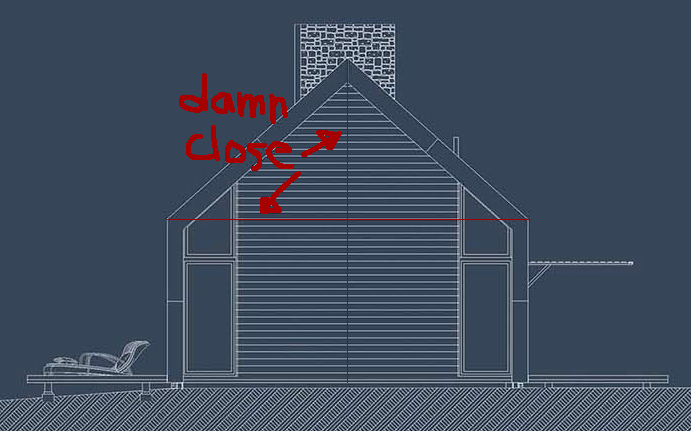
I could be reaching a little here, but I think there's even more to it. Of course every gable roof is a gorgeous isosceles triangle — which is what makes them so appealing — but Silvernails comes within a foot of *nailing two more* when you split the gable down the middle. Surely this was all thought through, and it's brilliant.
damn close
We're going a slightly different route, primarily because 22' just is not wide enough to fit three different spaces across, as we *need* to do in an ~800 sf structure. The MVC is 24' wide. Those two feet may as well be made of 🪙.
But we are (for now) adopting the core principle: 10' high walls and a 10/12 roof (on a 24'-wide volume that's 10'). We're also clipping our eaves and rakes, in order for the weather to wreak havoc on our doors and windows. As with fashion, architectural style comes with a price.
When I said we'd offset the expense of a crazy-expensive fridge by using IKEA cabinets, I wasn't *entirely* kidding. The value is just insane, even compared to other RTA (ready to assemble) cabinetmakers, and there are *far* more size and configuration options than any other RTA-er could even imagine providing.
Here's my estimate for the complete IKEA cabinetry package for the MVC kitchen. All the bases are SEKTION, and we're upgrading to the real wood, Shaker-style LERHYTTAN fronts in black stain.
30" glass door SubZero refrigerator, here we come!
The housing market can be hot, and it can be slow. Rates can be high, and they can be low. But one constant remains: most contractors aren't great at answering calls and emails, returning calls and emails, providing estimates, and in general doing what they say they will do. And we haven't even started construction yet.
When the sun dies in 5 billion years, this will still be the typical behavior.
It's been over two weeks since five different contractors looked at our project, and I have only one estimate back. I wanted to post it here to give readers an idea of what we're looking at in order to do all the sitework. As more bids come in🤞I'll add their numbers to the table in the most normalized, apples-apples way I can.
Item
Contractor A
Remove stumps for septic, driveway, and cottage site
4,000.00
Strip topsoil for cottage and driveway
400.00
Excavate for frost-wall foundation
860.00
Install driveway (approx. 3850 SF)
4,389.00
Backfill foundation with excavated material and imported fill (estimated 350 yds)
5,790.00
Supply and place screened stone inside foundation
3,360.00
Install a 3 bedroom mound system including design and permit fees
This video turned out not quite as I imagined, but it's passable to post here as a preview to Door County's only ski run, coming sometime in 2024.
It was recorded on December 5, 2022.
Yes, it's a tree run. Note the ancient eastern white cedars in the last 1/3 of the video.
The last 15% is a doozy; definitely a black diamond, with the possibility of Warren Miller-worthy air. But unlike almost any other part of the escarpment, where it's a cliff, skiing on our lot is a possibility.
I'll have more on Door County's downhill skiing history in a future post.


